Accessing your Windows OS on your VPS can be useful for administering and operating your server as needed. Windows is very versatile and allows for multiple methods to remote control and view your Windows OS. Two methods that are available at your disposal with your Hivelocity VPS are the virtual console feature of your VPS and the built-in feature within Windows called Remote Desktop Connection.
Using the Virtual Console Feature
To access your VPS virtual console, follow these 5 steps:
- First, head over to Hivelocity.net and log in to the myVelocity customer portal.
- Once you’ve gone through the login process, the screen below will appear, listing all of your current devices.
- You can note which device is VPS and which is a dedicated server by looking at the Type column as needed.
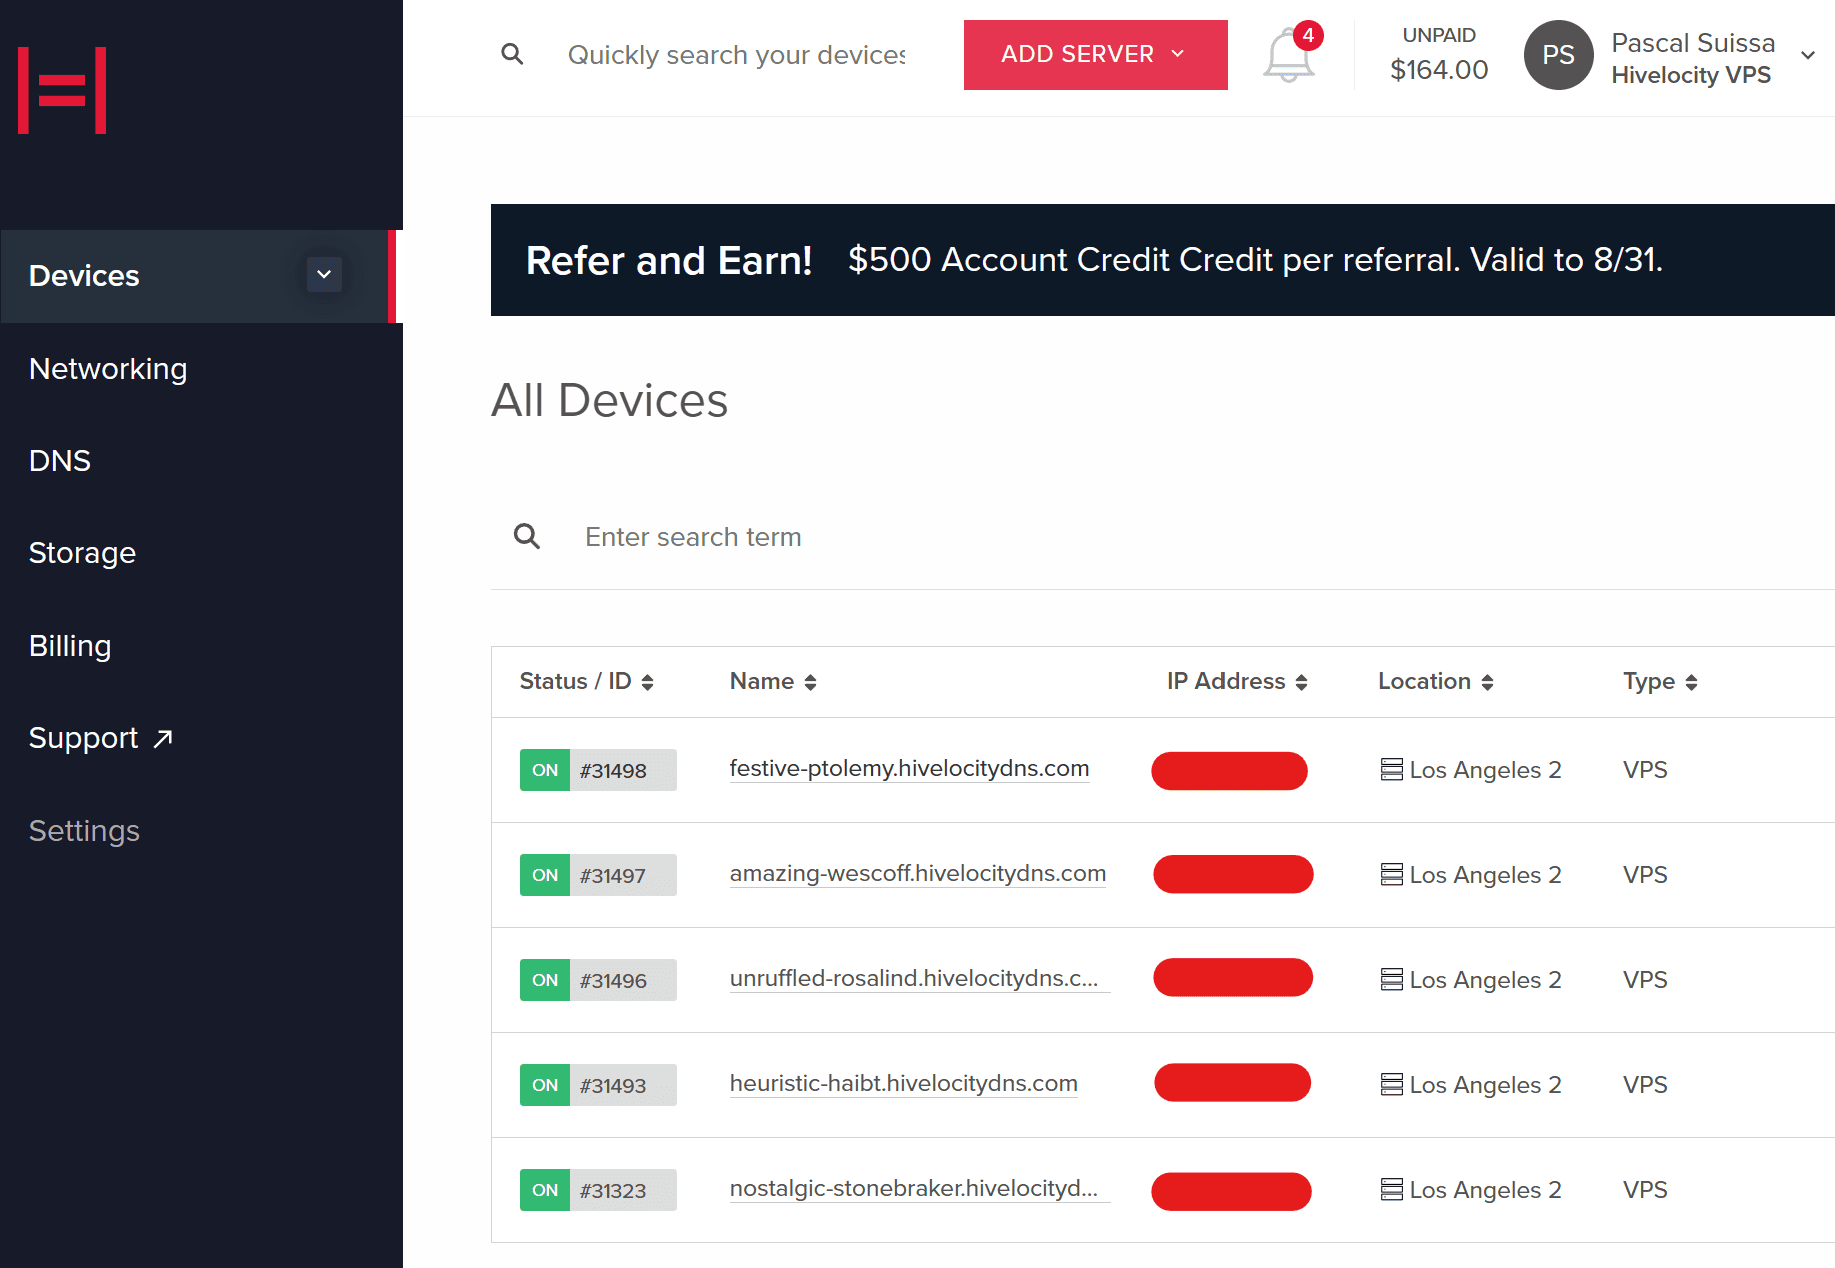
- You can note which device is VPS and which is a dedicated server by looking at the Type column as needed.
- Click on the device ID you wish to use the virtual console with. For this example, we will select device 31498 from the list above.
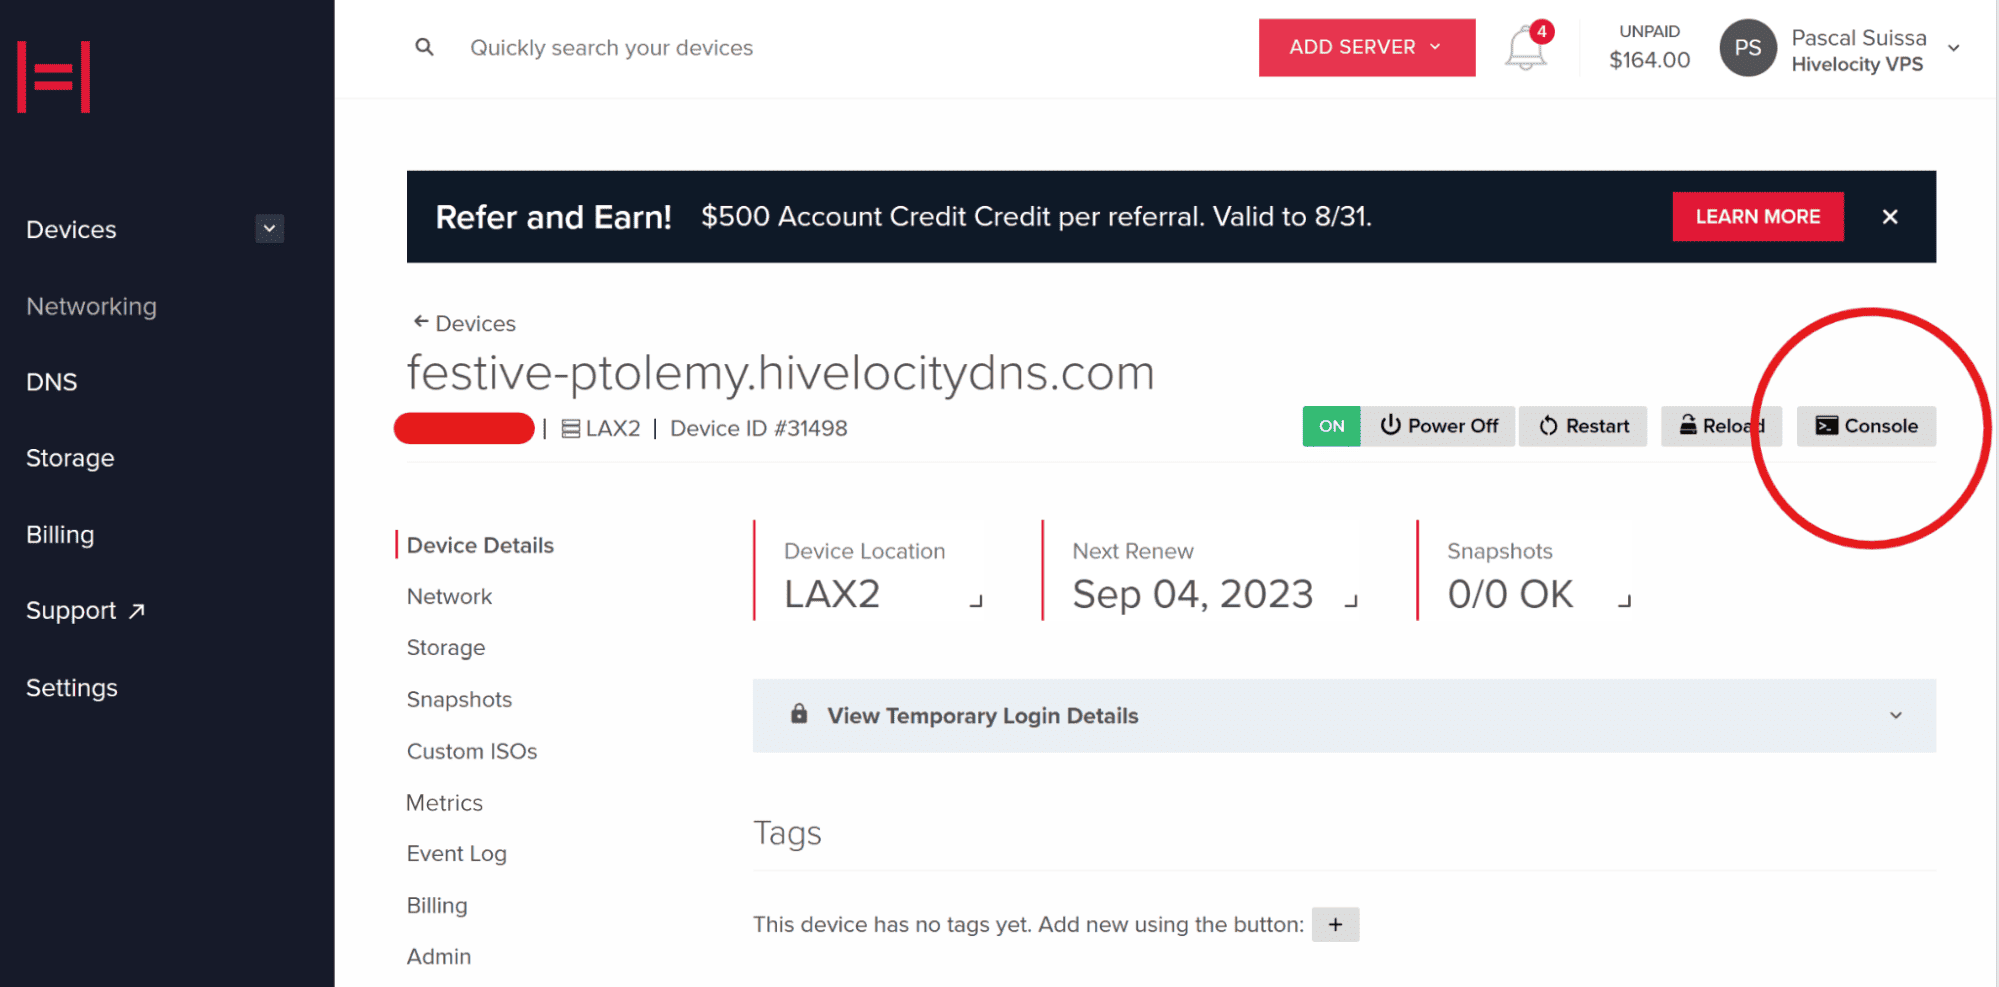
- On the next screen, you can view further information regarding your VPS along with the option to press the Console button which will open a new window with your virtual console.
- With the virtual console open, we can then proceed to log in to your VPS from the browser.
Using the Windows Remote Desktop Connection Software
Within Windows you can use the Remote Desktop Connection app which comes installed with most Windows operating systems. First you will need to acquire your VPS credentials and then proceed to use the built-in app.
To view your new VPS credentials, follow these 11 steps:
- Head over to Hivelocity.net and log in to the myVelocity customer portal.
- Once you’ve gone through the login process, the screen below will appear, listing all of your current devices.
- You can note which device is VPS and which is a dedicated server by looking at the “Type” column as needed.
- You can note which device is VPS and which is a dedicated server by looking at the “Type” column as needed.
- Press on the device ID you wish to upgrade. For this example, we will select device 31498 from the list above.
- Note that on the next page, marked Device Details, you will find a blue bar in the middle of the screen with the text View Temporary Login Details, as shown below:
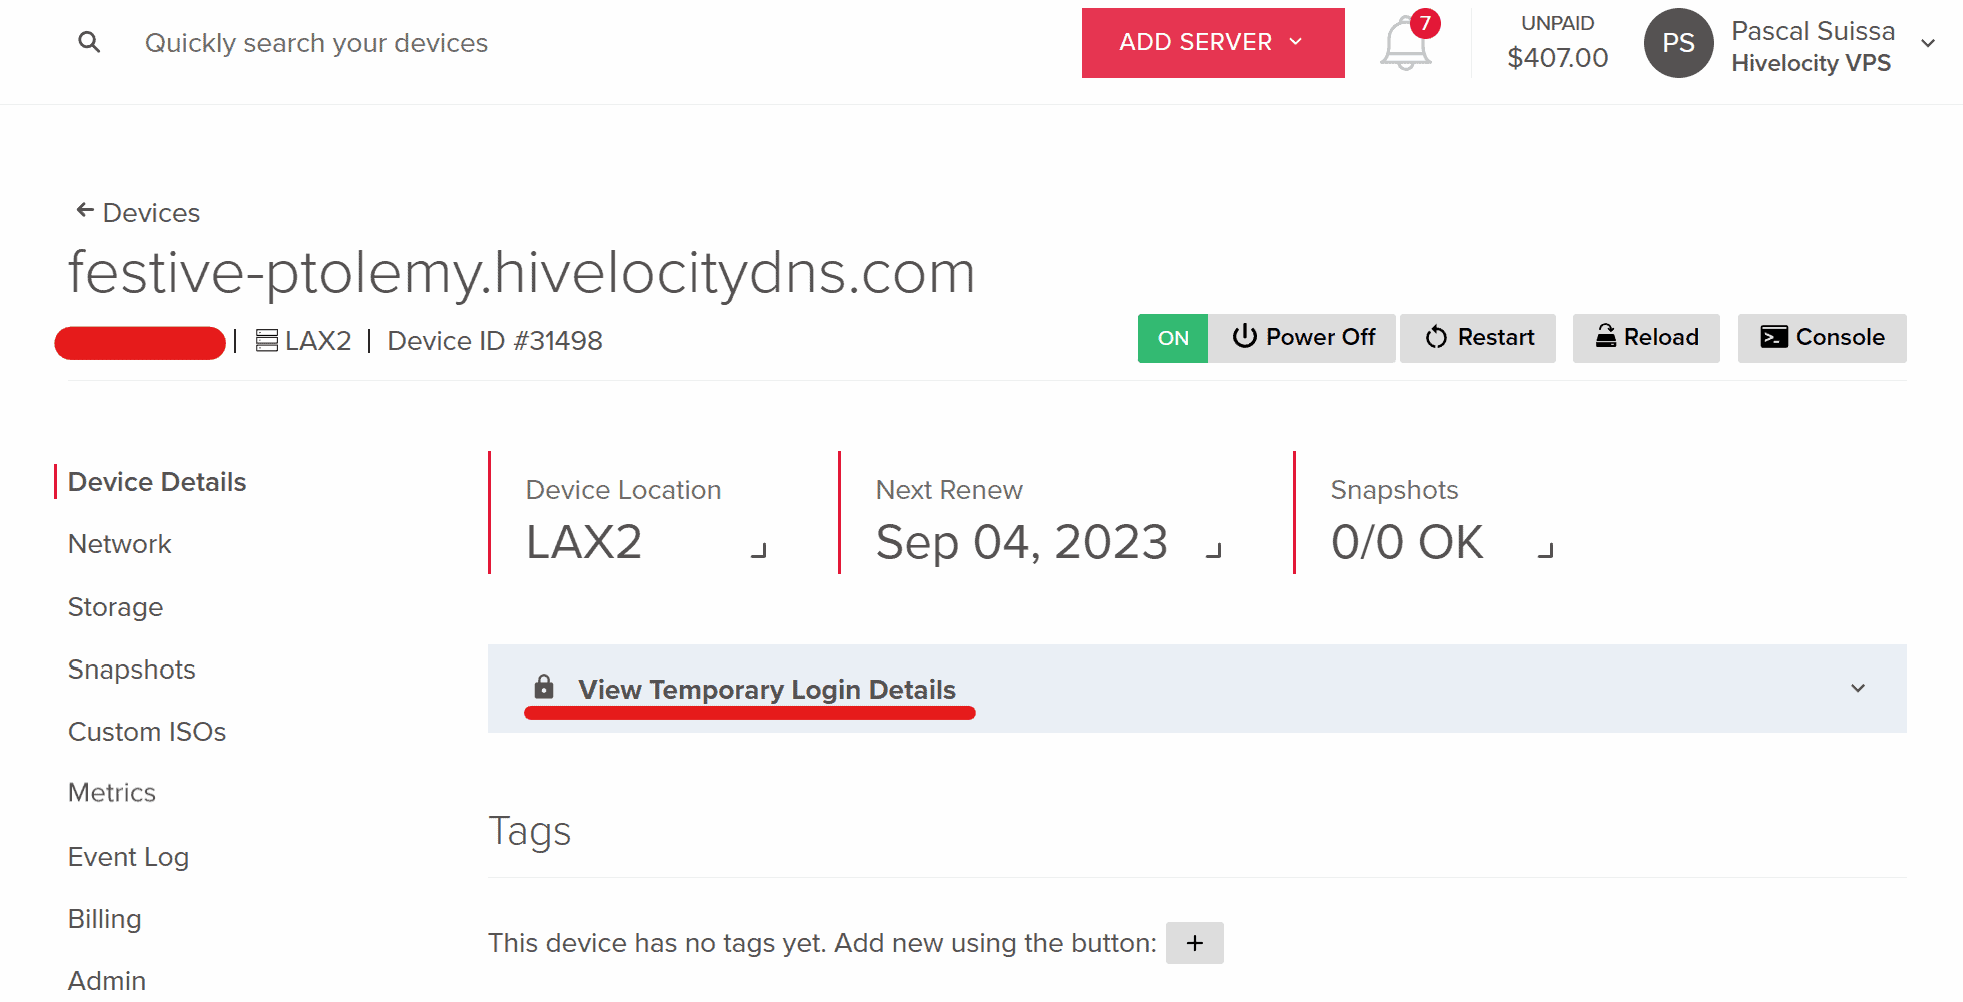
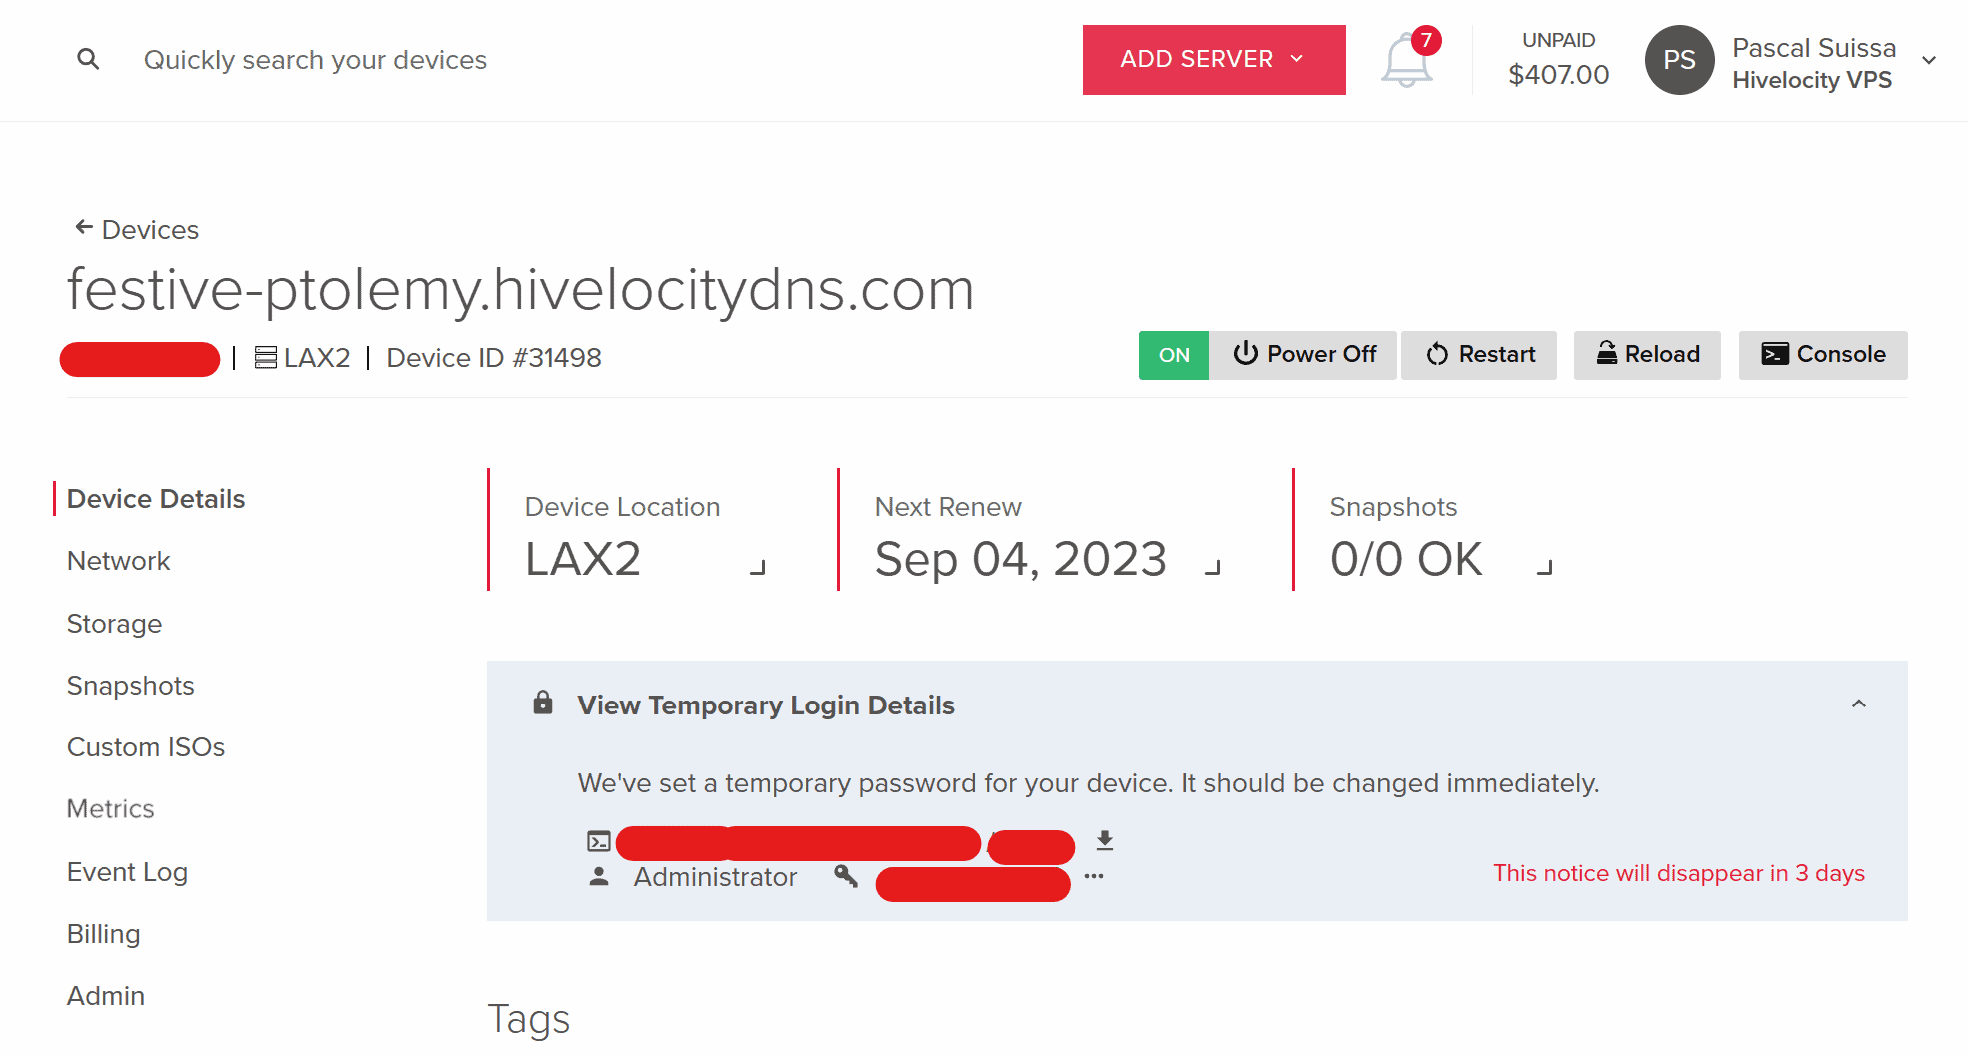
- Pressing on the text in the blue bar will display your new VPS credentials. You can then proceed to use the Virtual Console to gain access to the new system or use the SSH information to proceed.
- With the information above, open the Remote Desktop Connection app in your Windows OS on your workstation.
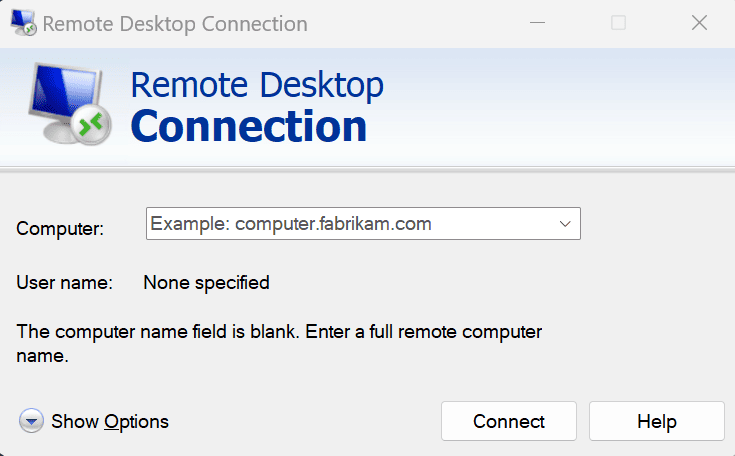
- Proceed to enter your VPS IP and the port given to you for access. An example would be your IP address followed by a colon and the port number (111.222.333.444:33890).
- Once the information has been filled, press the Connect button.
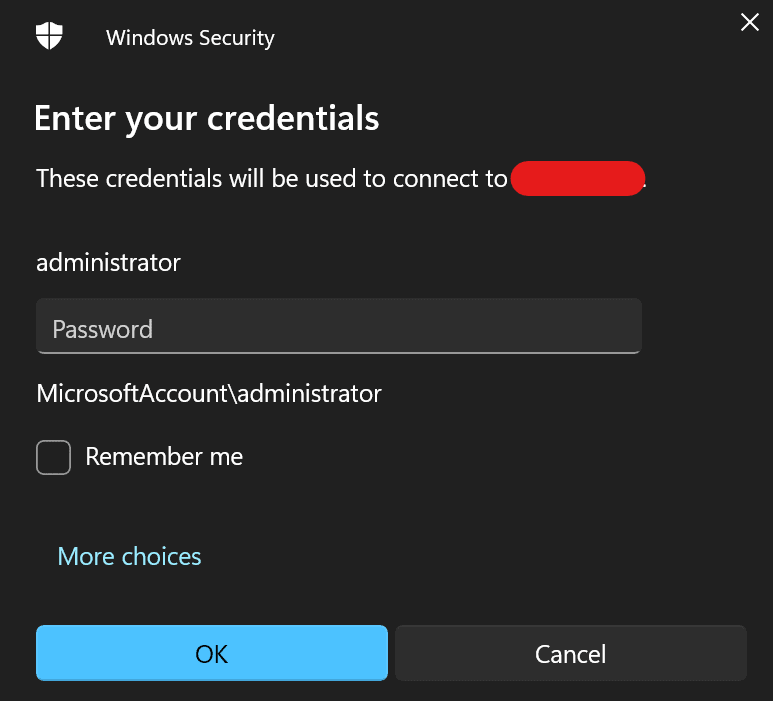
- A security popup will require you to enter your VPS password to log in. Do so and then press OK.
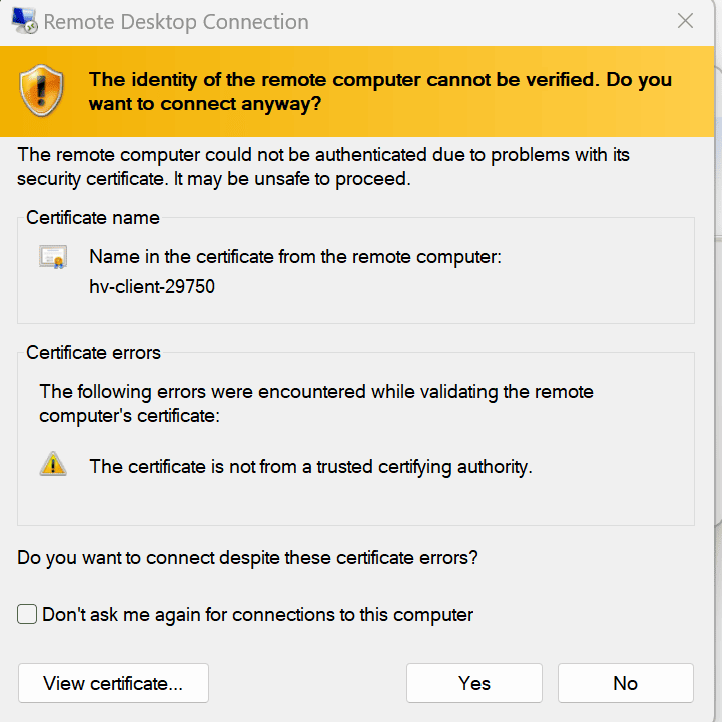
- The next screen will involve accepting connections to the VPS. Press the Yes button.
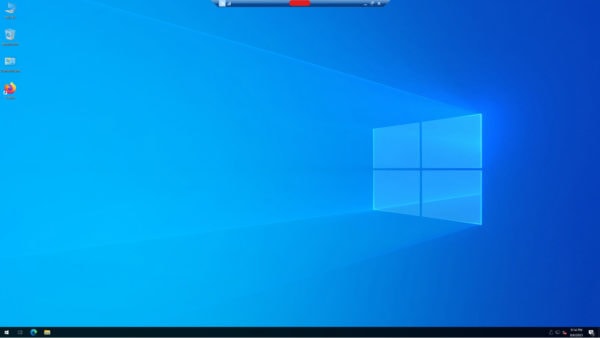
- Once you’ve accepted the previous message, the Windows OS will load and you will find yourself in your new VPS desktop, as shown below.
– by Pascal Suissa
