MySQL is the world’s most popular open-source relational database management system. While most web applications connect to MySQL locally, many scenarios—such as remote data analysis, multi-server architectures, or external management tools—require enabling remote access via Port 3306.
By default, Linux servers are secured to block these external connections. To enable the MySQL port, you must configure three distinct layers:
-
The System Firewall (CSF, UFW, or Firewalld)
-
The MySQL Configuration (Bind-Address)
-
The Database User Privileges (GRANT commands)
This guide covers all three layers to ensure your Hivelocity dedicated server is both accessible and secure.
Configuring Your Firewall
Your firewall is the first line of defense. Depending on your Linux distribution (Ubuntu, CentOS, Debian, or RHEL), you will likely be using one of the three methods below. Need a quick cheat sheet while you work? See our Common Firewall Commands: Iptables, CSF, UFW, & Firewalld.
Method 1: Configuring CSF (ConfigServer Security & Firewall)
Use this method if you are using a Hivelocity server with cPanel or a standard CSF installation. If CSF isn’t installed yet, follow our CSF install guide.
- Log in to your server as root via SSH.
- Open the CSF configuration file:
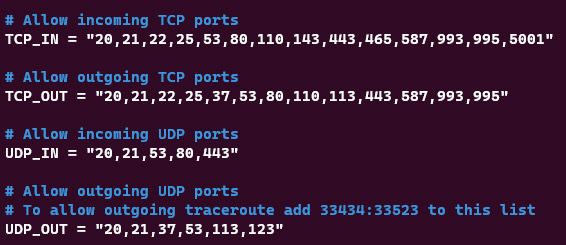
nano /etc/csf/csf.conf - Search for the
TCP_INandTCP_OUTlines as shown in the image below:
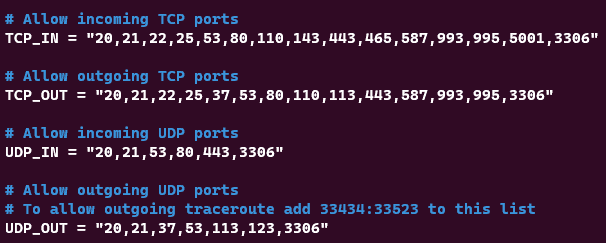
- Add port 3306 to the list of allowed ports as follows:
- Save changes (Ctrl+O, Enter) and exit (Ctrl+X).
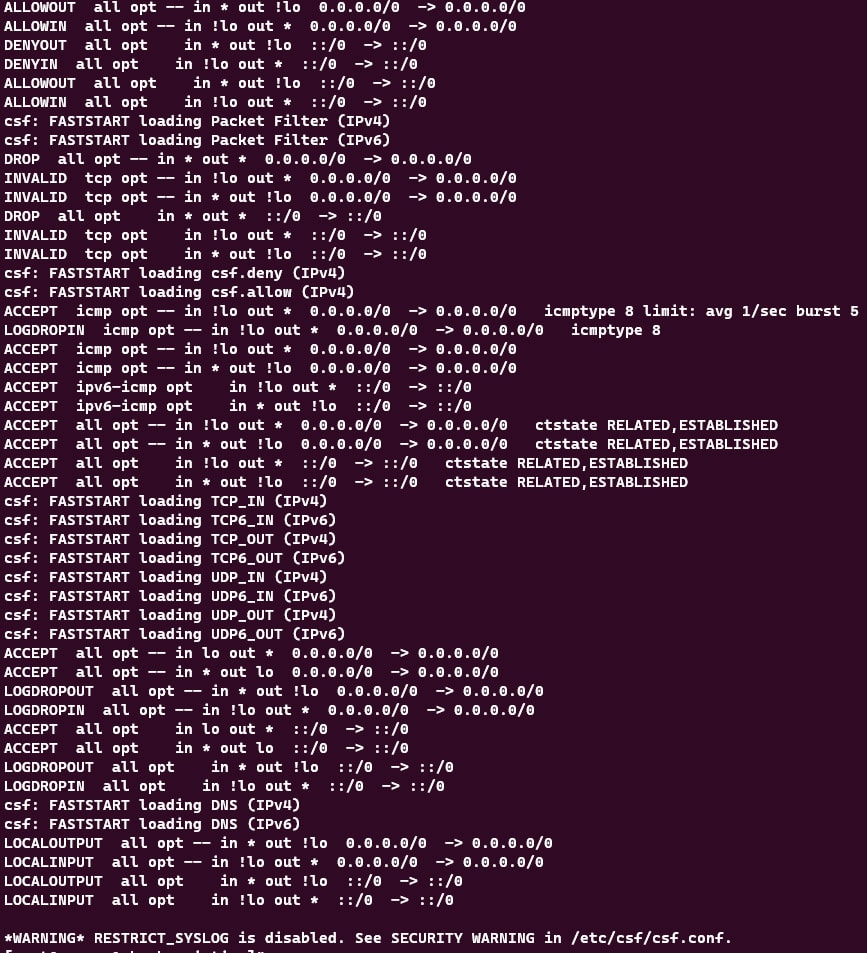
- Restart the firewall to apply changes:
csf -r
For a focused walkthrough on opening specific ports with CSF, see How to Open Certain Ports in CSF Firewall on a Dedicated Server.
Method 2: Configuring UFW (Ubuntu/Debian)
If you are using a standard Ubuntu or Debian install without CSF, use the Uncomplicated Firewall (UFW).
- To allow all connections (Less Secure):
sudo ufw allow 3306/tcp - To allow only a specific IP address (Recommended):
sudo ufw allow from [Your_Remote_IP] to any port 3306
Prefer to manage rules with raw iptables instead of UFW? Here’s our primer on setting iptables rules in Linux.
Method 3: Configuring Firewalld (CentOS/RHEL)
For modern RHEL-based systems: firewall-cmd --zone=public --add-port=3306/tcp --permanent firewall-cmd --reload
Configuring MySQL for Remote Access
Even if the port is open in the firewall, MySQL usually defaults to “localhost” mode, meaning it ignores any requests coming from the outside world. If MySQL isn’t installed yet, start with our guide: How to Install MySQL Server.
Step 1: Edit the Bind-Address
You must tell MySQL to listen to your server’s public or private IP address.
- Locate your config file (usually
/etc/mysql/mysql.conf.d/mysqld.cnfor/etc/my.cnf). - Find the line:
bind-address = 127.0.0.1. - Change it to:
0.0.0.0to listen on all network interfaces.[Your_Server_IP]for better security.
- Restart the service:
sudo systemctl restart mysql
Not sure which MySQL version you’re running (paths and options can vary)? Use our quick check: How to Check MySQL Version (Linux & Windows).
Managing Database User Privileges
MySQL requires internal permission to allow a specific user to connect from a specific remote location. If you need a refresher on connecting locally first, see Access MySQL from the command line.
Creating a Remote User
Log into the MySQL shell: mysql -u root -p
Run the following command to allow a user to connect from a specific IP:
GRANT ALL PRIVILEGES ON database_name.* TO 'remote_user'@'1.2.3.4' IDENTIFIED BY 'Strong_Password';
FLUSH PRIVILEGES;
For even tighter control over who can connect, learn how to restrict MySQL clients by IP address at the database layer.
Note: Using ‘%’ instead of an IP allows connection from any location but is a significant security risk.
Security Best Practices
Exposing Port 3306 to the public internet makes your server a target for brute-force attacks.
- SSH Tunneling (The Gold Standard): Instead of opening Port 3306, connect via an SSH tunnel. This encrypts your database traffic and keeps the port closed to the public. If SSH isn’t enabled on your server yet, start here: How to Enable SSH for Dedicated Server on Linux.
- IP Whitelisting: Always restrict firewall access to specific, known IP addresses.
- Use SSL/TLS: Ensure
require_secure_transport = ONis set in your MySQL configuration to prevent “Man-in-the-Middle” attacks. - MySQL 8.4+ Considerations: Be aware that
mysql_native_passwordis deprecated. Use thecaching_sha2_passwordplugin for modern, secure authentication.
Troubleshooting & Verification
If you still cannot connect, use these diagnostic commands:
- Check if MySQL is listening:
netstat -tulnp | grep 3306 - Test connection from a remote machine:
telnet [Your_Server_IP] 3306 - Check MySQL Error Logs:
tail -f /var/log/mysql/error.log
Seeing “ERROR 2002 (HY000): Can’t connect to local MySQL server through socket”? Here’s how to fix a missing socket file: What to Do if MySql.sock File is Missing. To observe live server activity and slow queries after enabling remote access, try mytop. And when testing from apps or scripts, these sample database connection strings can help you verify connectivity.
FAQ
What is the default MySQL port?
The default port is 3306.
Should I allow remote root access?
No. You should always create a dedicated remote user with limited privileges.
Is bind-address 0.0.0.0 safe?
It is only safe if your system firewall (CSF/UFW) is strictly whitelisting specific IPs.
The Hivelocity Difference
Seeking a better Dedicated Server solution? In the market for Private Cloud or Colocation services? Check out Hivelocity’s extensive list of products for great deals and offers.
With best-in-class customer service, affordable pricing, a wide-range of fully-customizable options, and a network like no other, Hivelocity is the hosting solution you’ve been waiting for.
Unsure which of our services is best for your particular needs? Call or live chat with one of our sales agents today and see the difference Hivelocity can make for you.
