If you’re looking to migrate your WordPress Site from one host server to another via cPanel and aren’t sure where to begin, read on to learn how to easily transition your site without losing your data.
Migrating Your WordPress Site with cPanel
To migrate your WordPress site using cPanel, just follow these key steps.
Exporting Current WordPress Databases
Before you can move your WordPress site, you first have to export your databases.
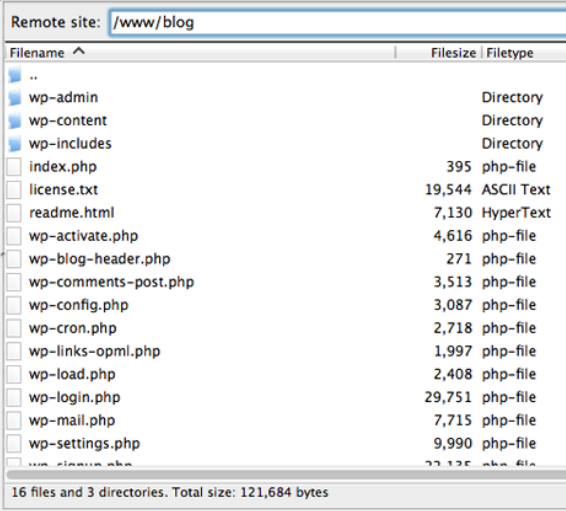
- Log in to FTP with your cPanel username, either using Filezilla or your preferred FTP program.
- Next, navigate to the public_html folder and download the WordPress files, including .htaccess, onto your local computer.
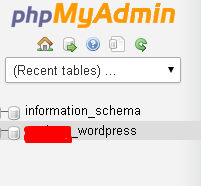
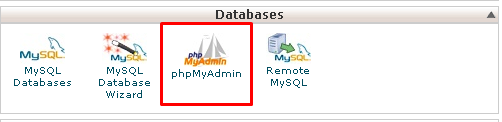
- Now, log in to cPanel using your username and password. Under the Databases options, open the phpMyAdmin application.

- Within phpMyAdmin, select the database that contains your WordPress installation from the list on the left hand sidebar.
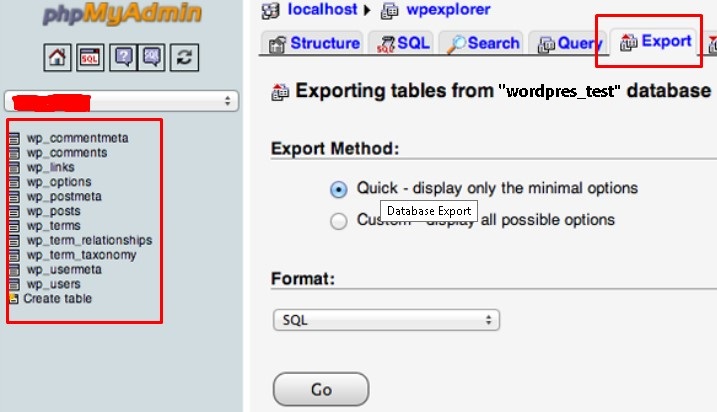
- Once you’ve selected the WordPress database, click on the Export tab on the navigation menu in the right hand side panel and save the file onto your local computer.
- Once the database export and the FTP transfer of your files have both completed, it’s time to move onto the next stage.
Creating a WordPress Database on the New Host Server
To create a new MySQL database for your WordPress site:
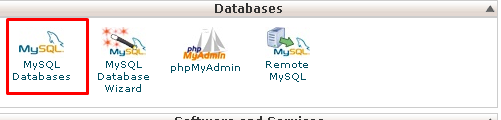
- First, log in to the cPanel account on your new server and, under the Databases options, click on MySQL Databases.
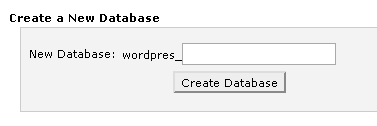
- Next, under the Create a New Database option, create a new database with an appropriate name for your website.
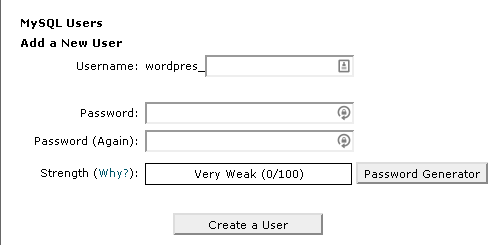
- After creating the new database, you’ll need to create a new MySQL User and assign them a secure password.
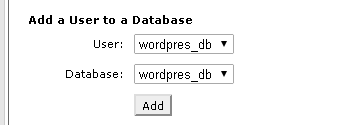
- Under the Add a User to a Database section, select your new user from the dropdown menu and add them to your new database.
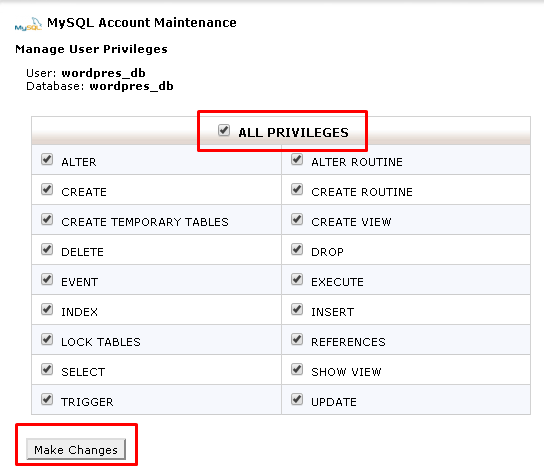
- Be sure to grant your new user all privileges by checking the box labelled All Privileges and then clicking on Make Changes.
- When you’ve finished, write down the name of your new database, the new MySQL username, and its password. You will need these for further configuration.
Editing the wp-config.php File
After creating your new database, the next step is to edit your WordPress site’s configuration files.
You can do that by browsing to the folder on your local computer where you downloaded your website files to in the first step of this tutorial. In that folder, you will find a file called wp-config.php. This file controls access between WordPress and your database.
Start by making a copy of this file and storing it in another folder on your local computer. Should anything go wrong during the process of making changes, this will allow you to restore to the previous version of the file.
Now, open the original version of the wp-config.php file with your favorite text editor and make the following three changes:
- Change the Database Name
In the configuration file, locate the following line:
define(‘DB_NAME’, ‘db_name’);
The db_name portion of this line will currently be set to the MySQL database name of your old web host. You must change this to the name of the new database you just created.
- Change the Database Username
After changing the database name, locate the line below it which says:
define(‘DB_USER’, ‘db_user’);
In this line, you will need to change the db_user portion from the username of your old host to the new username you just created for your new database.
- Change the Database User Password
Finally, after editing the database name and user, edit the third line:
define(‘DB_PASSWORD’, ‘db_pass’);
As with the others, the db_pass section of this line must be changed to the new secure password you created for your new MySQL user.
Once all changes are complete, save the configuration file and close your text editor.
Importing Your Database onto a New Server
Now that your configuration files are ready, the next step in your site migration is to upload your WordPress database onto your new server.
- First, log in to cPanel and under the Databases options, open the phpMyAdmin application.
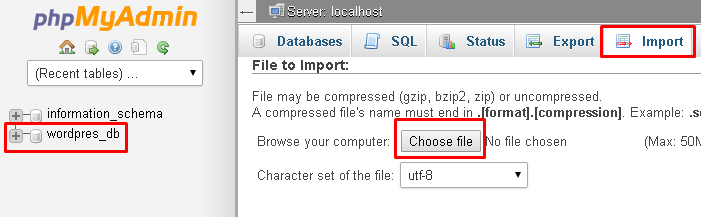
- Select your new database from the list on the left hand sidebar. Once it opens, select the Import tab from the navigation menu.
- In the File to Import section, click the Choose File button and select the WordPress SQL file you exported previously onto your local computer.
- Under Partial Import, un-tick the check box, and make sure the Format is set to SQL. Then, click the Go button. The database import will now begin.
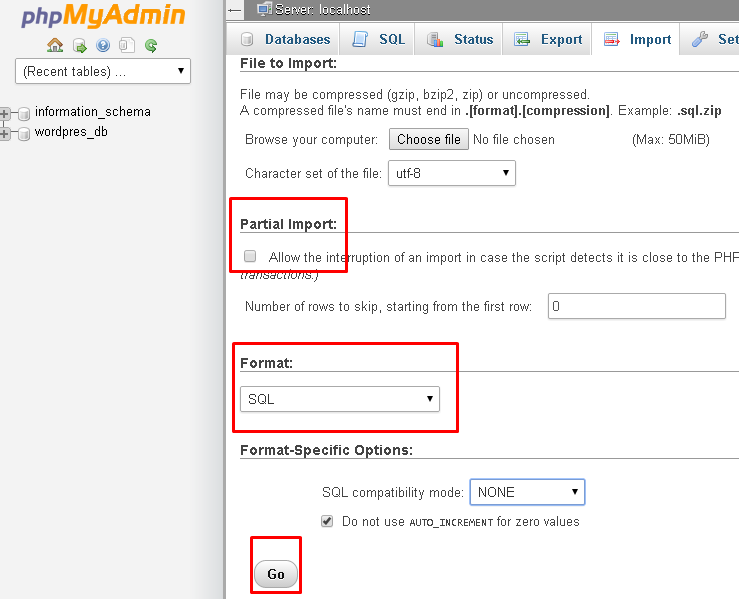
- You should receive a confirmation message informing you of the success of the import once it has completed.
Uploading the WordPress Files to Your New Host
Once you’re databases are set and ready to go, it’s time to upload your WordPress files to your new hosting provider.
- Log in to FTP with your cPanel username, either using Filezilla or your preferred FTP program, and access your new host server
- Navigate to the public_html folder
- Now, upload all the WordPress files from your local computer that you downloaded previously, including the newly updated version of wp-config.php.

Updating the Permalinks
At this point you should be just about finished with migrating your site. If you had permalinks set up on your dev site, you may notice that when you initially start clicking around the new, live site, that none of your pages are showing up when navigating away from the homepage.
To fix this:
- Log in in to your WordPress Admin Panel.
- Navigate to Settings.
- Locate the option for Permalinks and simply click Save Changes. WordPress will now create a new .htaccess file on your new server.
*Note: Sometimes WordPress will give an error message when trying to save your permalink settings, telling you it couldn’t create an .htaccess file. You can fix this by going into your web host’s file manager and creating a new file, named “.htaccess”, then making it writeable (permissions 777).
And there you have it! Your WordPress site should now have successfully migrated host servers without the loss of your data.
Popular Links
Looking for more information on WordPress? Search our Knowledge Base!
Interested in more articles about Web Design? Navigate to our Categories page using the bar on the left or check out these popular articles:
- How to Publish a Site via HTTP FrontPage
- How to Optimize a WordPress Website Using Plugins
- How Do I Install FrontPage Extensions?
Popular tags within this category include: WordPress, FrontPage, SiteStudio, and more.
Don’t see what you’re looking for? Use the search bar at the top to search our entire Knowledge Base.
The Hivelocity Difference
Seeking a better Dedicated Server solution? In the market for Private Cloud or Colocation services? Check out Hivelocity’s extensive list of products for great deals and offers.
With best-in-class customer service, affordable pricing, a wide-range of fully-customizable options, and a network like no other, Hivelocity is the hosting solution you’ve been waiting for.
Unsure which of our services is best for your particular needs? Call or live chat with one of our sales agents today and see the difference Hivelocity can make for you.
