WordPress is a very popular CMS used for creating websites. However, WordPress sites can be slow, which can harm conversions and search engine rankings. This article explores the most frequent performance issues with WordPress sites and offers some solutions.
To speed up your WordPress site you need to streamline everything: plugins, server, themes, content, etc. The idea is to minimize the use of plugins and external resources and use as much native WordPress functionality as possible.
Multiple plugins can slow down WordPress sites. Remove unused plugins and replace old ones with the latest versions (good for security as well). Ideally, replicate the plugin functionality you want in native WordPress code or custom PHP. The fewer plugins you use on your site, the less chance there is of performance and upgrade issues. Plugins can also call external resources, which introduce uncertain delays by relying on external servers.
Let’s see how to optimize the WordPress website with Plugins.
In this article, we are going to use a couple of plugins that will help a WordPress website load faster.
Once you have your WordPress website developed and designed properly
1) Login to the WordPress admin area with
https://wordpresswebsite.com/admin
(this path may be different as per the location of the admin folder)
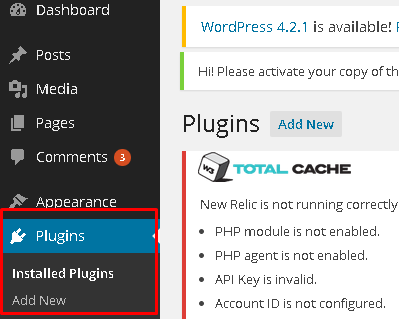
2) Once you are logged in to the admin area of the website, on the left-hand side click on Plugins and click on Add New.
-
On your right-hand side pane, Scroll down and in the Search Plugins window, search for “W3Total Cache Plugin” and press Enter

-
Now click on the Install Button and wait for it to be installed.
-
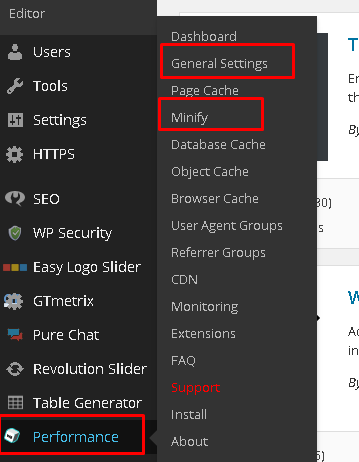
After installation, on your left-hand side pane you will now notice a new section in your admin sidebar called “Performance.”
-
Point to the Performance option with your mouse and click on General Settings.
-
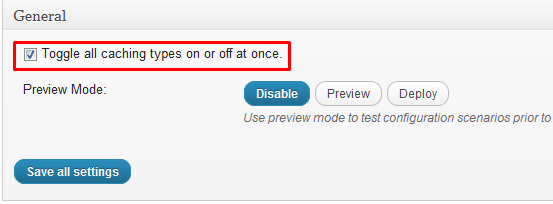
Under “General,” Check “Toggle all caching types on or off at once”
-
-
Since W3 Total Cache will turn on all its caching features, there are a few that may not apply to you. The common ones are a CDN and the CloudFlare feature. Uncheck “Enable” on these features if you don’t have them.
-
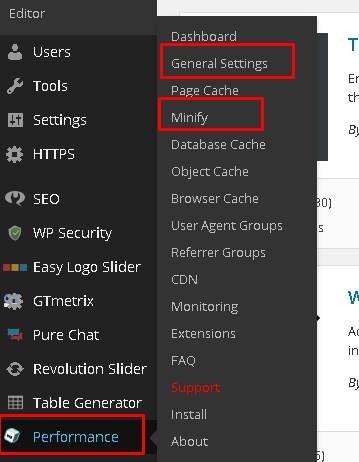
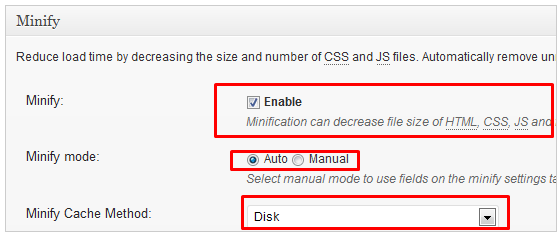
Under the Minify subsection, There is an option called Minify mode. Check the Box to Enable and Select the Auto option.
-
Once done with making the changes ,Click on Save All Settings .
Note: If you make any changes to your WordPress plugins, the W3 Total Cache plugin may ask you to Empty the Cache. This is done to make sure the plugin doesn’t serve a cached version of any changed files.
-
On the next step, on the sidebar, click on the Minify sub-section. Under HTML & XML, check Enable in the HTML minify settings. You can also check the other options, but make sure to test your site to see if it breaks.

-
Again On the sidebar, click on the Browser Cache sub-section.
-
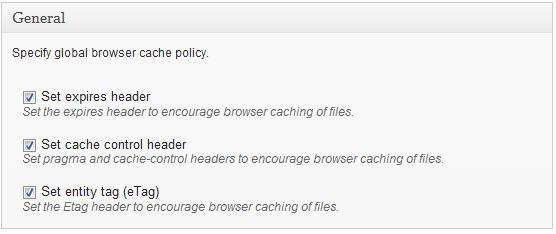
Under General, Cascading Style Sheets & JavaScript, HTML, and Media & Other Files headings enable the following:
-
Set expires header
-
Set cache control header
-
Set entity tag (eTag)
-
Click on Save All Settings
-
The next step would be to install one more plugin that WP Smush it Plugin
-
Repeat the steps .. step no. 2 & 3 to install the plugin
-
This plugin will optimize every image you upload henceforth since you activated it.

-
There are no options for this plugin and nothing to set up!
-
In the newer version of WP Smush, there is a Bulk Smush feature that can smush all of your uploaded images. It has worked for us on smaller media libraries and it is very convenient, however, it is experimental (we’ve experienced some errors with it on larger media libraries). Have a look at the feedback forums if you are looking for support.
-
That’s it! You’re finished.