Installing Plesk
To install Plesk on Windows server 2012, just follow these step-by-step instructions:
- First, log in to the server with administrator user.
- Download the Plesk installer for Windows from the following link https://installer-win.plesk.com/plesk-installer.exe
- Double click on the plesk-installer.exe file.

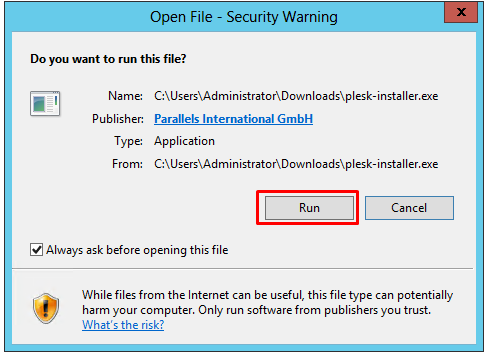
- You will receive a warning box. Click on Run.
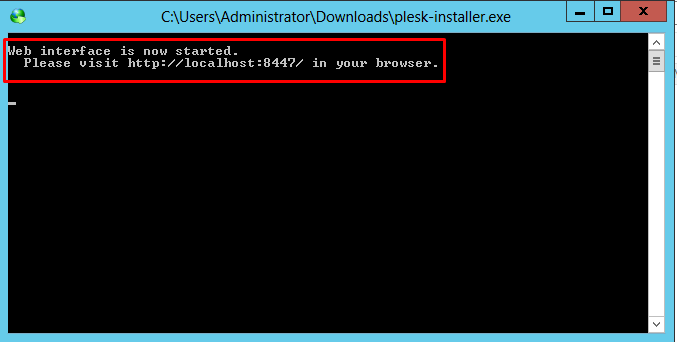
- A terminal window will open asking you to visit a URL using your internet browser. Copy the URL, which should be something along the lines of https://yourserverip:8447/, into your browser.
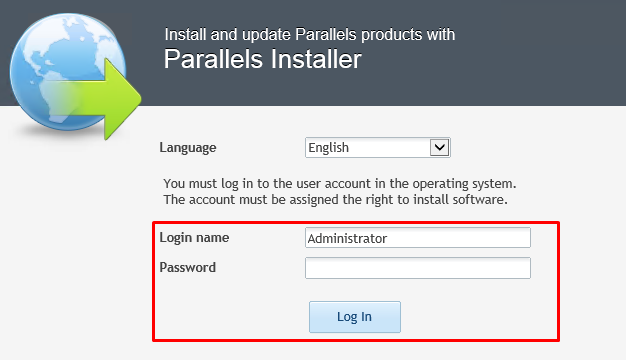
- The next screen will be of the browser-based Plesk login window. Log in using your server’s administrator password.
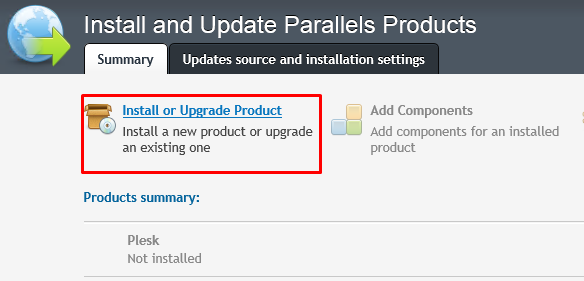
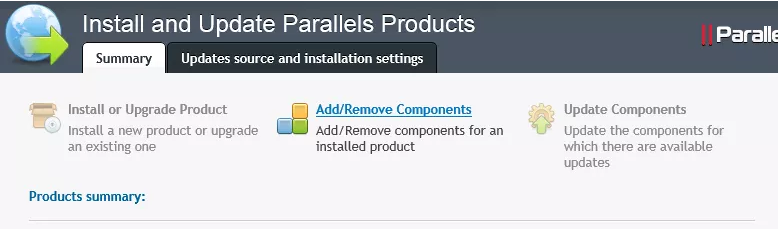
- After logging in, on the next screen, click on Install or Upgrade Product.
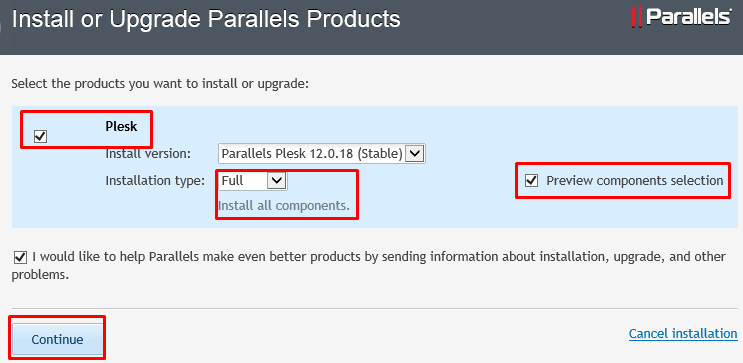
- On the next screen select the checkbox next to Plesk and choose its latest stable version from the dropdown menu. The Installation type should be set to Full, and you’ll want to click the checkbox next to Preview components selection. When you’re finished, click “Continue.
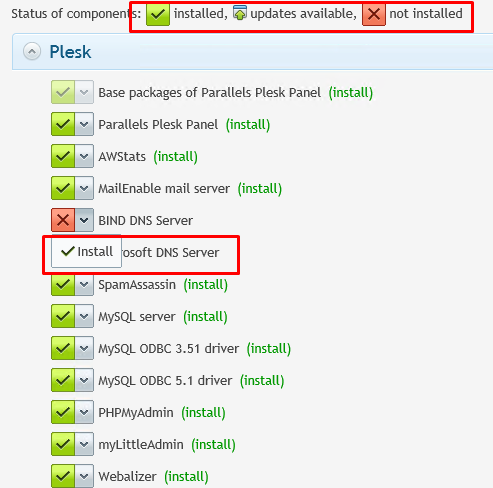
- Now, on the next screen select the components that you want to install and click on Continue.
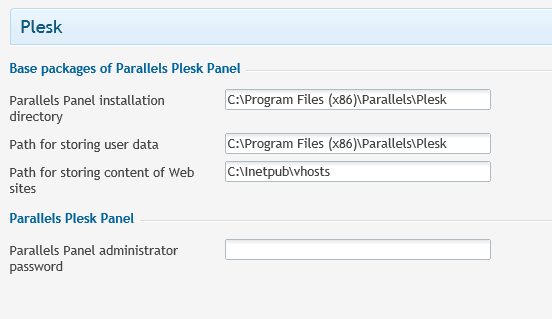
- On the next screen, leave the other fields as they are, allowing the Plesk installer to use its defaults. Provide the administrator password that you want to set for Plesk, then click on Continue.
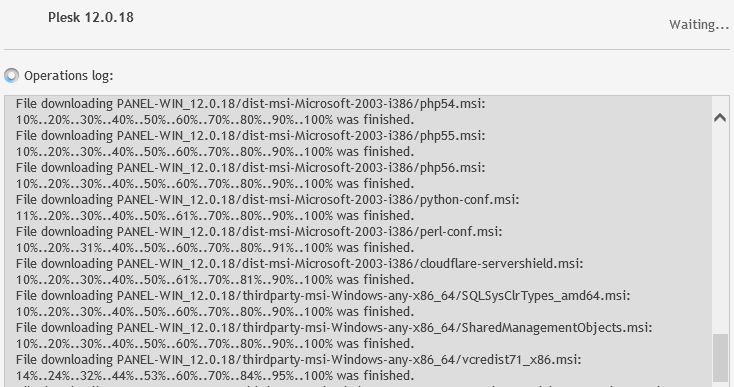
- The Plesk installation will now start.
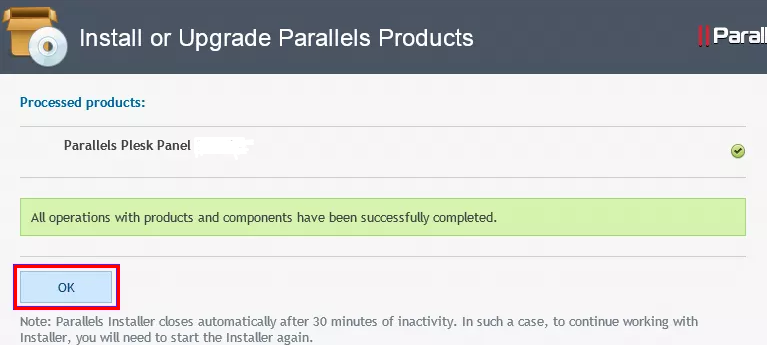
- When installation is complete, the next screen will inform you that all operations with products and components have been successfully completed. Click on OK.
- Once the installation has finished completely, you will be taken back to the summary screen. On this same screen, you can now add other Plesk components.
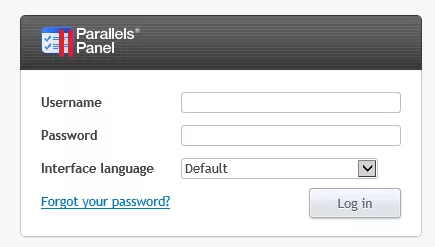
- Log in to the Plesk control panel using the password you set up when first logging in to Plesk via the provided URL.
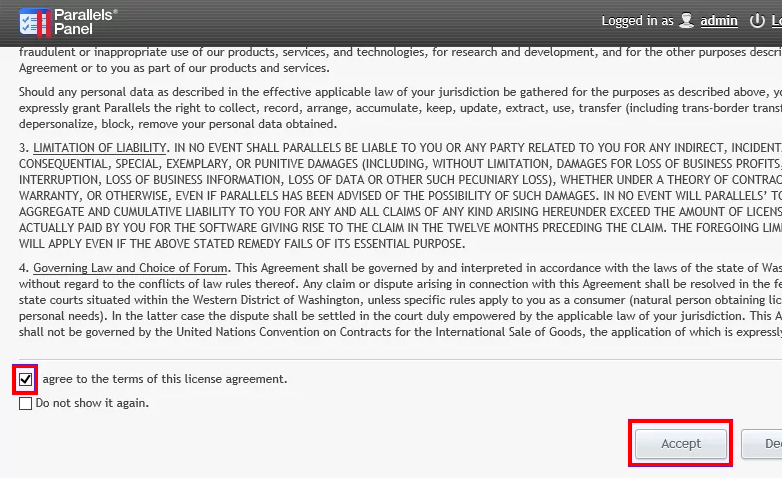
- Check the box next to I agree to the terms of this license agreement and click on Accept to proceed.
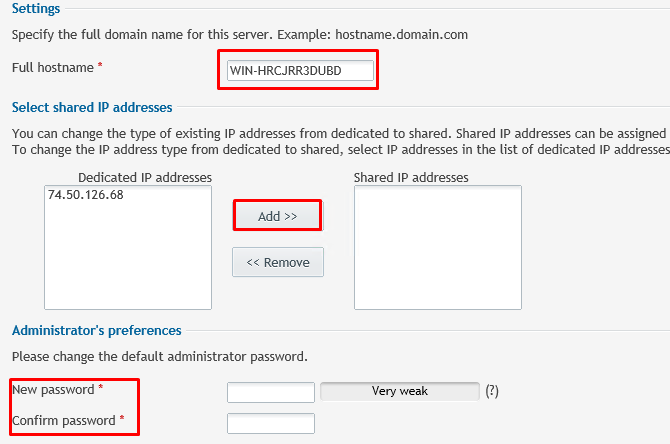
- On the next screen, specify the hostname of your server. For example: “hostname.yourdomain.com”. You will also need to select your server’s dedicated IP address or addresses.
*Note: It is also suggested that you change your password to a strong, secure password if you haven’t done so already.
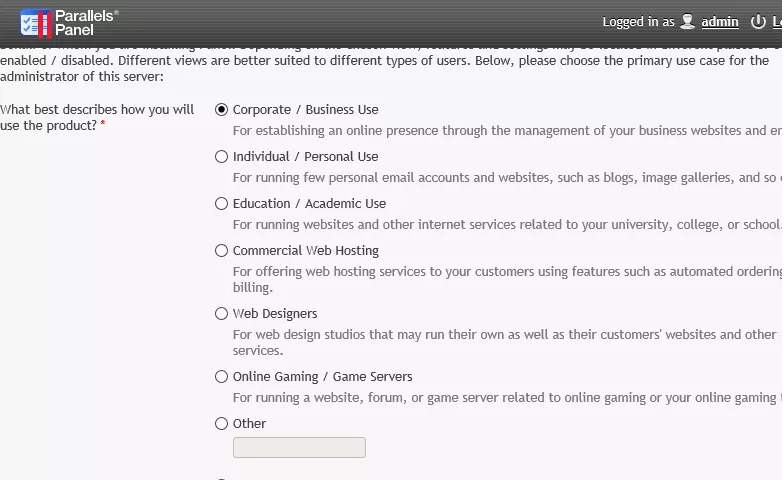
- On the next screen, select the radio button which best describes your purpose for using Plesk.
- Scroll down a bit and you will be given the option to select which interface view you prefer. Select any of the following radio button options and click on OK.
- Power User view – This view is an administrator view designed for a single user to manage websites, email accounts, etc. (It cannot be used if customers or resellers exist on the Panel).
- Service Provider view – This view is the actual end user view and can be used by administrators, resellers, and hosting clients. This view also includes an integrated billing system for invoicing and more.

- Power User view – This view is an administrator view designed for a single user to manage websites, email accounts, etc. (It cannot be used if customers or resellers exist on the Panel).
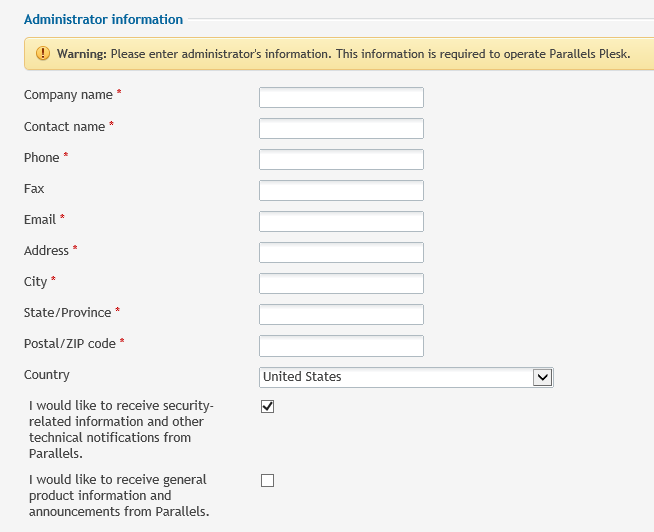
- On the next screen Provide all the requested information, including: Company name, contact name, phone number, email address, etc.
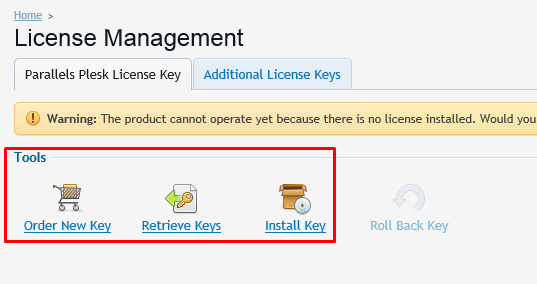
- The final screen will ask for the license. If you already have the license key you can install it here. If you do not already possess the license, you can either order one directly from this screen or utilize the 14 days trial license.
After installing the license, you’re all done! Now Plesk is installed and ready to be used on your Windows server 2012.
Popular Links
Looking for more information on Plesk? Search our Knowledge Base!
Interested in more articles about Control Panels? Navigate to our Categories page using the bar on the left or check out these popular articles:
- How to Fix Invalid cPanel License Error When the IP is In Fact Licensed
- How to Increase PHP Upload Limit on a cPanel Server
- How to Add a Subdomain in Plesk 12
Popular tags within this category include: cPanel, WHM, Plesk, DirectAdmin, and more.
Don’t see what you’re looking for? Use the search bar at the top to search our entire Knowledge Base.
The Hivelocity Difference
Seeking a better Dedicated Server solution? In the market for Private Cloud or Colocation services? Check out Hivelocity’s extensive list of products for great deals and offers.
With best-in-class customer service, affordable pricing, a wide-range of fully-customizable options, and a network like no other, Hivelocity is the hosting solution you’ve been waiting for.
Unsure which of our services is best for your particular needs? Call or live chat with one of our sales agents today and see the difference Hivelocity can make for you.
