In the diverse ecosystem of Linux, managing security credentials is a fundamental skill for both casual users and system administrators. Whether you are updating a forgotten login, rotating keys for security compliance, or performing emergency recovery on a locked system, knowing the right commands and environments is essential. This guide provides a comprehensive walkthrough on how to navigate password changes across various Linux distributions, from standard terminal commands for users and root, to advanced recovery techniques using the GRUB bootloader and rescue environment when the standard login screen is no longer an option.
Changing the Current User Password
The most frequent password task you’ll encounter is updating your own credentials. In Linux, this is handled by a dedicated utility that manages the encryption and storage of your secret key within the system’s shadow password suite. Because this process is self-contained, it is the safest and most common way to maintain account security or rotate passwords according to a regular schedule.
Method 1 – Changing User Password as the User
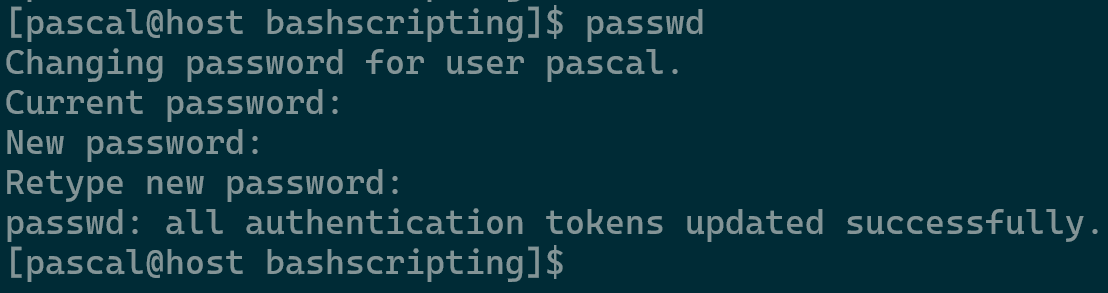
The first method is whether you’re logged into the user you wish the change the password for. If that is the case, proceed to send the command passwd and type the current password followed by the new password twice.
Method 2 – Changing User Password as Root User
The second method involves changing the user’s password while being logged in as the root user. This will allow you to change the password without knowing the current user password. The command to use is passwd username, ensuring to change the “username” to the user you wish to change the password for.

Changing the Root Password
The root account, or superuser, holds total control over the operating system, making its password the most critical piece of security on your machine. Depending on your distribution’s philosophy, whether it’s a sudo-heavy system like Ubuntu or a traditional root-centric system like Debian, the method for changing this password varies. Understanding how to update the root credential ensures you never lose administrative access to core system configurations.
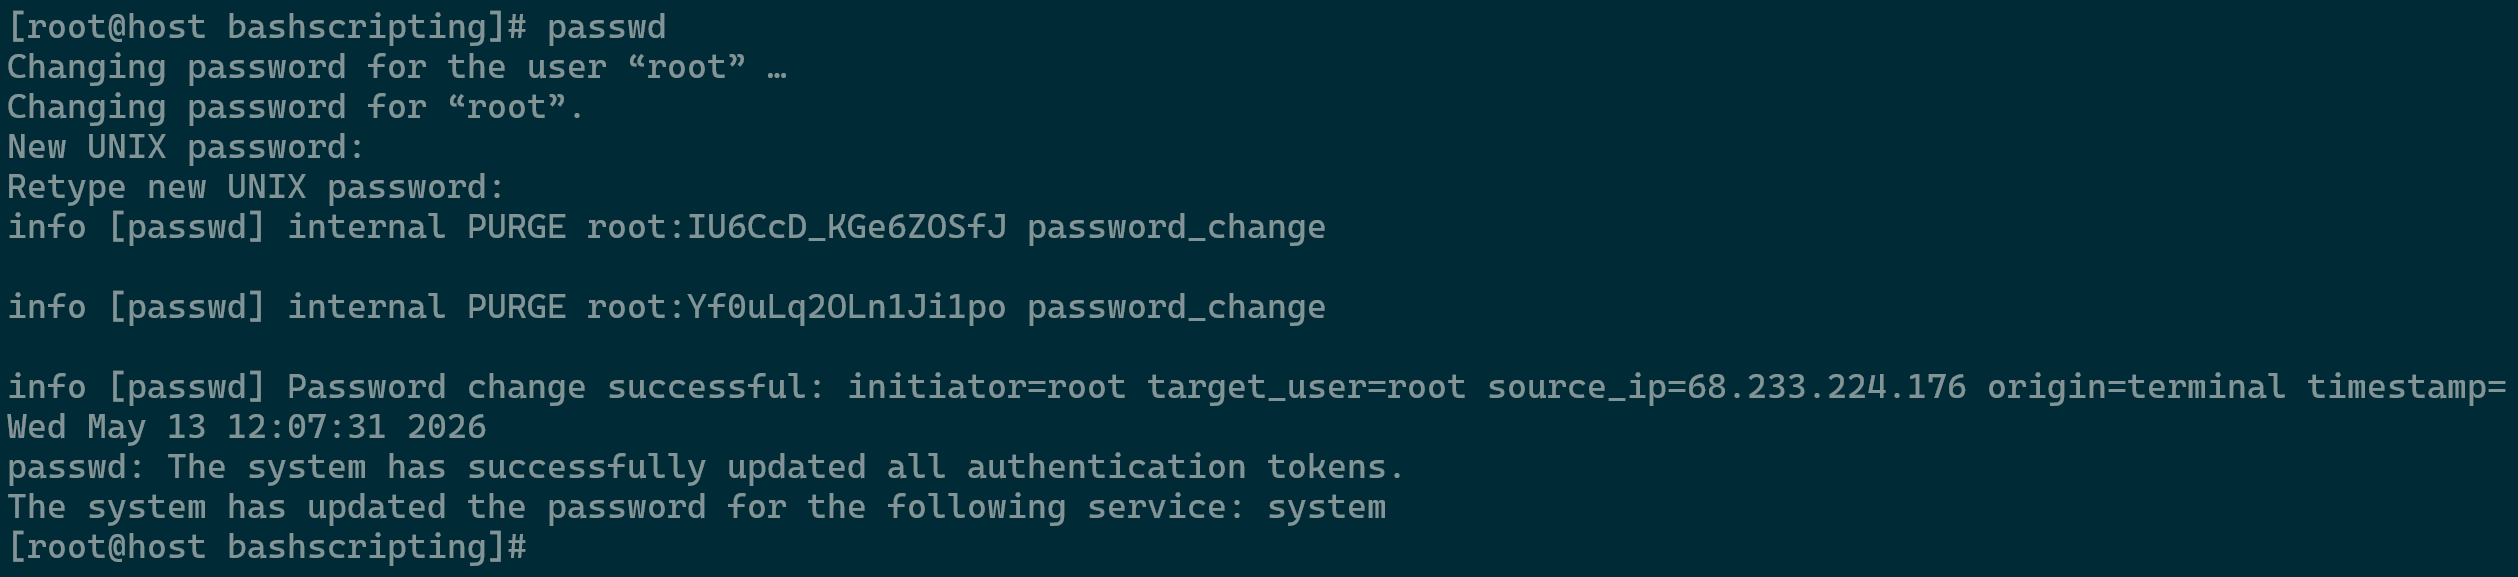
To change the root password logged in as root, you will require to run the command passwd and enter the new password twice.
Resetting a Password via GRUB (The Bootloader)
When you are completely locked out of your system and cannot reach a terminal, you must go to the bootloader level. GRUB (Grand Unified Bootloader) allows you to intercept the boot process before the operating system even starts. By temporarily modifying the kernel’s boot parameters, you can force the system to give you a root shell, bypassing the standard login screen entirely to fix a forgotten password.
The video within the section below is a good general flow for most of the distributions. Specific commands will be in each relevant section to be used as reference.
If you’ve lost access to root, you can utilize the Virtual Console/IPMI to gain access as per the articles below.
AlmaLinux Password Reset
- Reboot the machine while pressing SHIFT key in short intervals which will take you to the GRUB menu.
- Select your latest kernel and press “e” to edit the entry
- Find the line starting with “Linux” and place rd.break enforcing=0 at the end of it.
- Press Ctrl+X to reboot and let the modifications apply
- Access /sysroot directory by mounting /sysroot with read and write permissions using mount -o rw,remount /sysroot
- Change the directory environment to /sysroot using chroot /sysroot
- Change root password using passwd root
- [If applicable] Set the appropriate SELinux context. The command creates a hidden file called .autorelabel in the root directory. During the reboot, SELinux detects this file and relabels all the files on the system with appropriate SELinux contexts. This process takes quite some time in systems with huge disk space. The command to run is touch /.autorelabel
- Run the command exit twice and it will reboot the system

Debian / Proxmox Password Reset
- Boot into GRUB.
- Edit the kernel (e key)
- Find the line “linux /boot/vmlinuz” and at the end of it add init=/bin/bash
- Activate the changes using ctrl+X
- Remount root as read/write using mount -rw -o remount /
- Change root password and reboot using
passwd root - Reboot using the
rebootcommand
CentOS 5/6 Password Reset
- Reboot the machine.
- Press any key/SHIFT in short intervals to enter the boot menu.
- From the GRUB menu, select kernel the relevant kernel and press the ‘e’ key.
- Find the /vmlinuz-… line at the end of this line one of the following (choose one): 1, s, or single. Press Enter to save your changes (using a space after that line then adding “s”).
- You should be back on the kernel /vmlinuz… line. Press the ‘b’ key to boot to these temporary options to allow you to recover your root account.
- Now you will boot up to the root shell. Enter the command
passwdto set your new password. If you are unable to save the file be sure to run the following mount -o remount / - Once you have completed this, run the
rebootcommand.
CentOS 7 / CloudLinux Password Reset
- Boot the machine and press shift to enter GRUB.
- Select your kernel and press e to edit.
- Go to the line of Linux and change ro with rw init=/sysroot/bin/sh
- Now press Control+x to start on single user mode.
- Now access the system with this command
chroot /sysroot - Reset the password
passwd root - [If applicable] Update SELinux information
touch /.autorelabel - Exit chroot using
exitcommand - Reboot system using
rebootcommand
Ubuntu Password Reset
- Reboot the computer and press Shift/Escape keys in short interval to boot into GRUB.
- Highlight your kernel and press e to edit.
- Find the line starting with “linux”, delete ro and replace with rw init=/bin/bash at the end of that line.
- Press Ctrl + X to boot.
- Change password using
passwd root - Reboot system using
exec /sbin/init
Plesk Password Reset
- Login as root.
- Run command
plesk login - Run command
plesk bin admin --set-admin-password -passwd 'NEWPASSWORDHERE'
FreeBSD Password Reset
- During boot, select option 2 “Boot Single User”.
- Press Enter when prompted with “Enter full pathname of shell or RETURN for /bin/sh:” message in the shell.
- Mount root in rw using command
mount -u/ and mount all using commandmount -a - Reset the password using command
passwdand proceed to reboot using commandreboot
Red Hat Enterprise Linux / Oracle Linux Password Reset
- Press ‘e’ at the boot menu to change kernel parameters.
- Search for the line containing “rhgb quiet”.
- Replace ro to rw init=/sysroot/bin/sh
- Press Ctrl-X to continue the system startup.
- Now access the system with this command
chroot /sysroot - Reset the password
passwd root - [If applicable] Update SELinux information
touch /.autorelabel - Exit chroot using
exitcommand - Reboot system using
rebootcommand
Resetting a Password via Rescue or Recovery Environment
For those who prefer a more guided approach than manual GRUB editing, many Linux distributions offer a dedicated Recovery Mode. This environment acts as a maintenance toolkit, booting the system into a minimal state with a simplified menu. Using a rescue environment is often the most reliable way to reset passwords because it automates the mounting of file systems and provides a direct path to a root prompt in a controlled, safe-mode setting.
- You will require downloading and mounting a recovery ISO such as system-rescue to your dedicated hardware or VPS. Ensure to view links to both relevant articles above for reference.
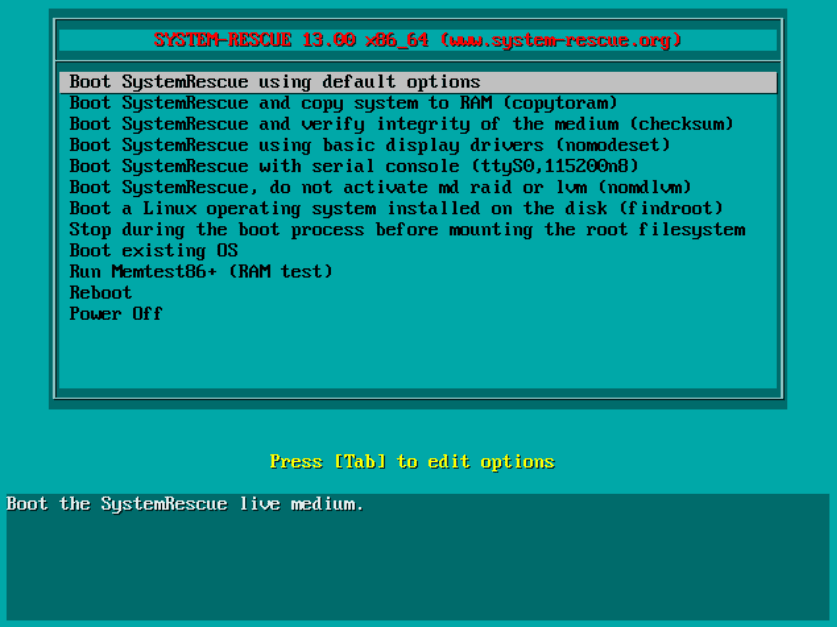
- Once the ISO is mounted, boot into the virtual drive and press on the first option in the menu as below.
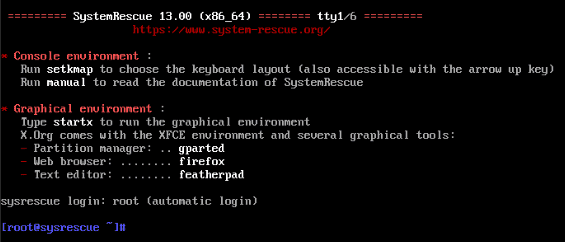
SystemRescue - The rescue environment will boot and you will be presented with the following screen as below.
SystemRescue Shell
- Run the following commands in the order as listed below:
lsblkto display current drives and partitionsmkdir /mydriveto create a temporary directory to mount the partition with the root/OS filesmount /dev/sda2 /mydriveto mount the partition to the newly created /mydrive directorylsblkto review and confirm the workchroot /mydriveto change our shell into the system that is in that partition. If you encounter an error proceed unless you’re hitting a hard wall. At that point reach out to the Hivelocity Support team for further assistancepasswd rootto change the root user password- Unmount the ISO and reboot the unit using the
rebootcommand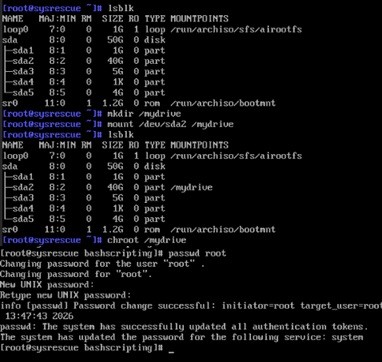
Performing the root Password Reset
