What is Maldet?
Maldet is a commonly used abbreviation for Linux Malware Detect (LMD), a malware scanner for Linux released under the GNU GPLv2 license.
What makes Maldet unique, is that it is designed around the threats faced in shared hosting environments. Maldet works by using threat data from network edge intrusion detection systems to extract malware that is actively being used in attacks and generates signatures for detection.
How to Install Maldet in 5 Easy Steps
Before you can run a scan with Maldet, you’ll need to download, unpack, and install it onto your server. By following these five easy steps though, you’ll be up and running in no time. Best of all, the process can be completed entirely from within your server’s terminal by using the following series of commands.
-
First, you’ll need to log in to your server with root user.
-
The Maldet installation pack is not available from online repositories, but is instead distributed as a tarball from the project’s official web site. The tarball containing the source code of the latest version can be downloaded directly using the following command or by accessing this link:
wget https://www.rfxn.com/downloads/maldetect-current.tar.gz

-
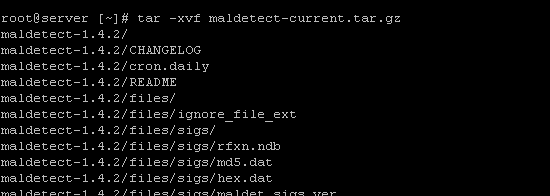
Once the tarball is downloaded, you’ll need to unpack it and enter the directory where its contents were extracted. To extract the file, use the command shown below and hit enter.
tar -xvf maldetect-current.tar.gz

-
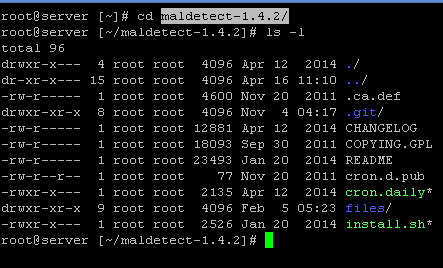
Now, move to the Maldet directory using the cd command:
cd maldetect-1.4.2
*Note: the above command is specific to maldetect version 1.4.2. Depending on which version of Maldet is current, this command will change. Be sure to use the version number that aligns with the version of Maldet which you unpacked in step 3. For instance, if you’ve downloaded maldetect ver 1.6.4, you should use the command cd maldetect-1.6.4.


-
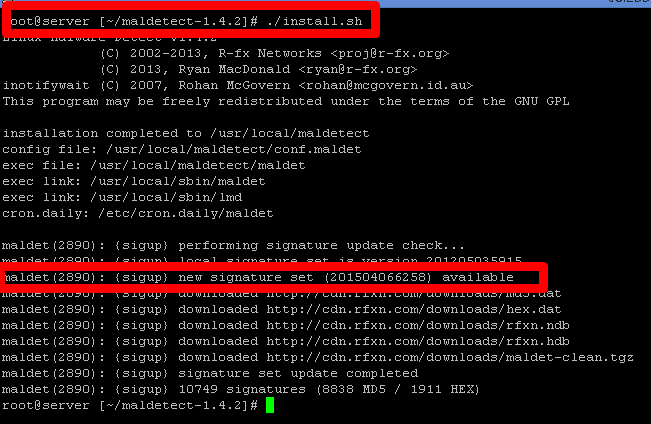
Once you’ve moved into the Maldet directory, you will have to execute the installation script. This can be done by entering the command below and then hitting enter.
./install.sh

Updating the Maldet Client
Now that the client has been installed, it’s critical to make sure that the definitions and scan signatures are up-to-date prior to every malware scan. Updating definitions helps ensure that the latest known malware threats are detected, so long as they are in the database which it is being updated from.
To update your Maldet client, just follow these steps:
- First, to update the Maldet definitions, run the following command:
maldet -u

- Next, to ensure optimal performance when running maldet -u, run this second command as well:
maldet -d

Running a Scan with Maldet
Now that Maldet is installed, you can check to make sure it’s working correctly by running a scan on your server to identify infected files. To run a scan, enter the following command:
maldet –a
![root server showing [~/maldetect-1.4.2] #maldet - a](https://www.hivelocity.net/storage/blog-kb/uploads/maldet6.png)
As you can see in the image above, if everything has been entered correctly, you should see that Maldet has started scanning now.
A report is made for every Maldet scan performed in the system. The event log along with the completed reports can all be viewed using the following commands:
- To view the events and scan status, just run the following command:
tail /usr/local/maldetect/logs/event_log

- To view a list of all the reports made by Maldet, run the following command. *Note: there are two hyphens before the “report list”.
Maldet –report list

- Once a report of interest has been presented, run this second command with the relevant “SCAN ID” to view the individual report in detail. *Note: you will need to replace “SCANID” in the command below with an actual ID number. See the screenshot below.
maldet –report SCANID


And with that, you should now be able to run Maldet scans as needed and check the results of past scans whenever necessary.
Popular Links
Looking for more information on Maldet? Search our Knowledge Base!
Interested in more articles about Security? Navigate to our Categories page using the bar on the left or check out these popular articles:
- How to Clear the YUM Cache
- How to Install CSF (ConfigServer Firewall)
- Reset the MySQL Root Password on Windows Server
Popular tags within this category include: YUM, Maldet, SSL, and more.
Don’t see what you’re looking for? Use the search bar at the top to search our entire Knowledge Base.
The Hivelocity Difference
Seeking a better Dedicated Server solution? In the market for Private Cloud or Colocation services? Check out Hivelocity’s extensive list of products for great deals and offers.
With best-in-class customer service, affordable pricing, a wide-range of fully-customizable options, and a network like no other, Hivelocity is the hosting solution you’ve been waiting for.
Unsure which of our services is best for your particular needs? Call or live chat with one of our sales agents today and see the difference Hivelocity can make for you.