What is RDP and How the Port Comes into Play
The built-in Windows Remote Desktop Protocol (RDP) feature empowers a client computer to securely view and control a host computer over a network. When you log in, RDP transmits your mouse movements, keyboard strokes, and display data in real time, allowing you to work exactly as if you sat right in front of the machine.
Network protocols rely on digital ports to route traffic. An IP address can be seen as the street address of an apartment building, and the port number as a specific apartment. For RDP, the standard apartment number assigned by the Internet Assigned Numbers Authority (IANA) is Port 3389. The Windows Remote Desktop app automatically assumes it needs to use this port unless told otherwise when attempting to create a connection.
While convenient, this standardization creates a security vulnerability. Port 3389 is universally known for RDP traffic, cybercriminals deploy automated bots to scan millions of public IP addresses specifically looking for it. Once found they launch brute-force attacks, flooding your system with thousands of password guesses a minute to gain administrative access, steal data, or deploy ransomware.
By changing the port to a custom, non-standard number between 1024 and 65535 (like 45000), you effectively camouflage your system. While “security through obscurity” shouldn’t be your only defense, it hides your connection from 99% of automated background scanners, drastically reducing log noise and keeping you off hacker radars.
How to Change the RDP Port
Modifying the native RDP port requires making a small adjustment to the Windows Registry database, adding a custom rule to your system’s firewall, and resetting the underlying RDP service so the changes take effect.
The Windows Registry is a highly sensitive database that contains core settings for your operating system. Accidentally changing or deleting the wrong key can cause system instability or render your OS unbootable. Follow these instructions precisely. If you are working on a production environment or a critical machine, it is highly recommended to back up your registry before proceeding.
Part A: Modify the Windows Registry
To change how the operating system listens for remote connections, we must update its internal network configuration using the Registry Editor (regedit).
- Press the Windows Key + R on your keyboard to open the Run dialog box or use the taskbar search box.
- Type regedit into the text field and press Enter. If a User Account Control (UAC) prompt appears asking for administrative permission, click Yes.
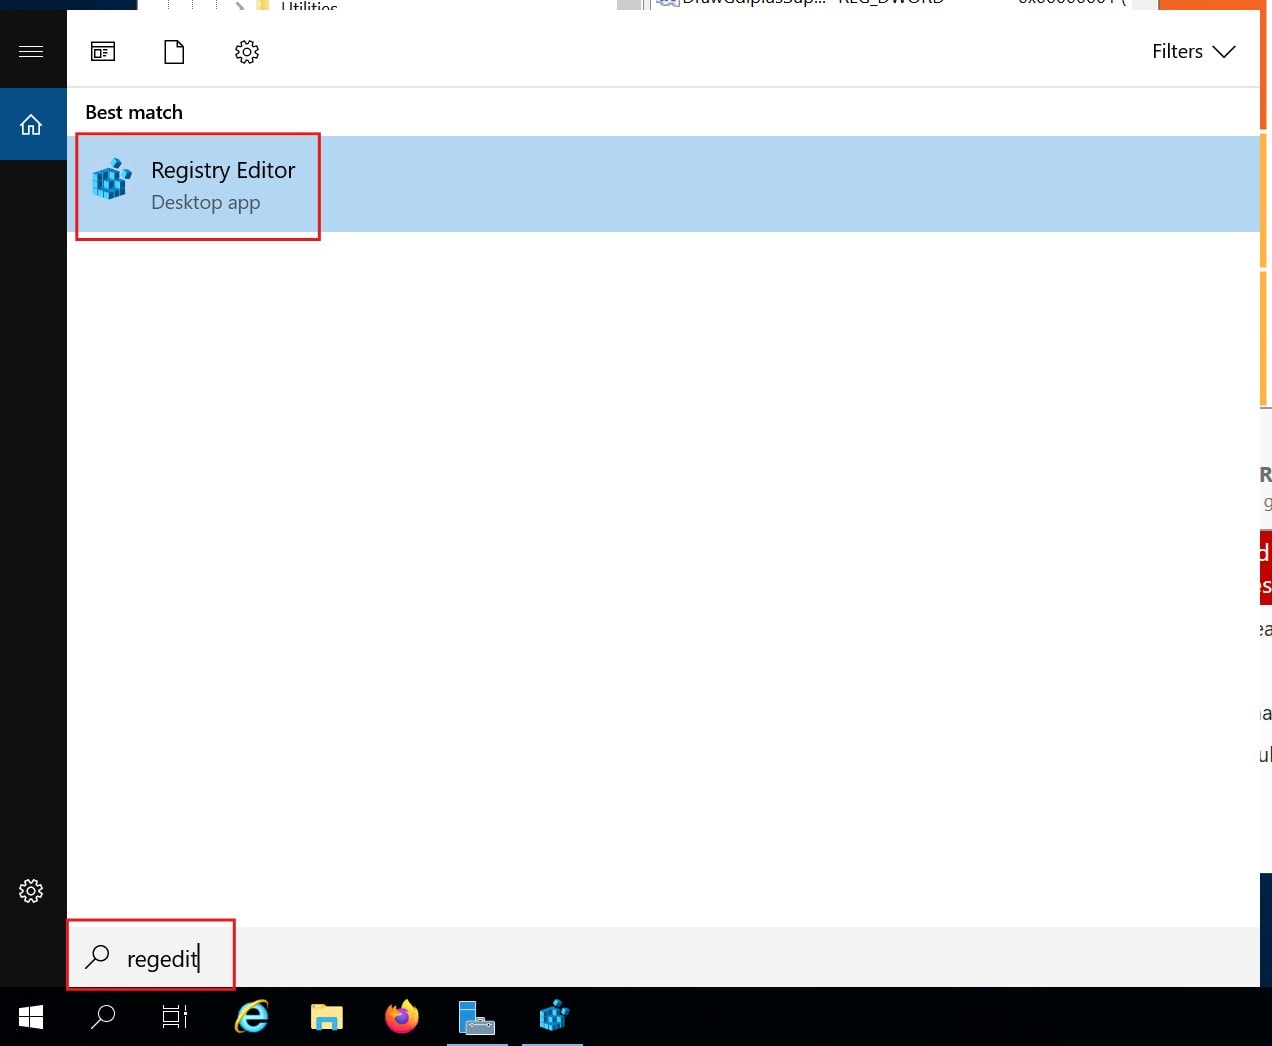
Opening Registry Editor - Use the folder hierarchy in the left-hand sidebar to navigate to the exact location where RDP configuration settings are stored.
- You can expand the folders manually by following the path below, or copy and paste it directly into the address bar at the very top of the window.
- HKEY_LOCAL_MACHINE\System\CurrentControlSet\Control\Terminal Server\WinStations\RDP-Tcp
- You can expand the folders manually by following the path below, or copy and paste it directly into the address bar at the very top of the window.
- Once you have selected the RDP-Tcp folder in the left sidebar, scroll down through the alphabetical list of files in the right-hand pane until you find a registry key named PortNumber.
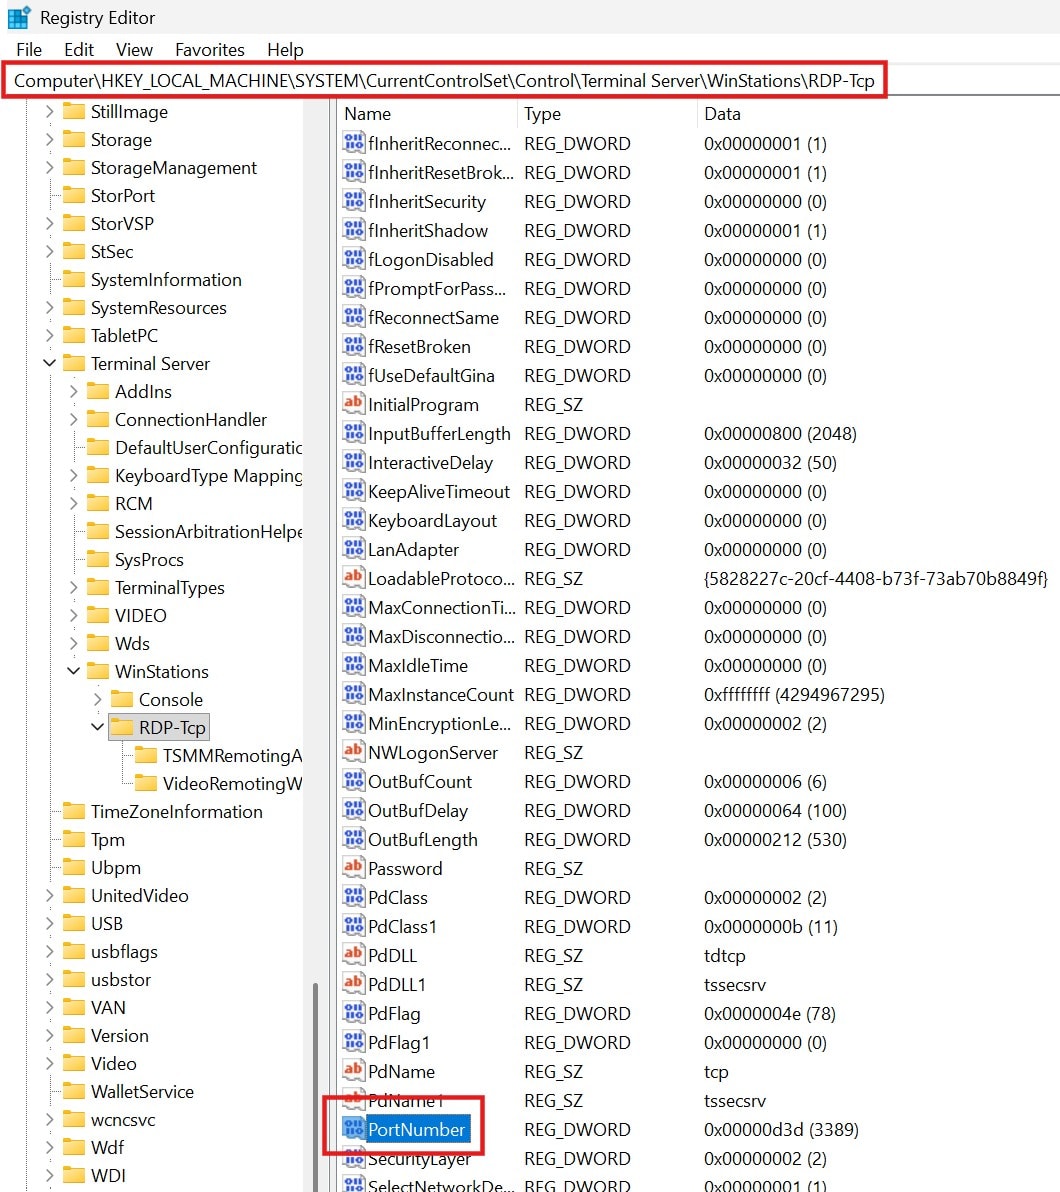
Registry Entry for RDP Port Number - Double-click on PortNumber to open its edit window.
- By default, the window will show the value in a Hexadecimal format (which looks like 00000D3D). To make this readable, look at the Base section on the right side of the pop-up box and select the radio button for Decimal. The value data box will instantly change to show the standard 3389.
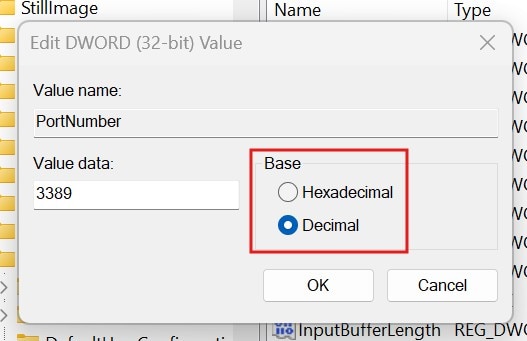
Editing the Entry Values - Delete 3389 and type your new, custom port number into the Value data field. For this guide, we will use 45000 as our example. Ensure your number falls within the safe range of 1024 to 65535.
- To avoid a port conflict with other server software, check this Wikipedia list of port assignments to ensure your chosen port is available.
- Click OK to save the changes and close the Registry Editor.
Part B: Configure the Windows Defender Firewall
Even though the registry has been updated, the built-in Windows Firewall is still trained to block any incoming traffic that isn’t explicitly whitelisted. If you don’t build a new rule, you will immediately lock yourself out of the computer.
- Click on your Start Menu, type wf.msc, and press Enter. This opens the Windows Defender Firewall with Advanced Security management console.
- Look at the left-hand sidebar menu and click once on Inbound Rules.
- On the far right-hand sidebar (the Actions pane), click on New Rule….
- The New Inbound Rule Wizard will launch. On the first screen, select the Port radio button and click Next.
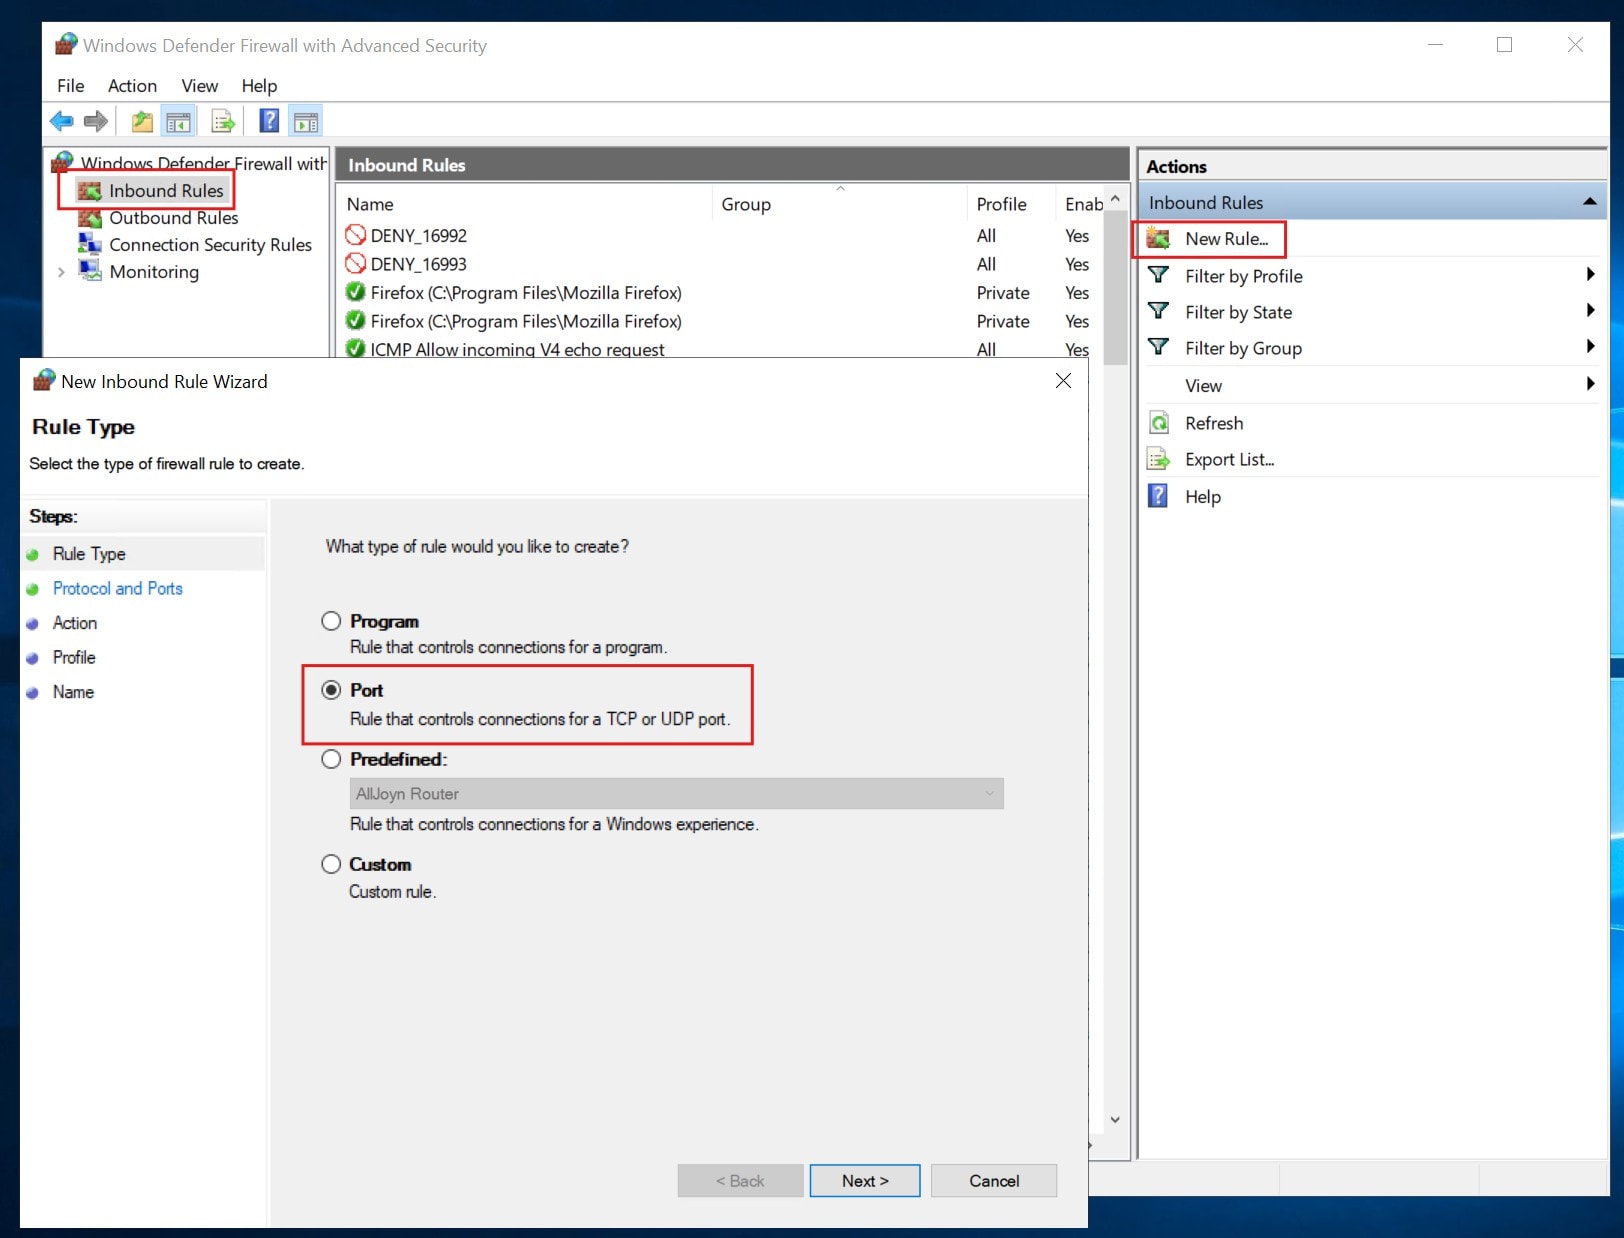
Creating New Firewall Rule - On the Protocols and Ports screen, select TCP. Directly below that, select Specific local ports and type your custom port number (In this example we’re using 45000) into the text box. Click Next.
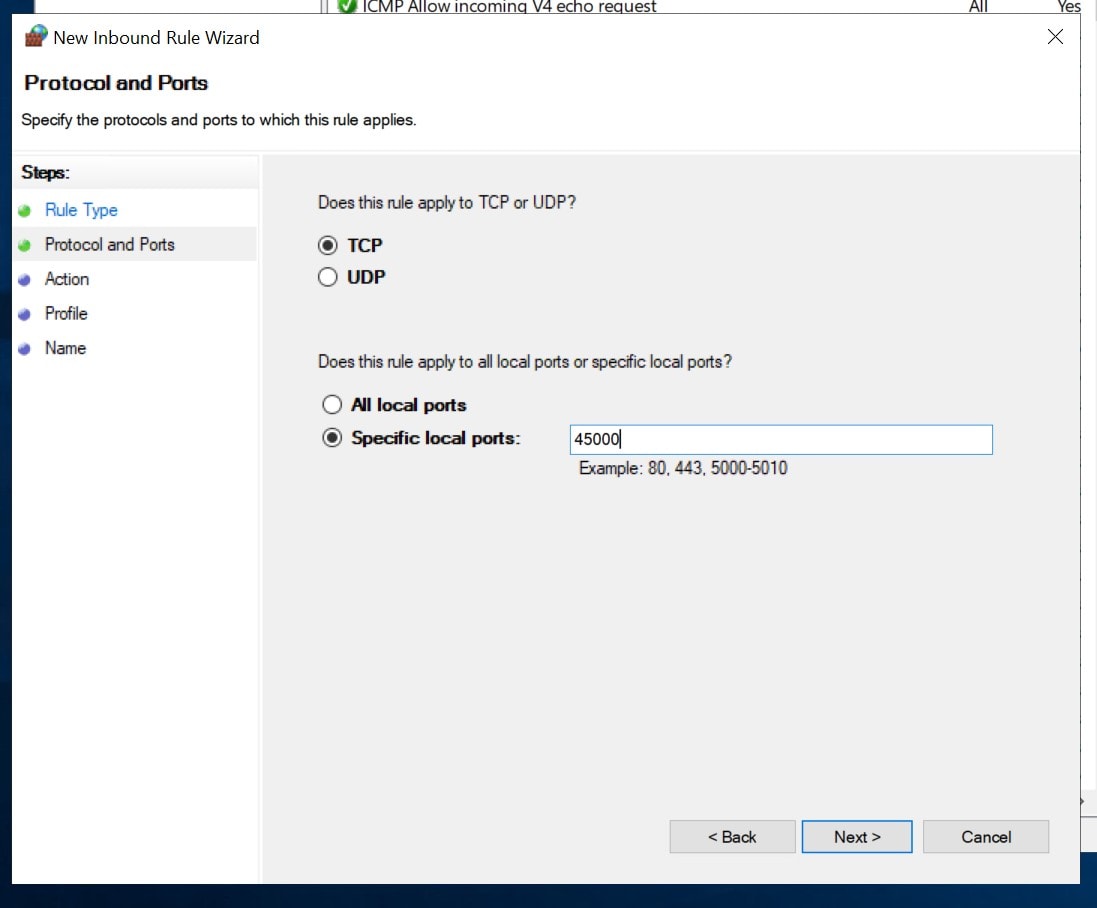
Protocol and Port Number Entry - On the Action screen, choose Allow the connection and click Next.
- On the Profile screen, keep the Domain, Private, and Public checkboxes selected to ensure your new firewall rule works across all network profiles. Click Next.
- Give the rule a clear, recognizable name so you can find it later (In this example I’ve used New RDP Port – 45000). You can leave the description blank. Click Finish.
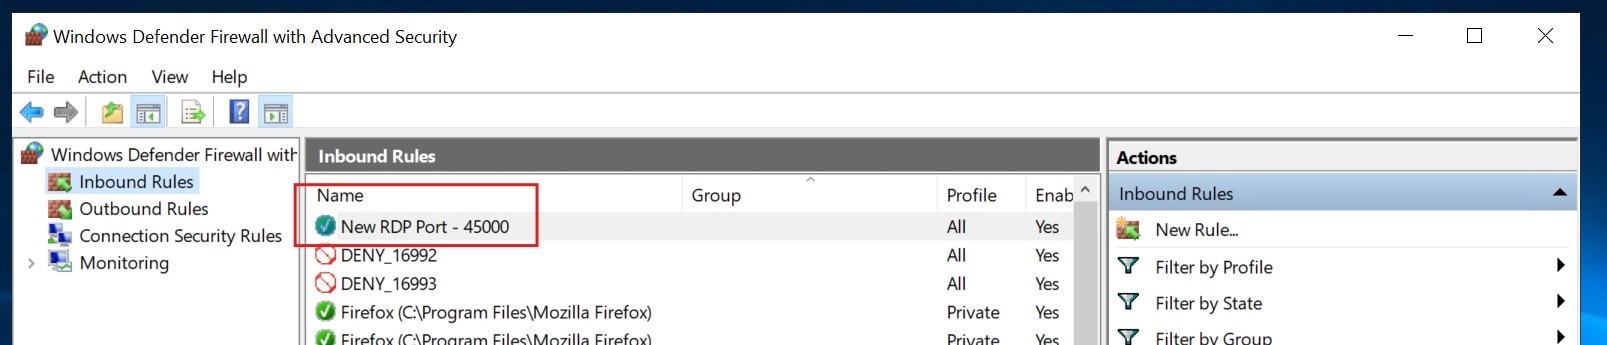
New Firewall Rule Enabled
Part C: Restart the Remote Desktop Service via Services.msc
Your registry is modified and your firewall is open, but the actual Remote Desktop background engine is still running on the old port. To force it to read your new settings, you must restart the background service using the Windows Services manager.
- Press the Windows Key + R on your keyboard to open the Run dialog box or use the taskbar search box.
- Type services.msc into the text field and press Enter.
- A window will open listing every background service installed on your computer. Scroll down through the alphabetical list until you find the service named Remote Desktop Services.
- Right-click on Remote Desktop Services and select Restart from the context menu.
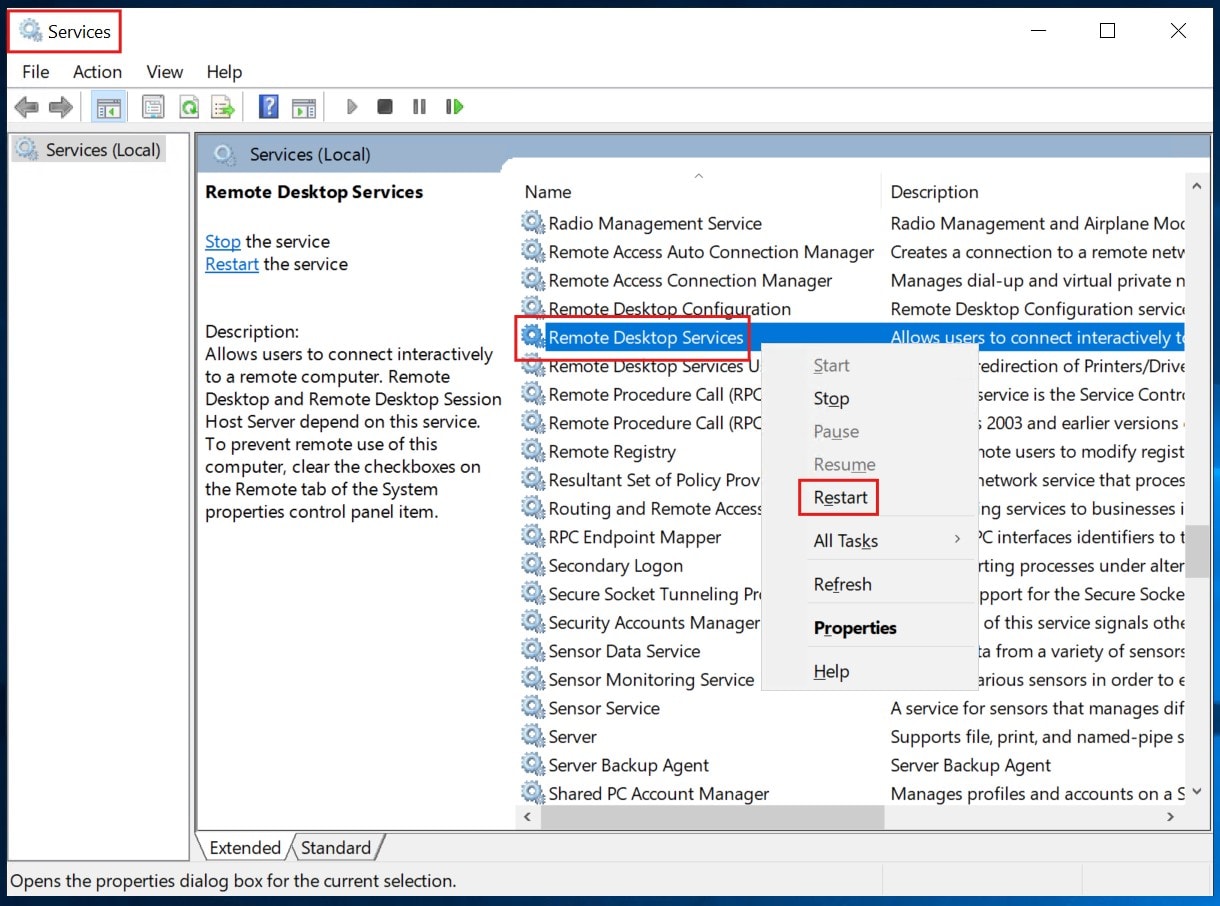
Restarting the RDP Service - A pop-up window named “Restart Other Services” will appear. Windows is warning you that restarting this engine will also temporarily shut down dependent features, such as the Remote Desktop Services UserMode Port Redirector. Click Yes to confirm and proceed.
- Note that if you are connected via RDP at that moment, you will lose connectivity.
- A small progress bar will appear for a few seconds as Windows shuts down and restarts the service. Once the progress bar disappears, close the Services window.
Part D: Verifying Changes & Logging into the OS via RDP
Now that your host machine has dropped Port 3389 in favor of a custom port, attempting to connect using just the computer’s name or local IP address will fail. The client software will try to reach out on 3389, hit that closed door, and time out. To successfully establish a remote desktop connection, you must explicitly instruct the client application to look at your newly assigned port which we’ve created, 45000.
- Press the Windows Key or the search field in the taskbar, type Remote Desktop Connection, and open the built-in app.
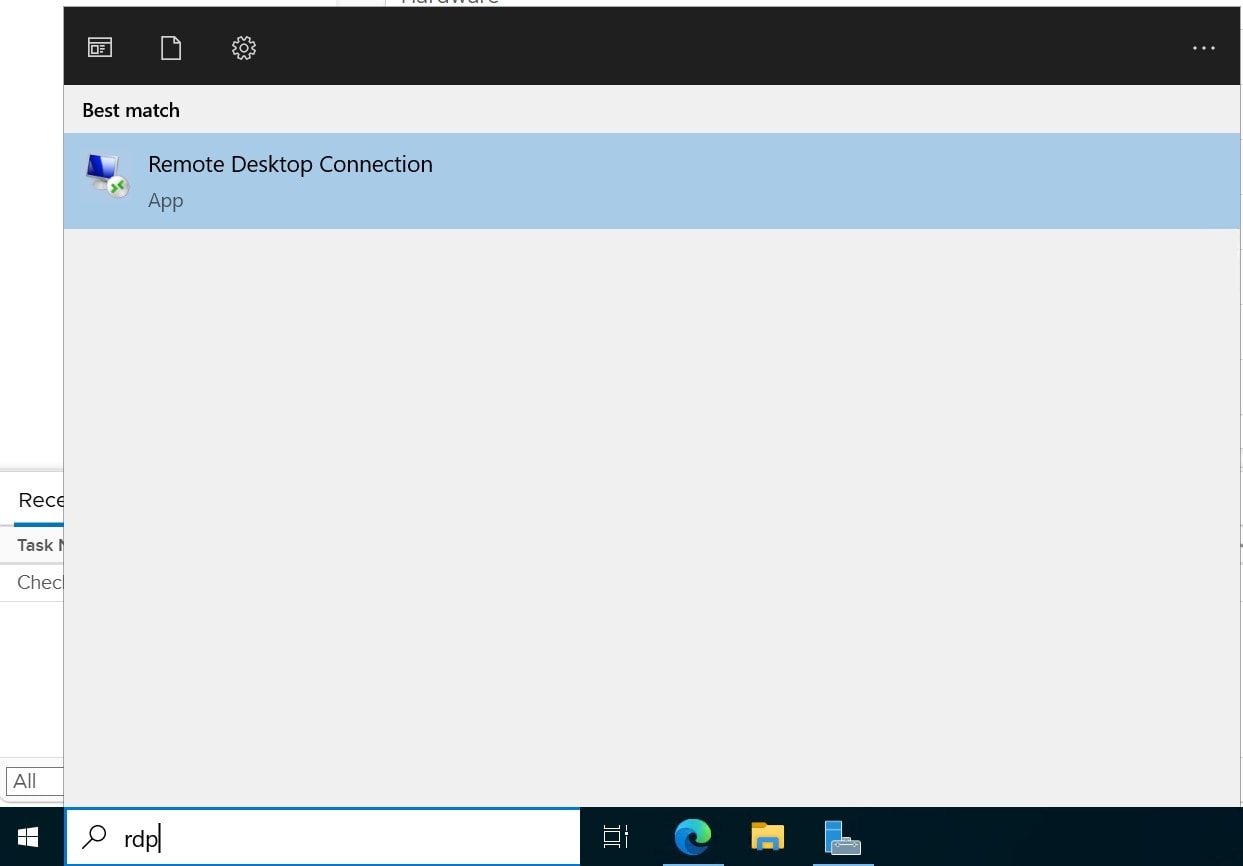
Remote Desktop Connection Software - In the Remote Desktop app’s Computer field, type the host’s IP or name followed by a colon and the port.
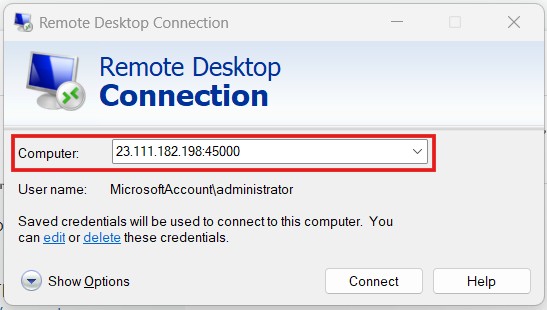
Connecting to the Server via the New RDP Port - Once your string is typed correctly, click the Connect button at the bottom of the window.
- The security system will prompt you for credentials. Input the administrative username and password belonging to the host computer you are connecting to.
- Windows may display a warning stating that it cannot authenticate the remote computer’s security certificate. This is completely standard for local connections. Check the box for “Don’t ask me again for connections to this computer” and click Yes.
- You will now login to the environment via RDP and will be able to begin working.
— Written by Pascal Suissa
