Introduction
There comes a point in every system administrator’s life when a server becomes completely unresponsive. Whether a broken firewall configuration has locked you out of SSH, a corrupted kernel update is causing a boot loop, or a filesystem error has mounted your drive as read-only, standard troubleshooting methods won’t work.
When your primary operating system fails to boot or accept connections, you need Rescue Mode. Rescue mode is a diagnostic environment that runs entirely in your server’s volatile memory (RAM), independent of your primary hard drives. In this guide, we will use SystemRescue (formerly known as SystemRescueCd), a powerful, Linux-based rescue toolkit designed specifically for repairing damaged systems.
Why SystemRescue?
Available at system-rescue.org, SystemRescue is an industry-standard, lightweight live Linux distribution. Because it boots entirely from network storage or a virtual drive, it leaves your physical data untouched, allowing you to:
- Fix Broken Configurations: Mount your server’s primary storage to repair bad SSH configs, modify
/etc/fstab, or fix firewall rules. - Reset Root Passwords: Safely change lost admin credentials via a
chrootenvironment. - Repair Filesystems & Bootloaders: Run diagnostic utilities like
fsckor reinstall GRUB. - Data Recovery: Back up critical data to a remote server before performing a clean OS reinstallation.
Rescue Environment – VPS/V
- Login to the myV Customer Portal and navigate to the required VPS/VDS.
- Press on the Custom ISOs tab on the left-side menu.
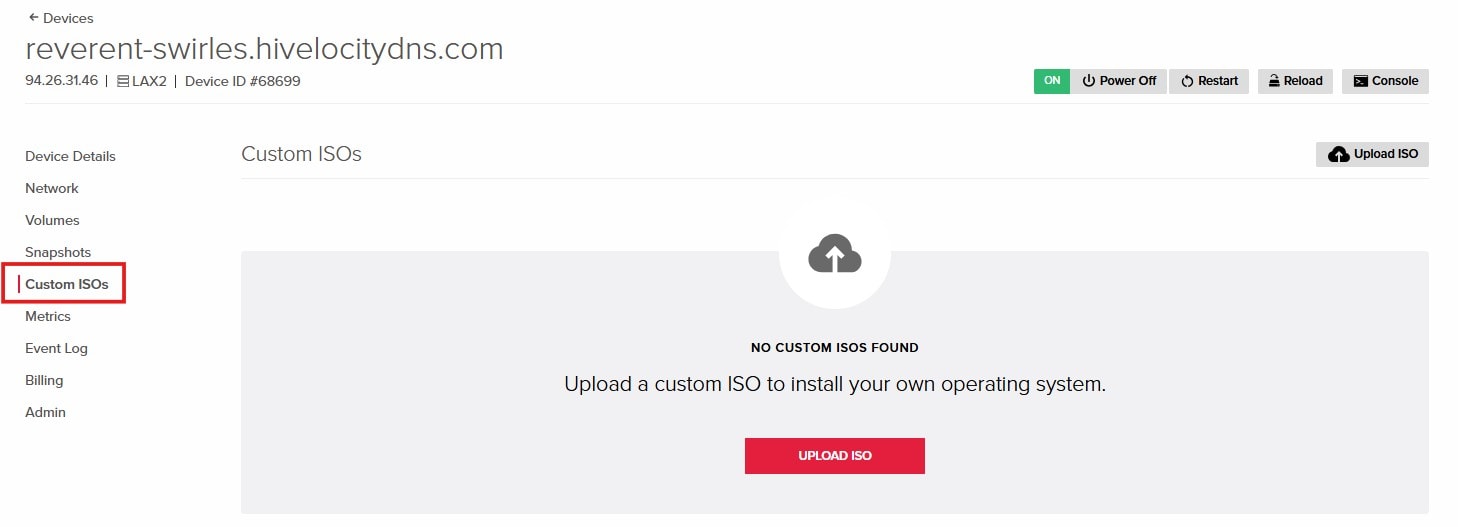
VPS/VDS Custom ISOs - Press the Upload ISO button.
- Navigate to https://www.system-rescue.org/Download/ and copy the link from the “fastly” provider into the URL field.
- It is critical to remove the “s” from the “https” portion of the URL that you are pasting
- It is critical to remove the “s” from the “https” portion of the URL that you are pasting
- Provide a name and description to the upload.
- Check the Bootable button to ensure the unit boots into the ISO upon reboot.
- Press the Upload button.
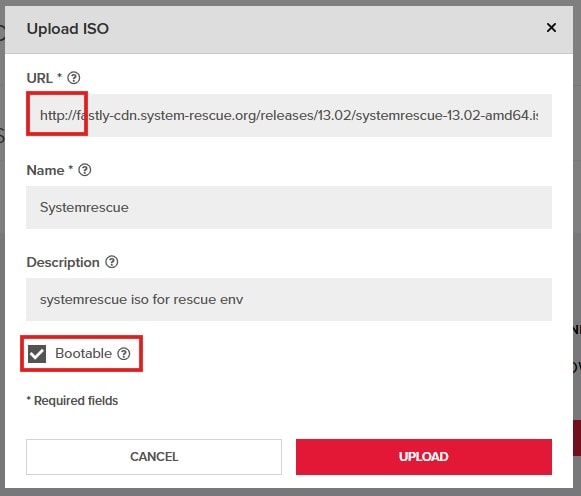
Uploading a Custom ISO - Once the upload is complete, press the Attach button and confirm the request in the next prompt.

Attaching the ISO - You will notice the CD icon at the top of the device page, indicating an ISO is attached. Proceed to reboot the OS from within the console or pressing the Restart button.

Rebooting into the Rescue Environment - Press the Console button to pull up the remote view of your VPS.
- Allow the ISO to complete boot and you will be dropped into the shell within your rescue environment. There you will be able to run commands and work in your filesystem/OS as needed.
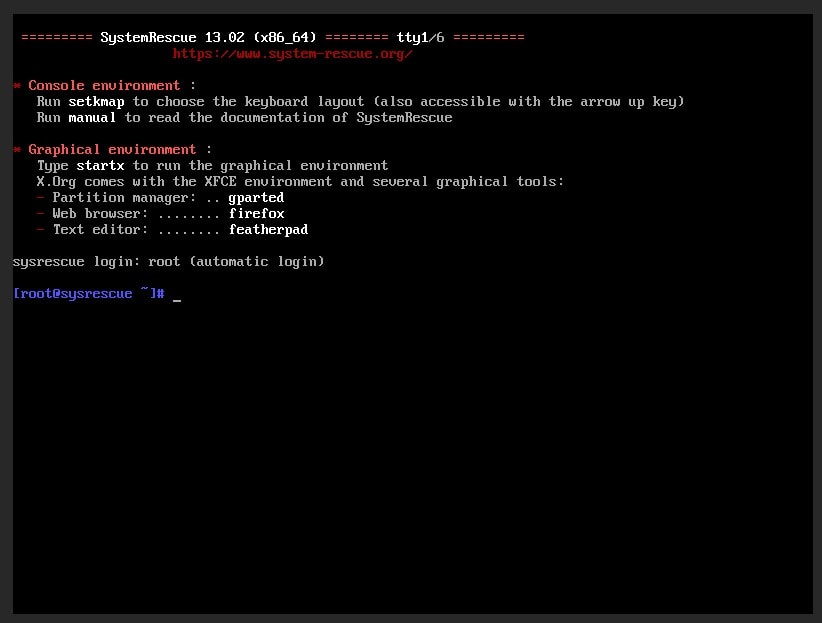
SystemRescue Shell - To remove the ISO and return to your OS, press the Detach button within the Custom ISOs page followed by rebooting the VPS.
Rescue Environment – Dedicated Server
The most reliable way to launch a rescue environment on a dedicated server is to let our Support team handle it for you. Available 24/7/365, our team can quickly mount the SystemRescue ISO directly to your bare-metal hardware. You can easily request this at any time by connecting with a technical agent via our website live chat or by opening a formal ticket through the MyV Support Section in your customer portal.
If you prefer a hands-on approach and have out-of-band management access, some hardware configurations allow you to mount the ISO yourself. Depending on your specific motherboard model, you can log into the server’s IPMI, iDRAC, or iLO interface, launch the built-in HTML5 or Java-based remote console, and use the Virtual Media feature to map the SystemRescue file directly from your local computer before rebooting. However, because these hardware interfaces vary heavily by board model, reaching out through the MyV Support Section remains the fastest and most foolproof way to get your server back online.
