A Cron job is a time-based job scheduler in Unix-like operating systems. It allows users to schedule tasks (commands or shell scripts) to run automatically at specific intervals, whether that’s every minute, every week, or once a month.
Common Use Cases Include:
- Backups: Automatically backing up a database every night.
- Maintenance: Clearing out temporary files or caches.
- Notifications: Sending out daily email newsletters or system alerts.
- System Updates: Triggering API syncs for platforms like Drupal, WordPress, or WHMCS.
How a Cron Job Works
A standard Cron configuration consists of three main elements:
- The Schedule: A series of five stars or numbers that define the execution frequency.
- The Command: The path to the script or the specific command you want to run.
- The Output: What happens after execution. This could be a modified database, a generated log file, or an automated email.
The crond service is running in the background and checking your schedule every minute. If the current time matches your defined stars, the daemon triggers the command automatically. Because it runs in a restricted environment, using absolute file paths is essential to ensure the daemon can locate your scripts and tools correctly.
A Cron job’s Structure
The cron job schedule defines when and how often the task should run, using a special format of minute, hour, day of month, month, day of week, and optional year. The command defines what action should be performed by the task, such as executing a script or sending an email. For example, a cronjob that runs every Monday at 10:00 am and prints “Hello World” to the standard output would look like this:
0 10 * * 1 echo "Hello World"
The general structure of each section of the above line can be found in the table below.
| * | * | * | * | * | Command |
| Minute (0-59) | Hour (0-23) | Day of the month (1-31) |
Month of the year (1-12) |
Day of the week (0-6) | Command to be executed |
Using Linux Command Line to Manage Cron Jobs
The Hivelocity Knowledge base contains an updated article with further details on how to manage cron jobs in your OS.
Cron Job Management
By scheduling tasks like database backups, system updates, and report generation to run at precise intervals, it ensures backend operations remain consistent and reliable. As systems scale, effective management becomes less about the schedule itself and more about visibility and error handling, ensuring that when a background process fails it doesn’t go unnoticed.
Managing UPCP/Backup Jobs within WHM
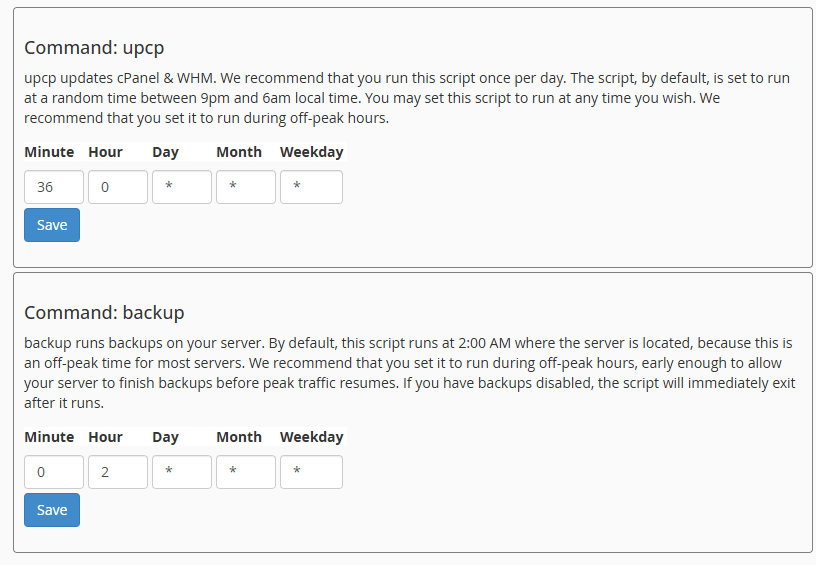
upcp updates cPanel & WHM. We recommend that you run this script once per day. The script, by default, is set to run at a random time between 9pm and 6am local time. You may set this script to run at any time you wish. We recommend that you set it to run during off-peak hours.
backup runs backups on your server. By default, this script runs at 2:00 AM where the server is located, because this is an off-peak time for most servers. We recommend that you set it to run during off-peak hours, early enough to allow your server to finish backups before peak traffic resumes. If you have backups disabled, the script will immediately exit after it runs.
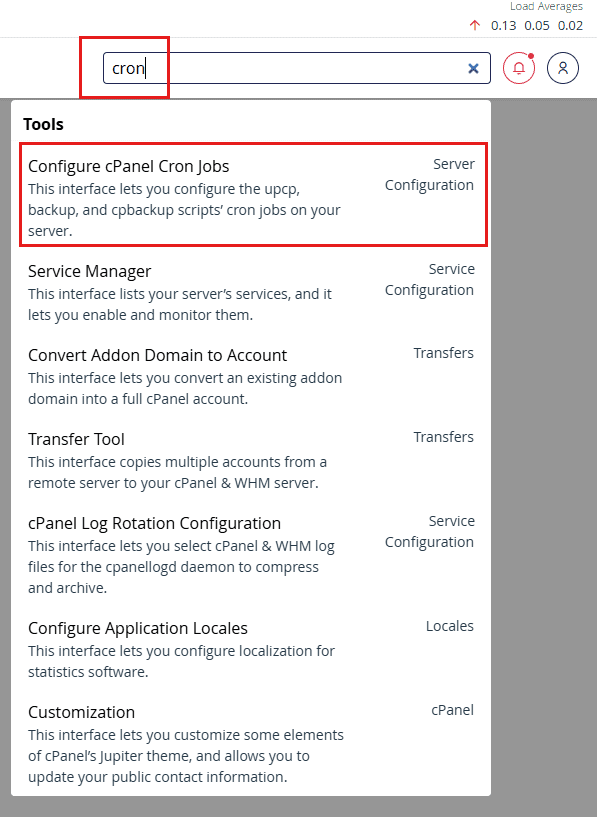
- To control and change the time of these you will need to search for “cron” in WHM search bar and proceed navigating to “Configure cPanel Cron Jobs” page.
Navigating to Cron Management in WHM - Make the required changes as necessary in the entries below. Leaving them as found below is also acceptable as it is set to a timeframe that assumes low traffic.
upcp/backup Management
Managing Cron Jobs within cPanel Accounts
Cron Job Management in cPanel simplifies server automation by providing a user-friendly interface to schedule repetitive scripts without touching the command line. cPanel allows you to set precise intervals and receive email notifications upon execution. Effective management here is key to maintaining site performance and ensuring that background tasks don’t overlap or exhaust your account’s resources.
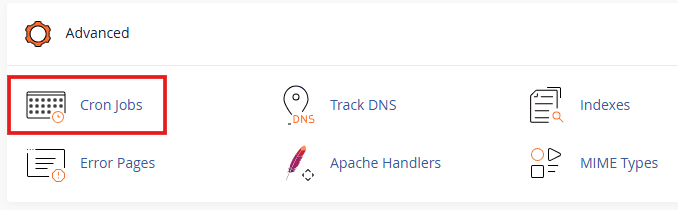
- Navigate to the cPanel account you wish to work on and locate the “Cron Jobs” button.
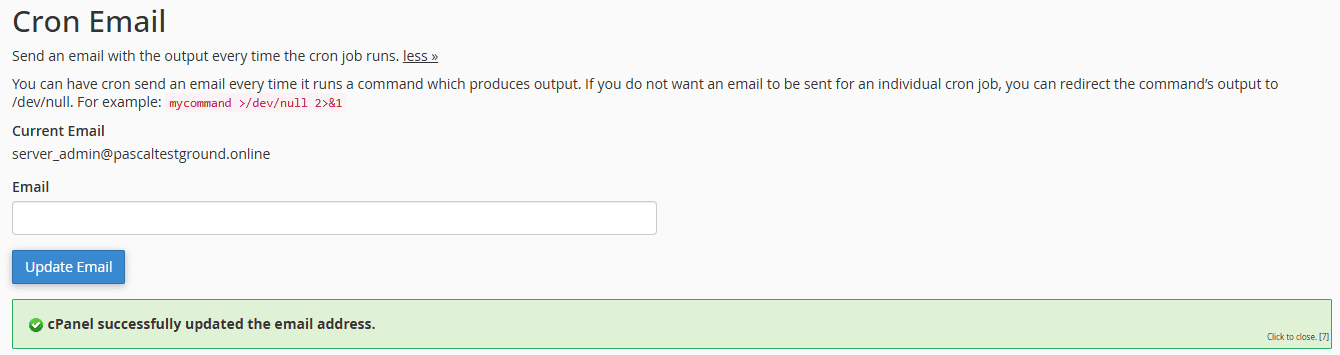
cPanel Cron Jobs - Add/edit the email address you’d like the cron jobs to report to. You can have cron send an email every time it runs a command which produces output.
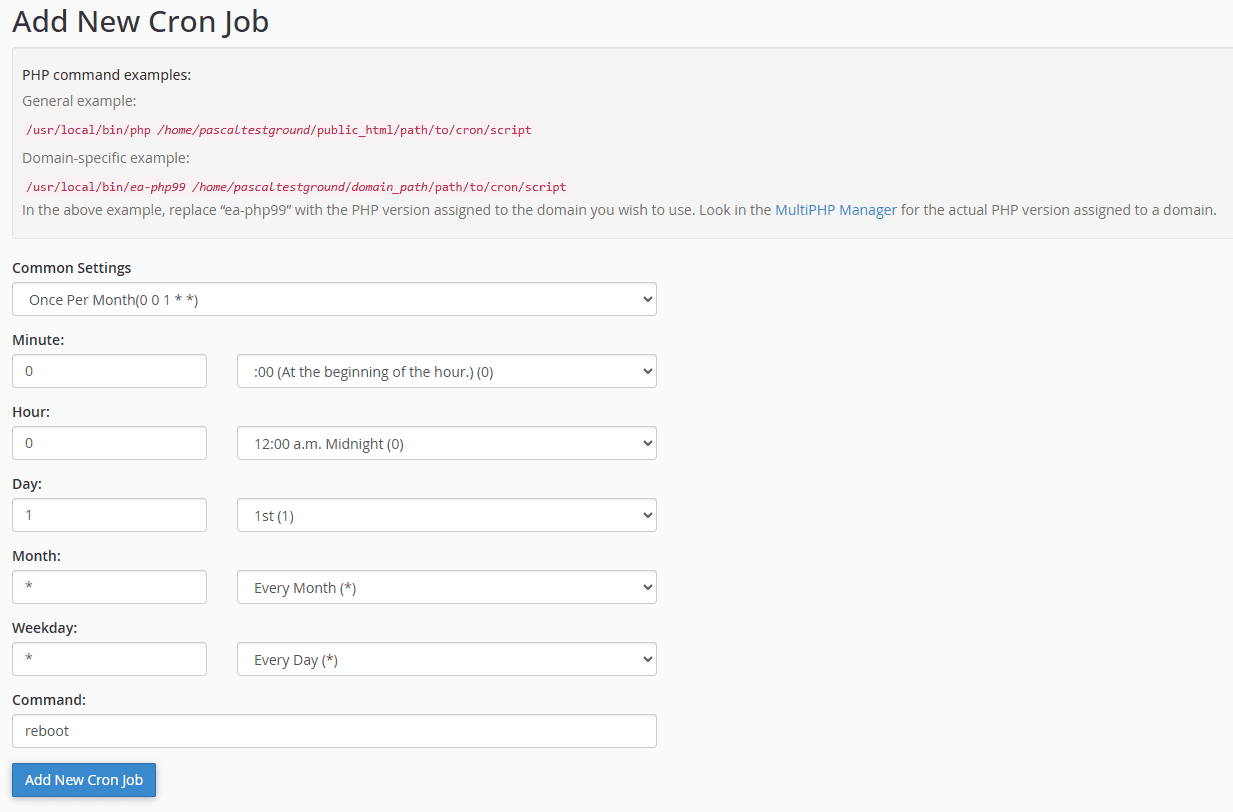
Cron Email Notification - Creating a new job is simple by selecting a common setting from the dropdown menu or customizing it to your needs by editing the time fields. Below is an example of such task to reboot the server while using the “Once Per Month” common setting.
Adding a New Cron Job - Viewing existing cron jobs for the specific account can be done at the last section of the page under “Current Cron Jobs”.

Current Cron Jobs
Using Plesk to Set a Cron Job
to add a cron job using Plesk, just follow these steps:
- First, log in to your Plesk control panel
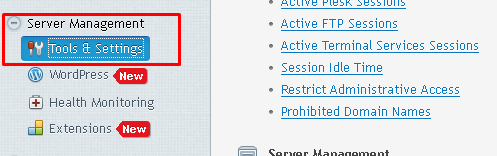
- Once you’re logged in, on the left side of the dashboard under Server Management, click the option for Tools & Settings
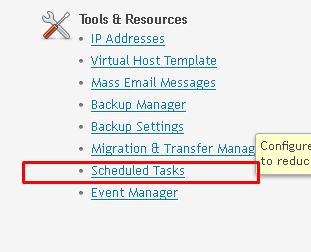
- Now, on the right side panel, under Tools & Resources, click on Scheduled Tasks
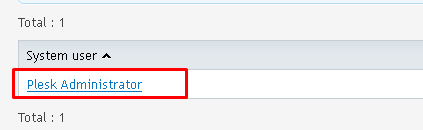
- On the next screen, click on Plesk Administrator User
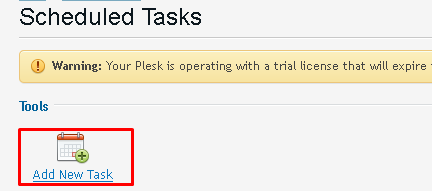
- On the Scheduled Tasks screen, under Tools, click on Add New Task
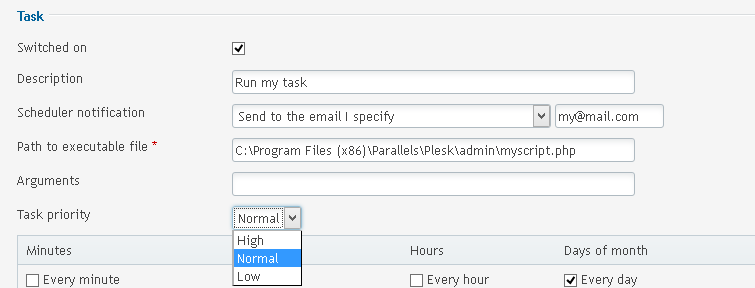
- On the following screen, provide all requested information as shown in the image below
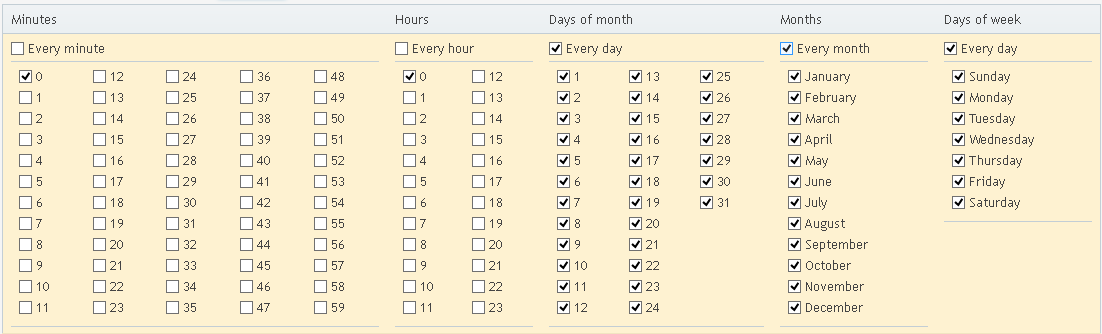
- Now, scroll down a bit and in the section beneath Task priority, you’ll see a calendar. Here, you can select the frequency with which your command runs. For this example, we’ve selected Every day, Every month, and under Days of the week we’ve also selected Every day
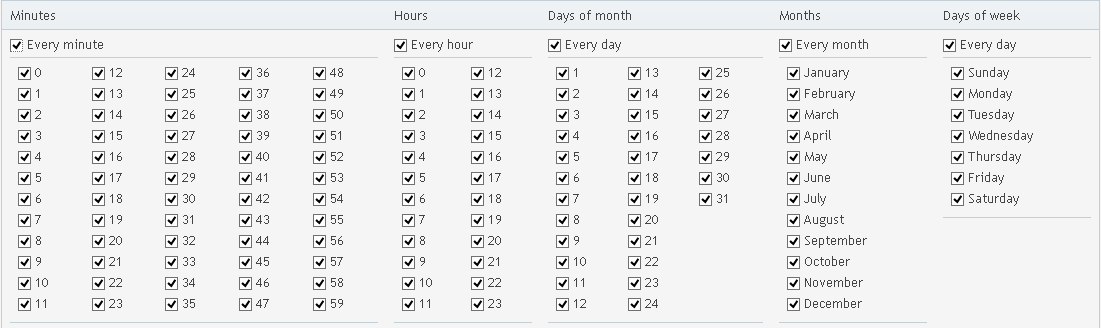
- If you want to schedule a different frequency with which your command will run, simply select the corresponding check boxes. For instance, if you wanted a scheduled task to run every minute of every hour, or every day, you’re calendar would look like this:
- Once you’ve finished scheduling your task per your requirements, simply click OK to finalize your selections.
— Written by Pascal Suissa