If you’d like to install a custom operating system on your dedicated server, you can do so by sourcing your own ISO file and booting the server from it. This gives you full flexibility to deploy the OS of your choice, whether it’s a specific Linux distribution, Windows, or another supported system. The steps below will guide you through uploading an ISO to the server’s management console and starting the installation process.
Available Methods
There are four ways you can source an ISO on your dedicated server. Ideally the best course of action is to utilize the Hivelocity team for this request.
- Request the Hivelocity Support team to upload the ISO and mount it via IPMI on your server. Once that task is complete you will be able to access the Console through the myVelocity portal on the relevant device page.
- Request the Hivelocity Support team to burn an ISO on to a flash drive and insert it to your server. The ISO source must come from an official provider.
- Utilize HTML5 using your server console and source the ISO from your local workstation (Dependent on the server board you have and firmware).
- Utilize the JAVA console to source the ISO from your local workstation (Ideally JAVA 11.0.25 is best when using this method).
Utilizing HTML5 Console and Sourcing ISO Locally
Depending on the firmware and motherboard model you have on your dedicated server, some allow for sourcing the ISO file locally via the HTML5 viewer.
- Navigate to the myVelocity portal and utilize the console to open IPMI on your server.
- Once logged in to IPMI, open the remote console using the HTML5 option.
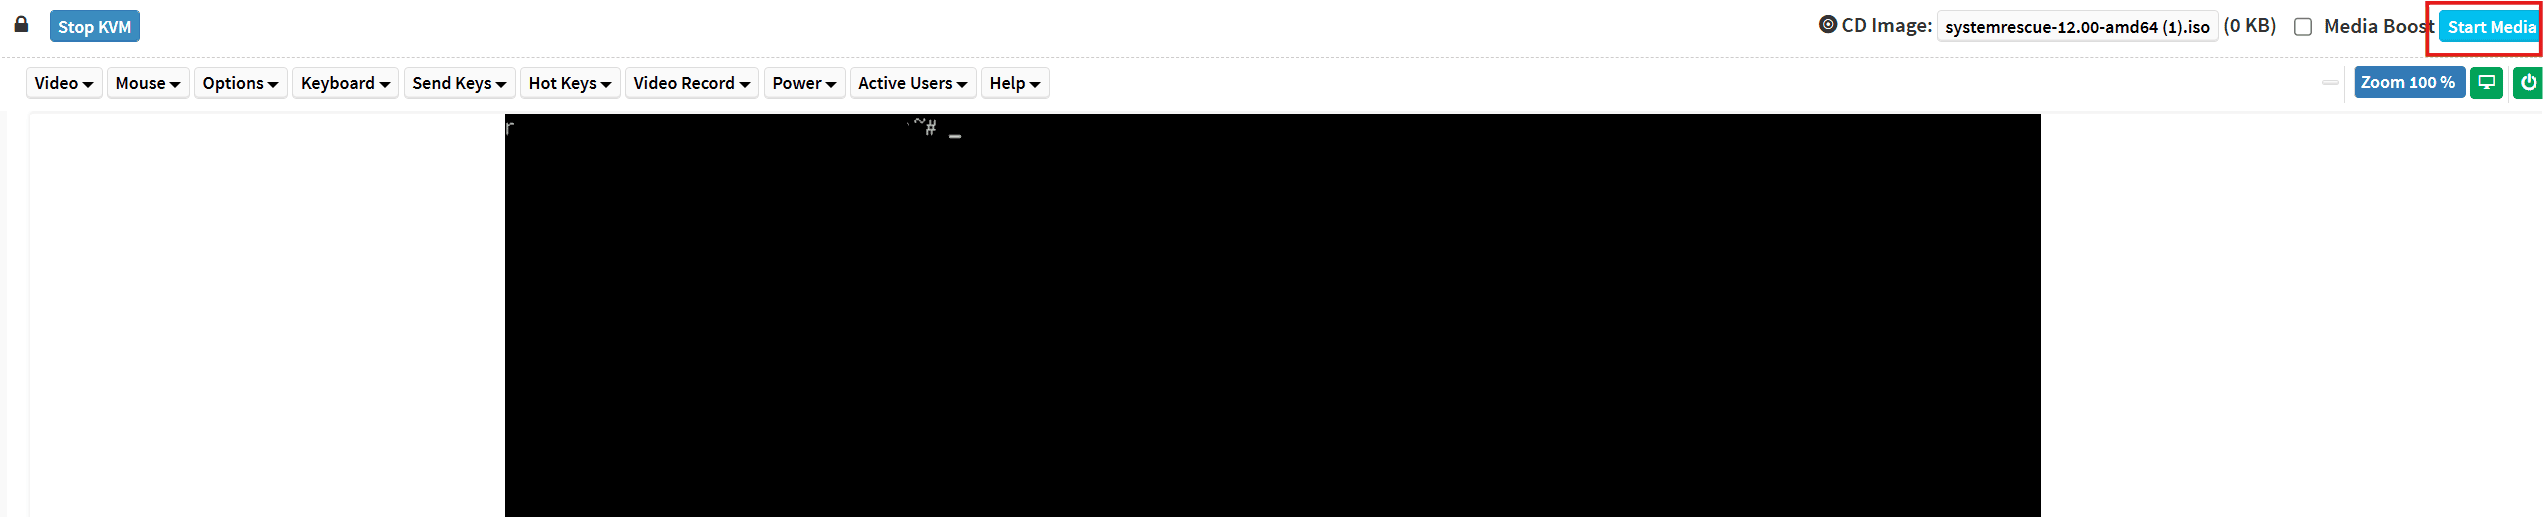
- At the top right of the page or within the tools at the top you will have the ability to source the ISO locally. Proceed to press the “Browse File” on the page to select the ISO file of choice.

HTML5 ISO Mounting - Once the file has been selected, press on “Start Media” to mount the ISO.
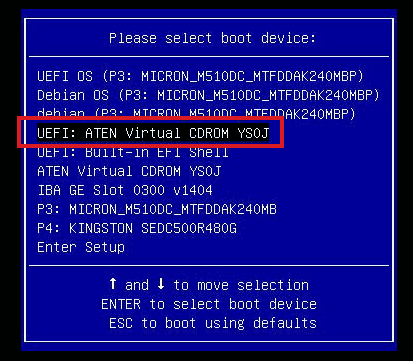
HTML5 ISO Mounting - Proceed to restart the device using the “Power” options followed by entering the required key (F11 normally) to select the ISO you’ve uploaded during the boot process. Closing the page can disrupt the process so be advised to avoid such instances.
ISO Selection
Utilizing JAVA Console and Sourcing ISO Locally
Many if not all motherboards available provide the ability to utilize the base JAVA console in order to remote control your dedicated server. These instructions will display how to process and locally source an ISO on the server.
- Navigate to the myVelocity portal and utilize the console to open IPMI on your server.
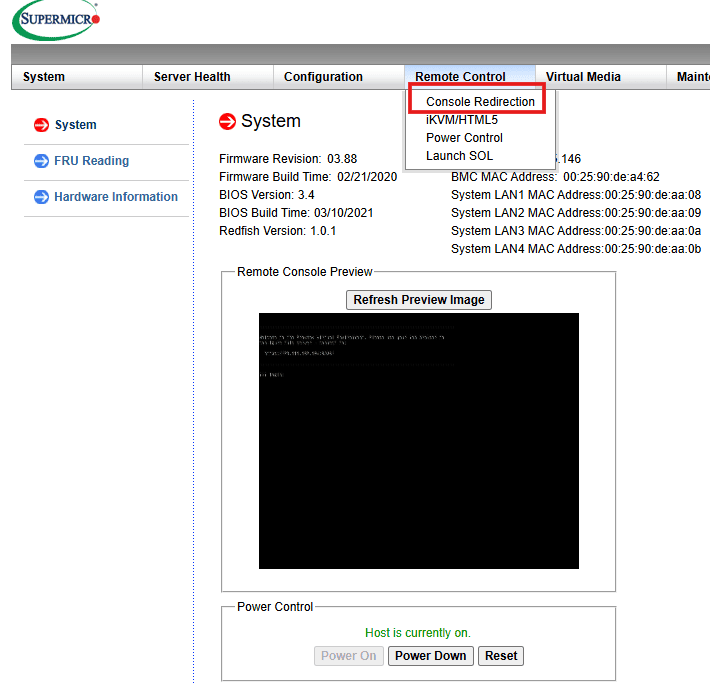
- Once logged in to IPMI, open the remote console using the JAVA option. The naming can be different and might display as “Console Redirection”.
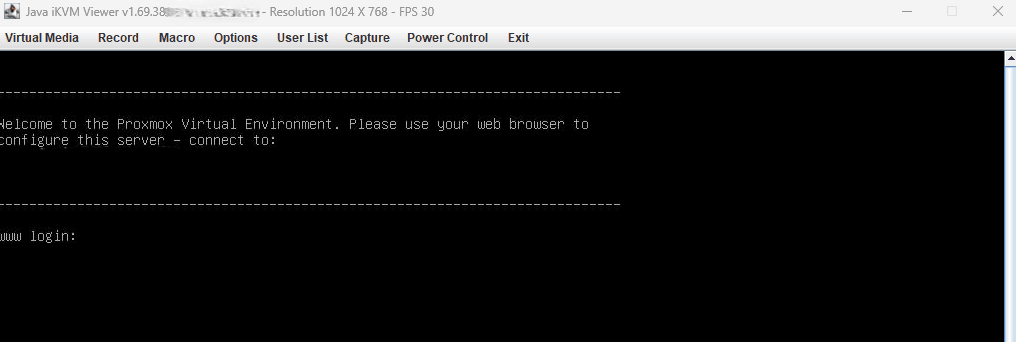
Opening the JAVA Console - Download the .jnlp file and open it on your workstation. Approve any relevant prompts to initiate the connection.
- Once the connection is made and prompts approved, the console viewer will open and display the current server status.
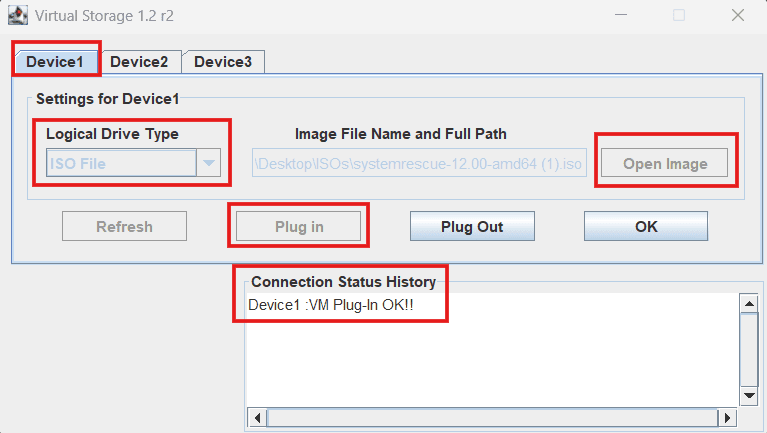
JAVA Console - Proceed to select “Virtual Media” followed by “Virtual Storage”.
- Press on the “Logical Drive Type” and change the type to “ISO file”.
- Press on “Open Image” and select the ISO file from your workstation.
- When ready, press on “Plug in” to locally source the ISO file.
- Once that is complete, the “Connection Status History” section will display whether the task was completed.
Locally Sourcing the ISO File - Press “OK” and proceed to reboot the device using the “Power Control” at the top of the console or via the “reboot” command.
- When prompted, proceed to press the F11 key during the boot process to select the ISO you’ve mounted.
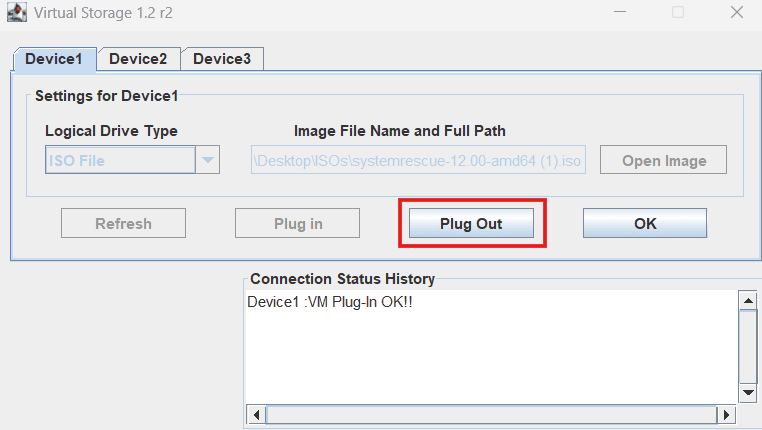
ISO Selection - Once you’re done with the ISO, proceed to open the “Virtual Media” tool and press on “Plug Out” to remove the ISO within the console.
Unmounting the ISO File Further Assistance
For any further assistance involving ISO files and your dedicated servers, do not hesitate to reach out to the Hivelocity Support team via a chat, support ticket, or phone at 888-869-4678.
— Written by Pascal Suissa