Whether you’d like to get more memory or processor power, you have the option to upgrade your existing virtual dedicated server to a more powerful instance than your current setup at any time. The upgrade can be done via the customer portal by following the steps detailed below.
Upgrading Your VDS
To upgrade your VDS, follow these 9 steps:
- Head over to Hivelocity.net and log in to the myVelocity customer portal.
- Once you’ve gone through the login process, the screen below will appear, listing all of your current devices.
- You can note which device is VDS by looking at the Type column as needed.
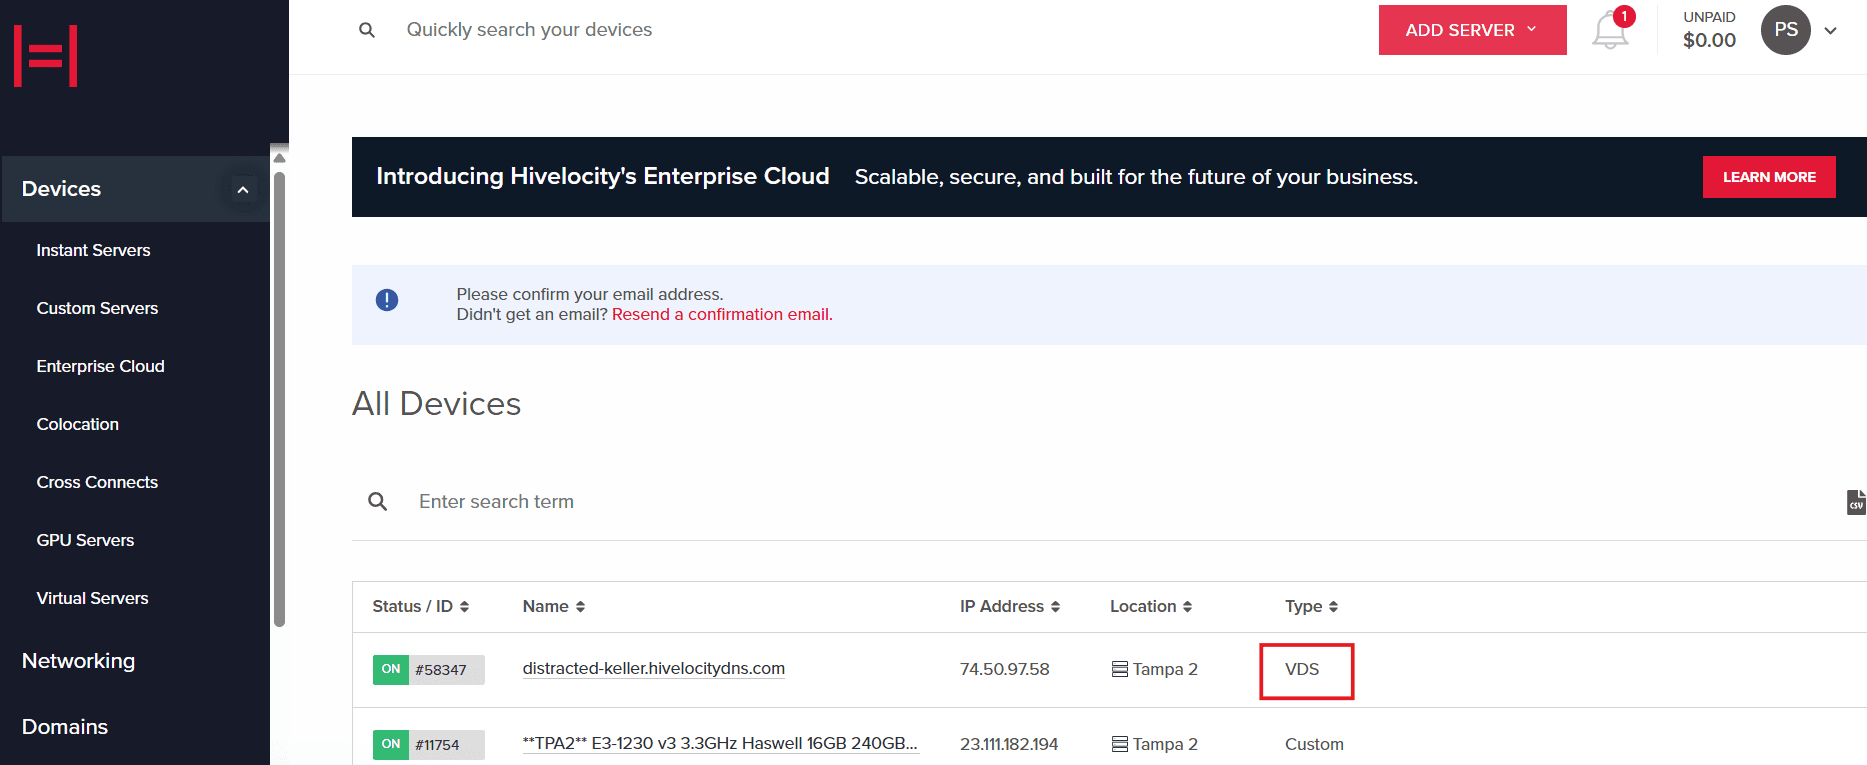
Devices tab within myVelocity
- You can note which device is VDS by looking at the Type column as needed.
- Select the device ID you wish to upgrade. For this example, we will select device 58347 from the list above.
- Before you can proceed with the upgrade, ensure that the VDS is powered off. The portal displays the status of the VDS as shown below.
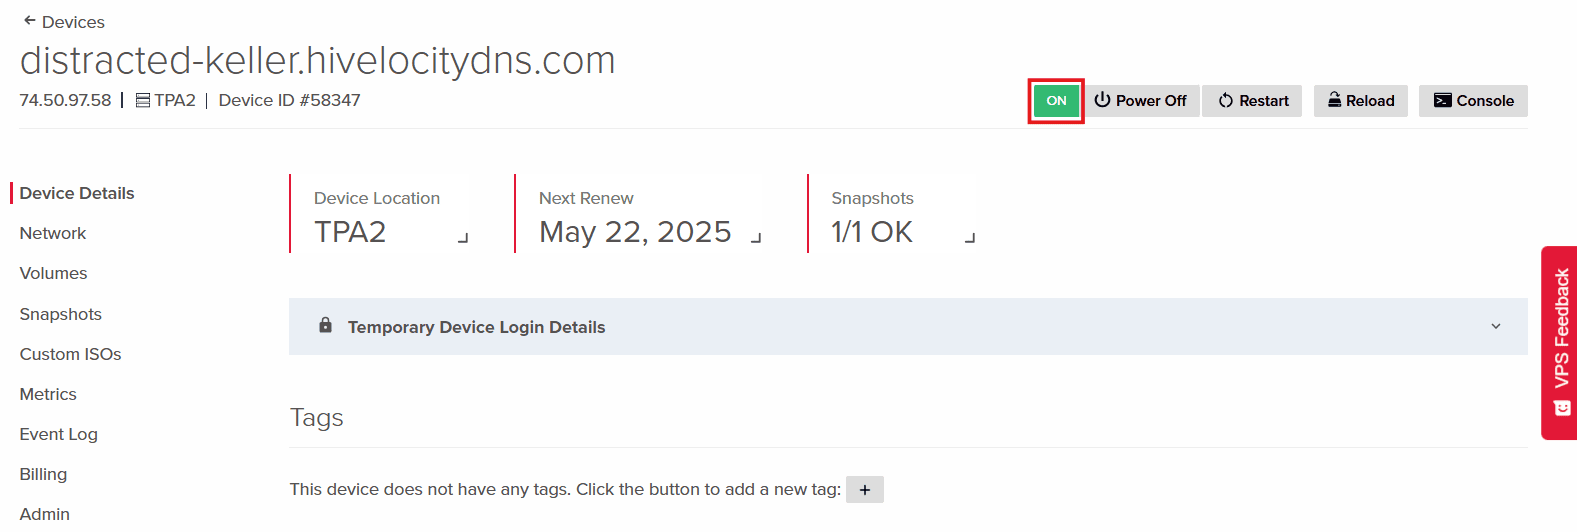
- To power down the VDS you can use the following two methods.
- First method is to press the Power Off button in the device page.
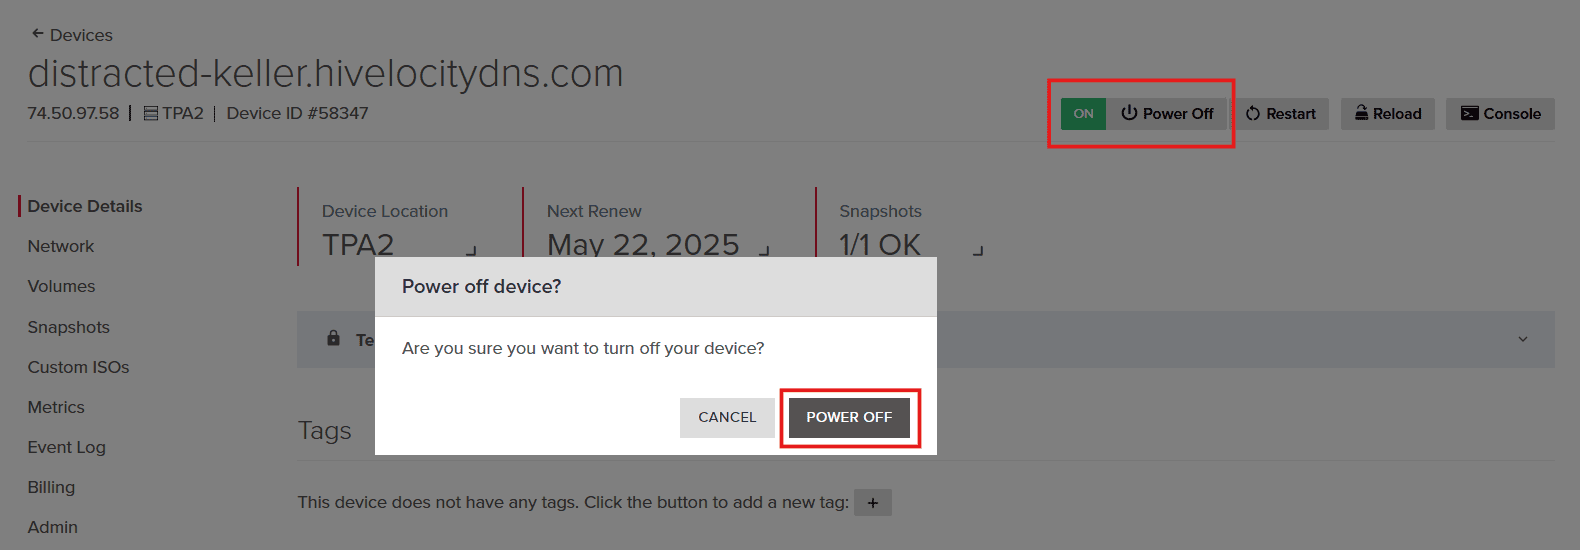
VDS Power Control - A second option is to open the Console, log in to your root account, and run the command shutdown.
- First method is to press the Power Off button in the device page.
- The power state of the VDS will change automatically on the page. Once the state is OFF, you will then be able to proceed with the upgrade.
- Click on the Upgrade VDS button, as shown below. Once the button is pressed, a new popup window will appear going over the details of the upgrade.
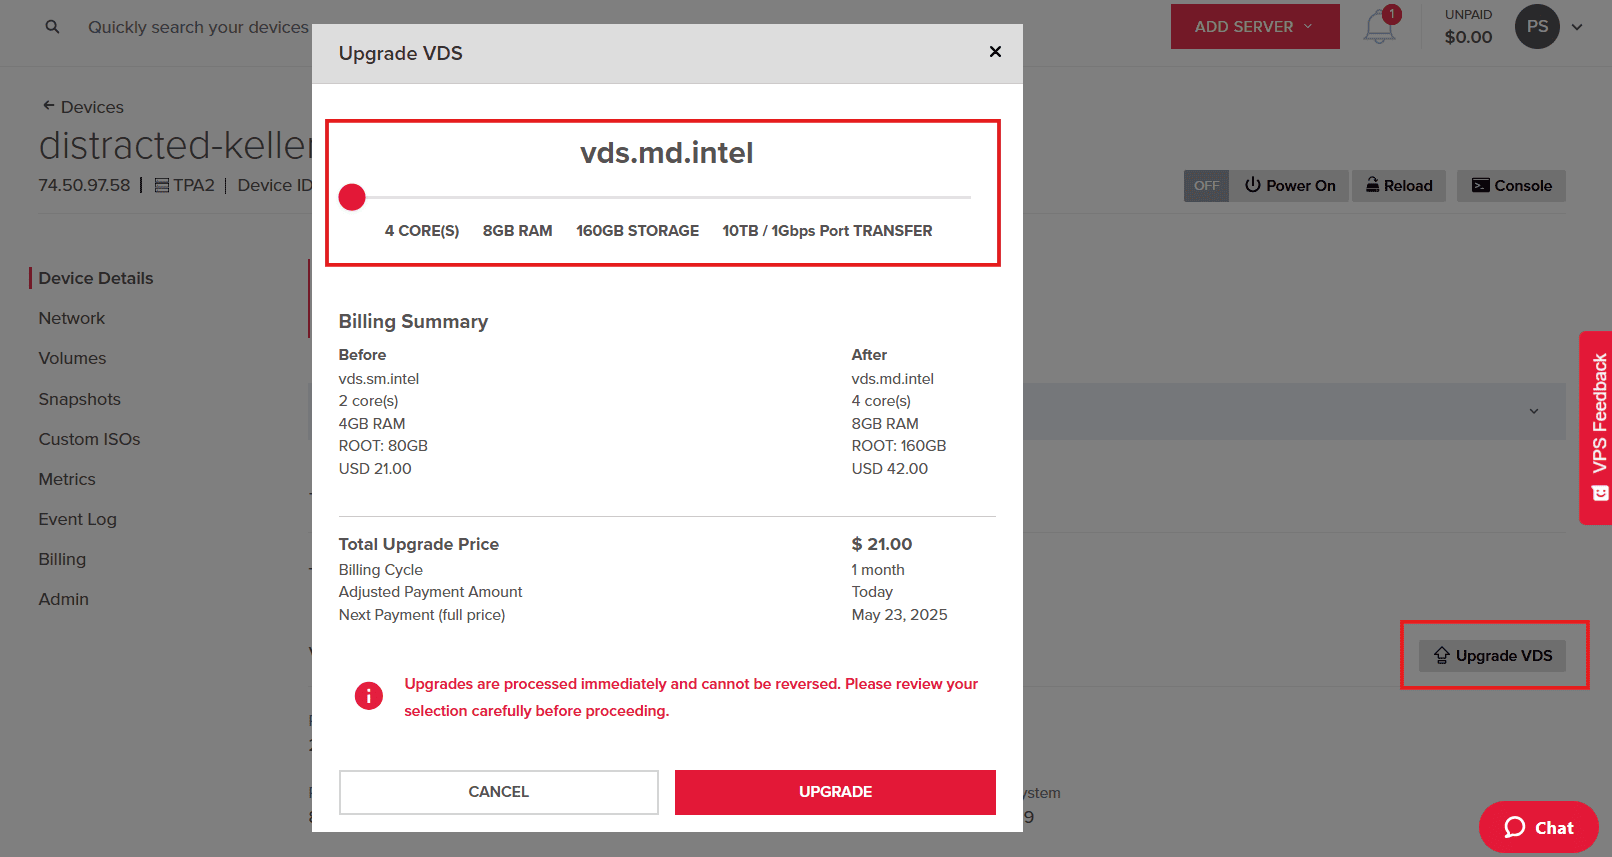
VDS Upgrade - Select the options that are relevant to the upgrade you require and proceed to upgrade the VDS.
- Once provisioning is complete, your upgraded instance will appear online in the devices list within myVelocity.
Further Assistance
For any further assistance involving the portal or devices, do not hesitate to reach out to the Hivelocity Support team via a chat, support ticket, or phone at 888-869-4678.
– by Pascal Suissa