When managing a dedicated server, direct console access can be essential for troubleshooting, configuration, or recovery tasks. The myVelocity customer portal makes this simple by providing a Virtual Console option that leverages your server’s IPMI interface. This feature allows you to interact with your server as though you were physically connected to it, even if remote SSH or RDP access is unavailable.
To ensure security, myVelocity offers two methods of access. You can either whitelist your current IP address to connect directly or use one of the provided VPN options to establish a secure connection. Both approaches give you reliable and secure access to your server’s console, ensuring you remain in control no matter the situation.
Accessing the Virtual Console of Your Dedicated Server
To Access your server’s virtual console, follow these steps:
- Proceed to login to the myVelocity customer portal using your account credentials.
- Once logged in, the screen below will appear, listing all of your current devices.
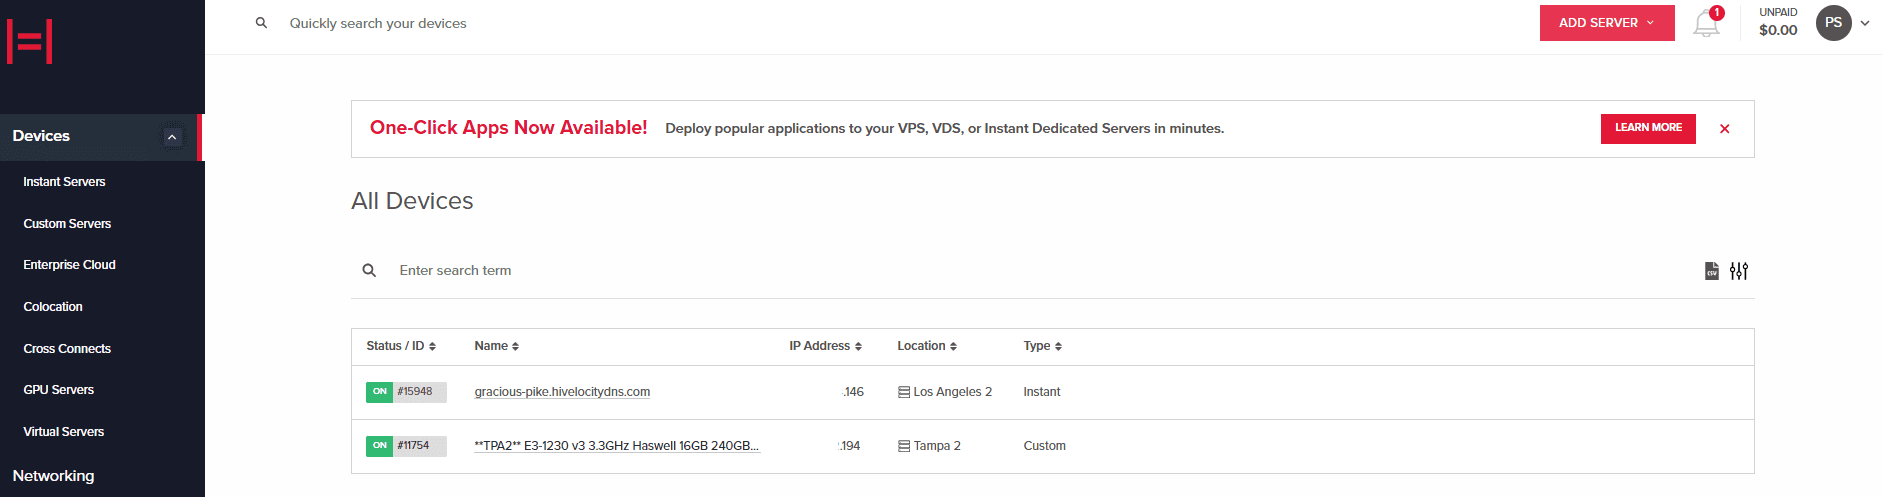
Device Page Overview - Select the device ID you wish to use the virtual console with. For this example, we will select device 15948 from the list above.
- In the next screen, you can view further information regarding your dedicated server along with the option to press the Console button.
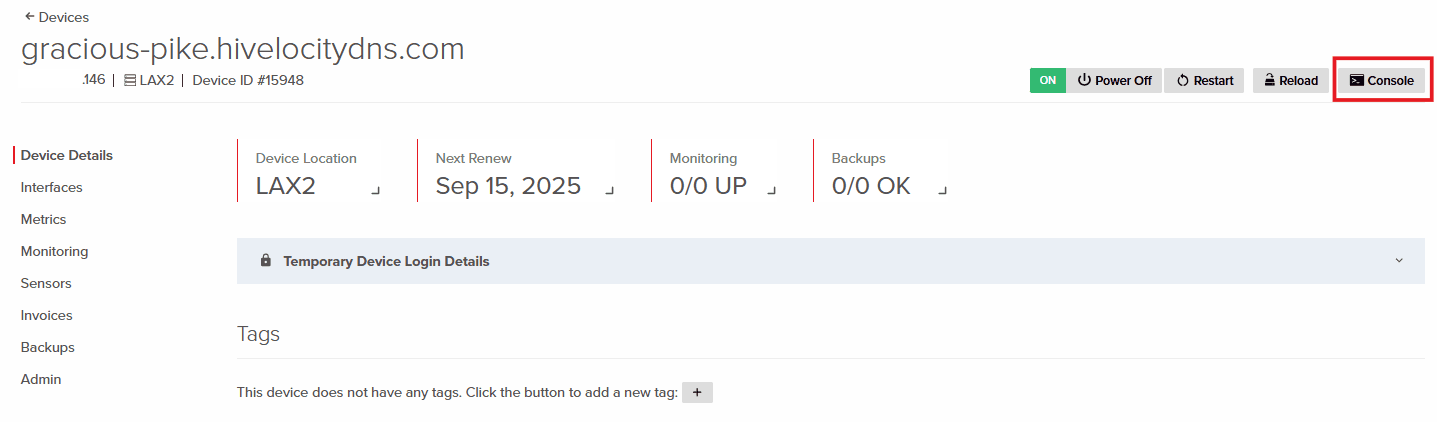
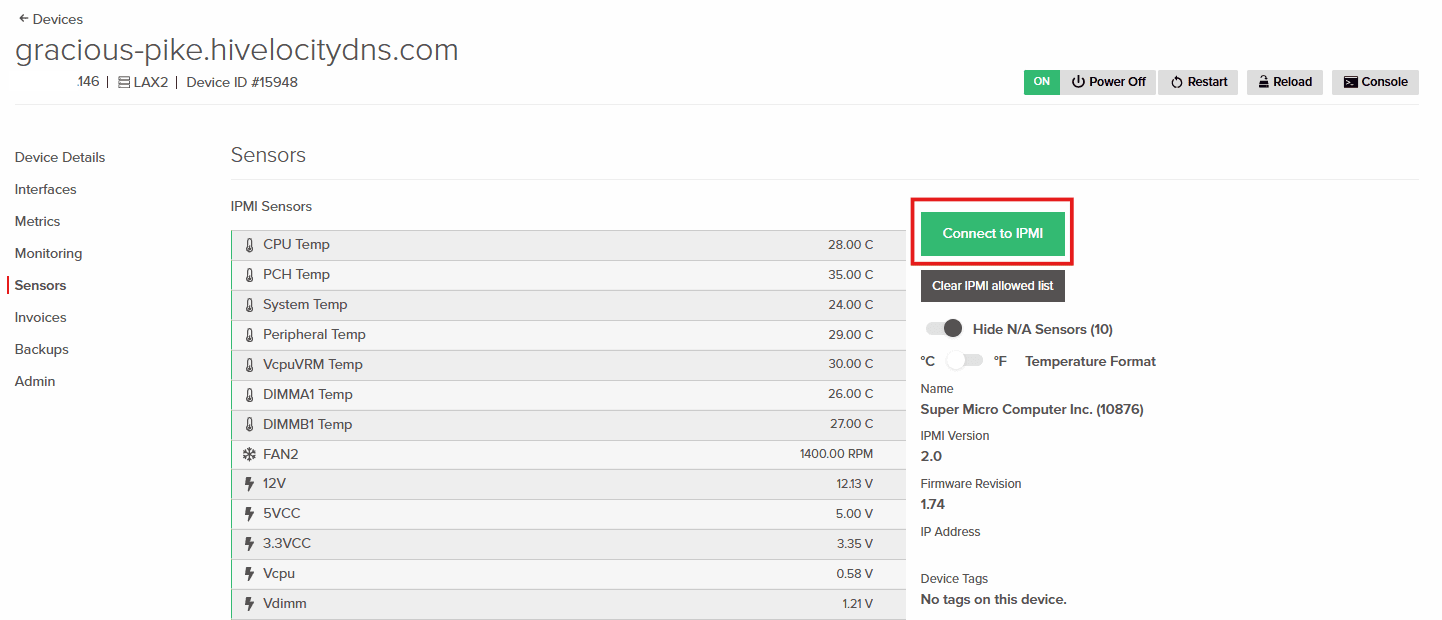
Device Console Button - Pressing the “Console” button will navigate you to the “Sensors” page, in which you can view device sensor data and open the console. Proceed to press on “Connect to IPMI”.
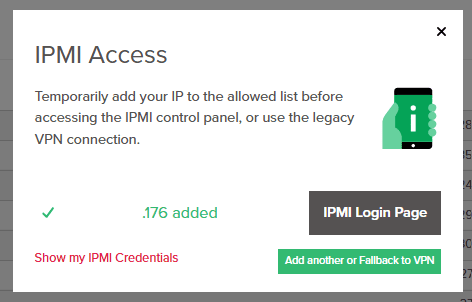
Connecting to IPMI - The following popup will present you with an option to Allow your IP address or to proceed with the VPN option.
- If you select “Use VPN”, instructions will display along with the ability to view the IPMI credentials to login with.
- For this example, we will use the allow my IP option. Proceed to press on “Allow <Your IP>” button.
- Once the IP is allowed, task completion will be displayed along with the ability to show your IPMI credentials and to proceed. Press on the “IPMI Login Page” once you’ve acquired your IPMI credentials.
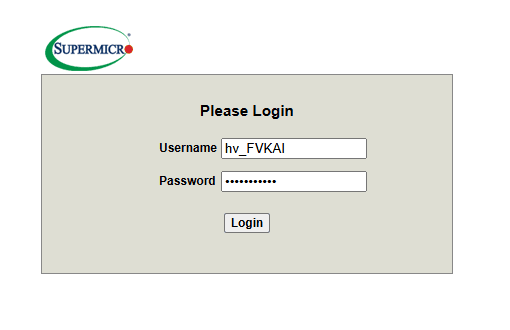
IPMI Login & Credentials - A new page will open in your browser, proceed to press on “Advanced” and “Continue to the <IP>” link.
- Enter your IPMI credentials and login.
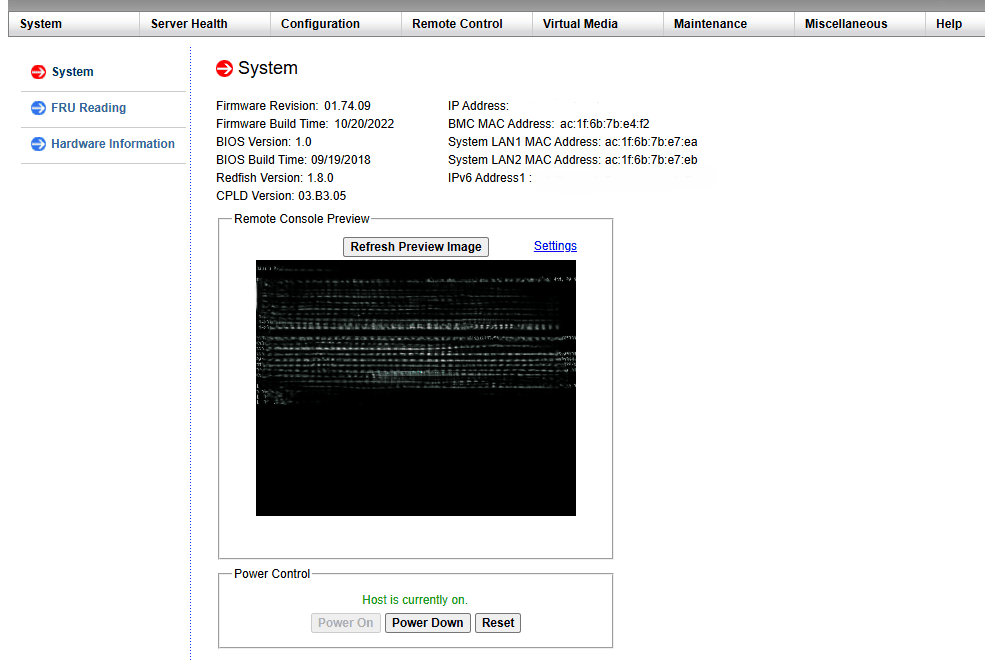
IPMI Login - The landing page shows BIOS and BMC/IPMI firmware details, with options to adjust permitted settings. Click “Remote Control” then “Remote Console” to proceed.
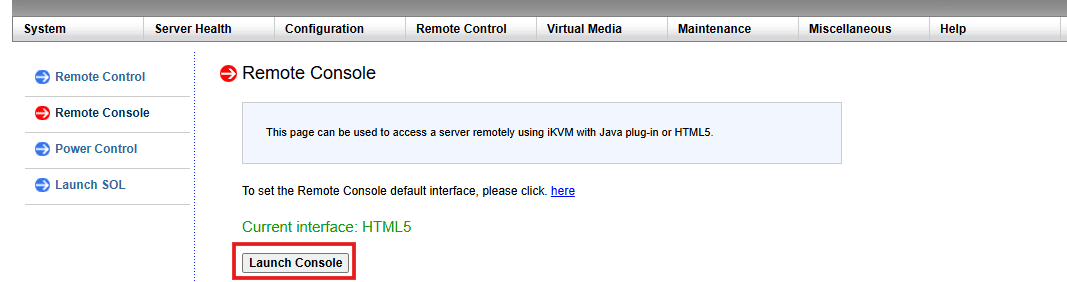
IPMI Main Landing Page - Proceed to press on “Launch Console” to open the HTML5 viewer. You also have the ability to change the Remote Console Default Interface to JAVA if required.
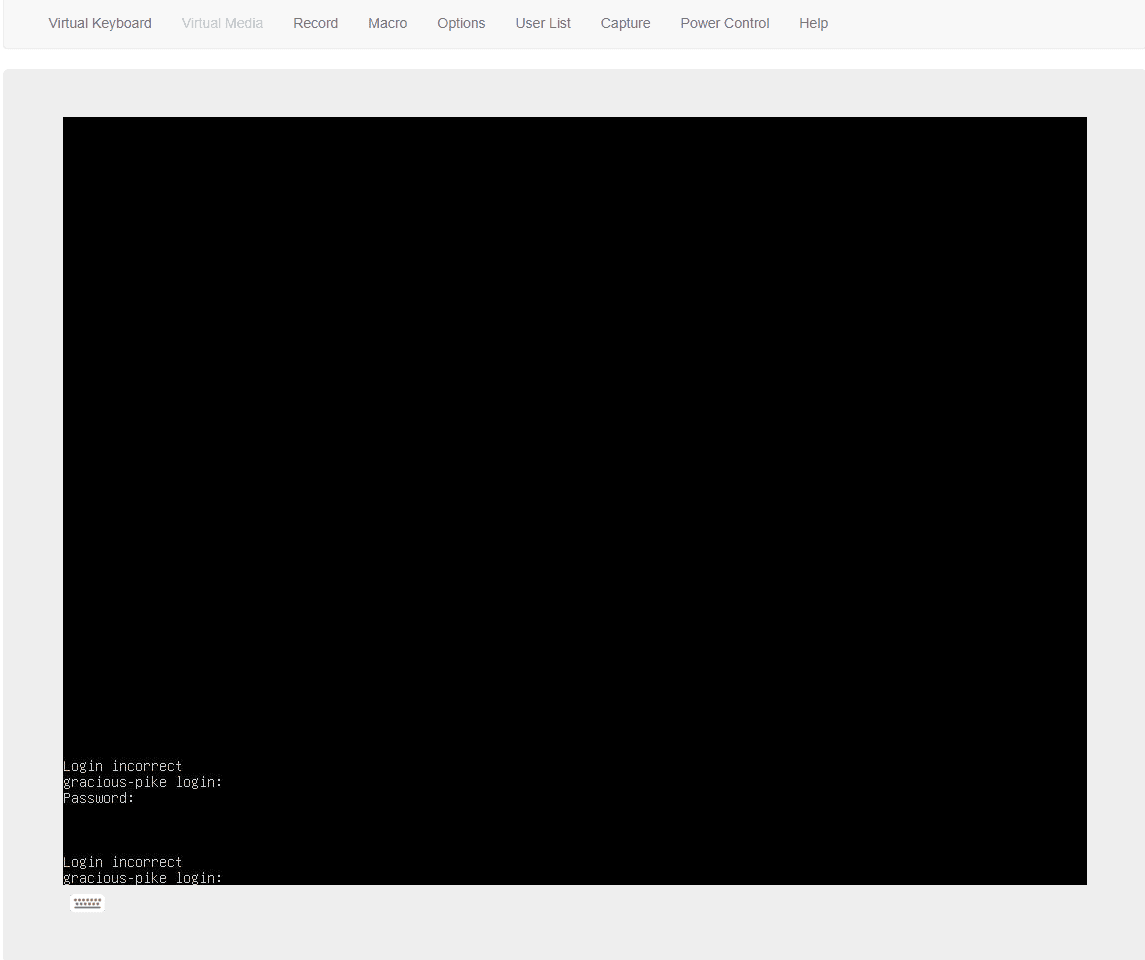
Launching the Console - From the console you will be able to control your server directly and to perform power commands, create keyboard macros, and utilize a virtual keyboard among other features.
Further Assistance
For any further assistance involving IPMI and server administration, do not hesitate to reach out to the Hivelocity Support team via a chat, support ticket, or phone at 888-869-4678.
— Written by Pascal Suissa