Congratulations on acquiring an Instant or Custom Dedicated Server from Hivelocity! We’re excited to have you onboard and cannot wait to provide you with excellent service around the clock. Your dedicated server can be managed through the myVelocity customer portal which will allow you to take control of your dedicated server. The features involved with server management include the ability to control the power status of your device, reloading your server with a new OS, and viewing and modifying many various management aspects.
Finding Your Dedicated Server in myVelocity
To find your server, proceed with the following steps.
- First, head over to Hivelocity.net and log in to myVelocity.
- Once you’ve gone through the login process. The screen below will appear, listing all of your current devices.
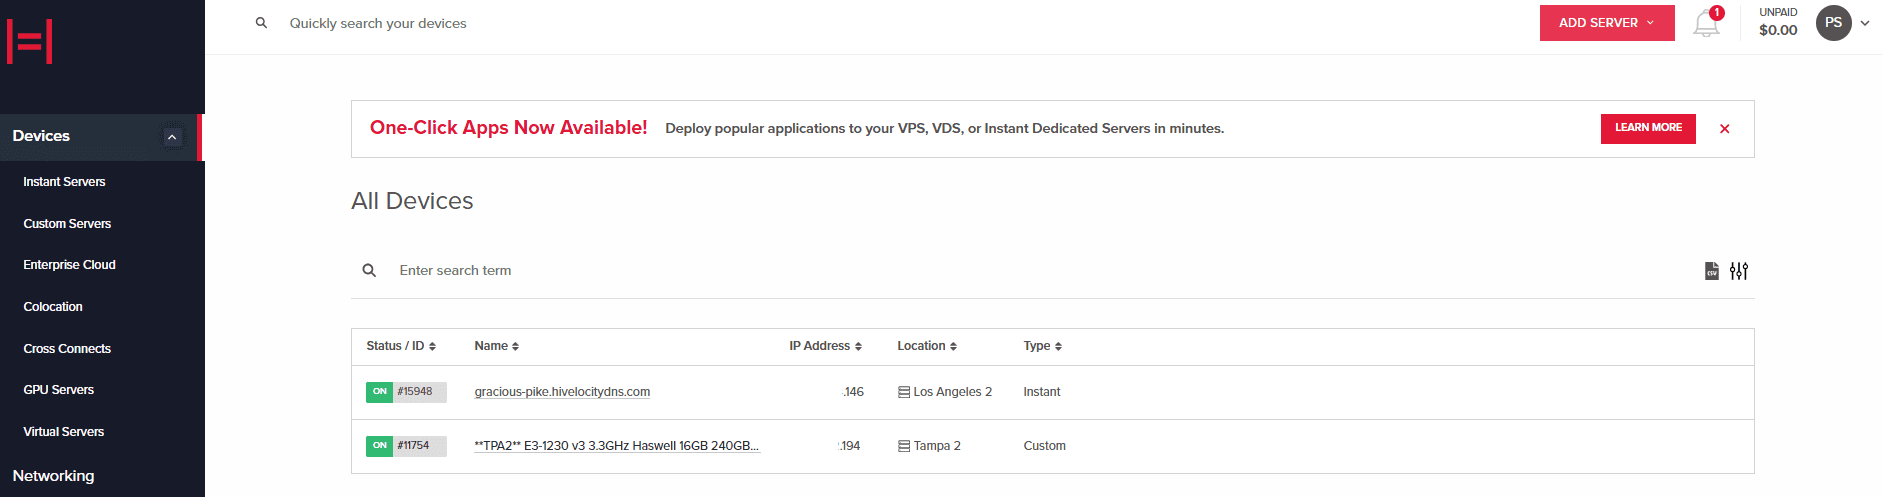
Device Page Overview - Press on the device ID you wish to view. For this example, we will select device 15948 from the list above.
Device Details Page
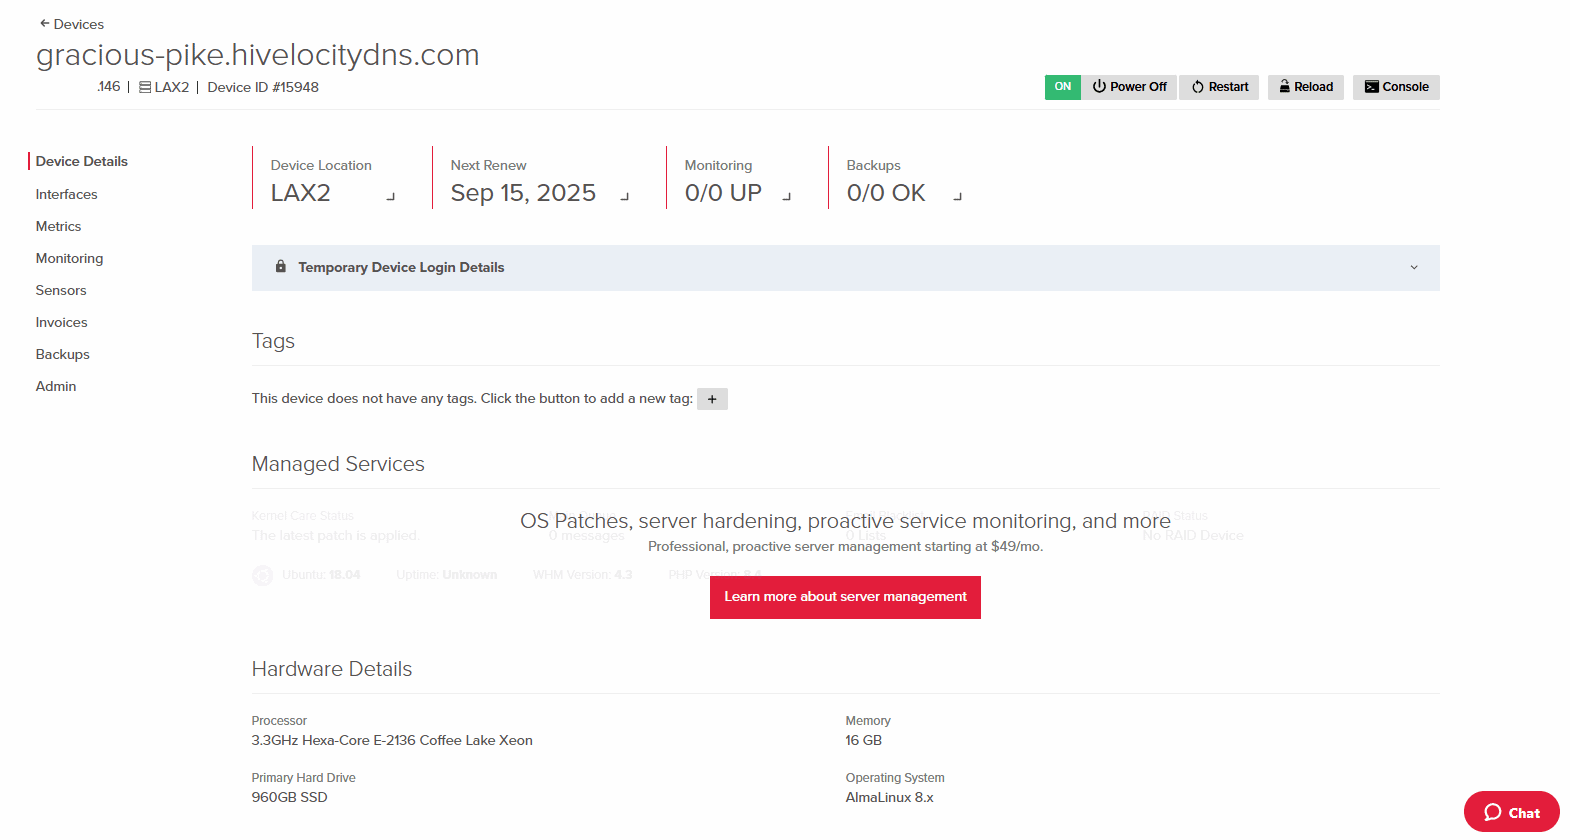
Once you’ve selected your dedicated server, you will arrive at the Device Details page. This page contains vital information regarding your server.
This page contains the following important information:
- The ability to restart, power off or on, reload the server with a new OS, and use a virtual console to control it via the browser.
- Your temporary password and username, available for the first few days after you purchase a dedicated server.
- Your dedicated server hardware details.
- Your public IP, including your IPv6 IP, if applicable.
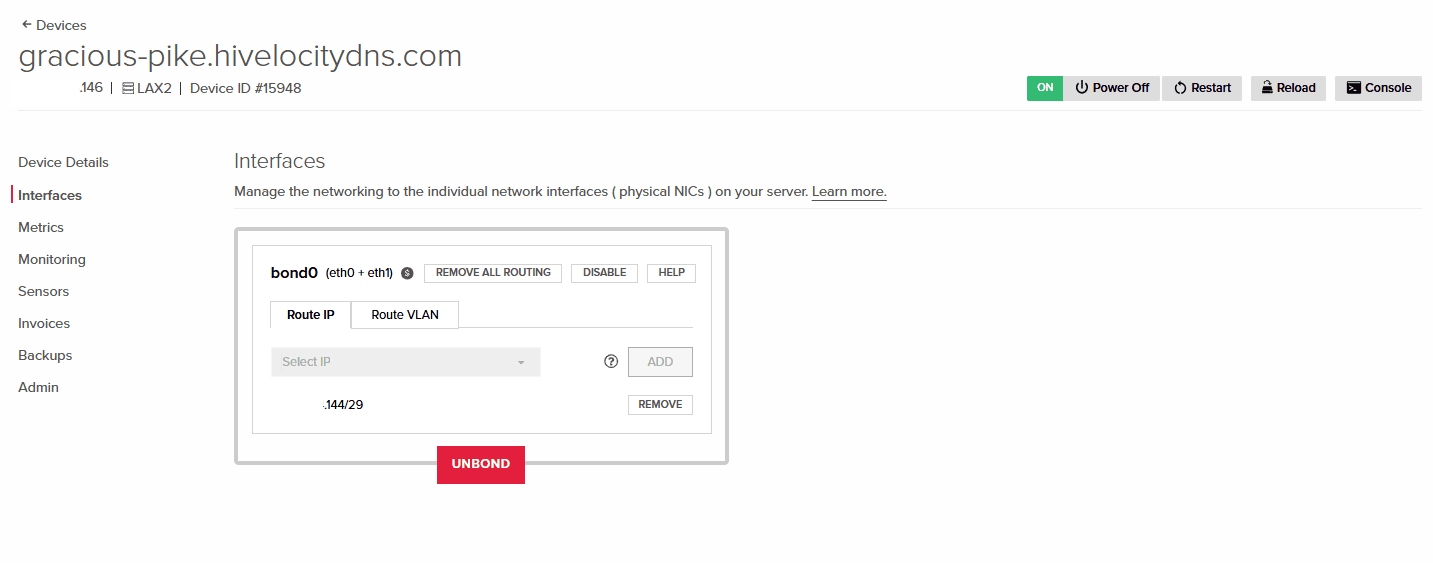
Interfaces Page
The Interfaces Page of your dedicated server includes information regarding your primary assignments, interfaces, routing VLANs, and utilizing any secondary IP assignments. In this section you will be able to break an interface bond all through the myVelocity portal.
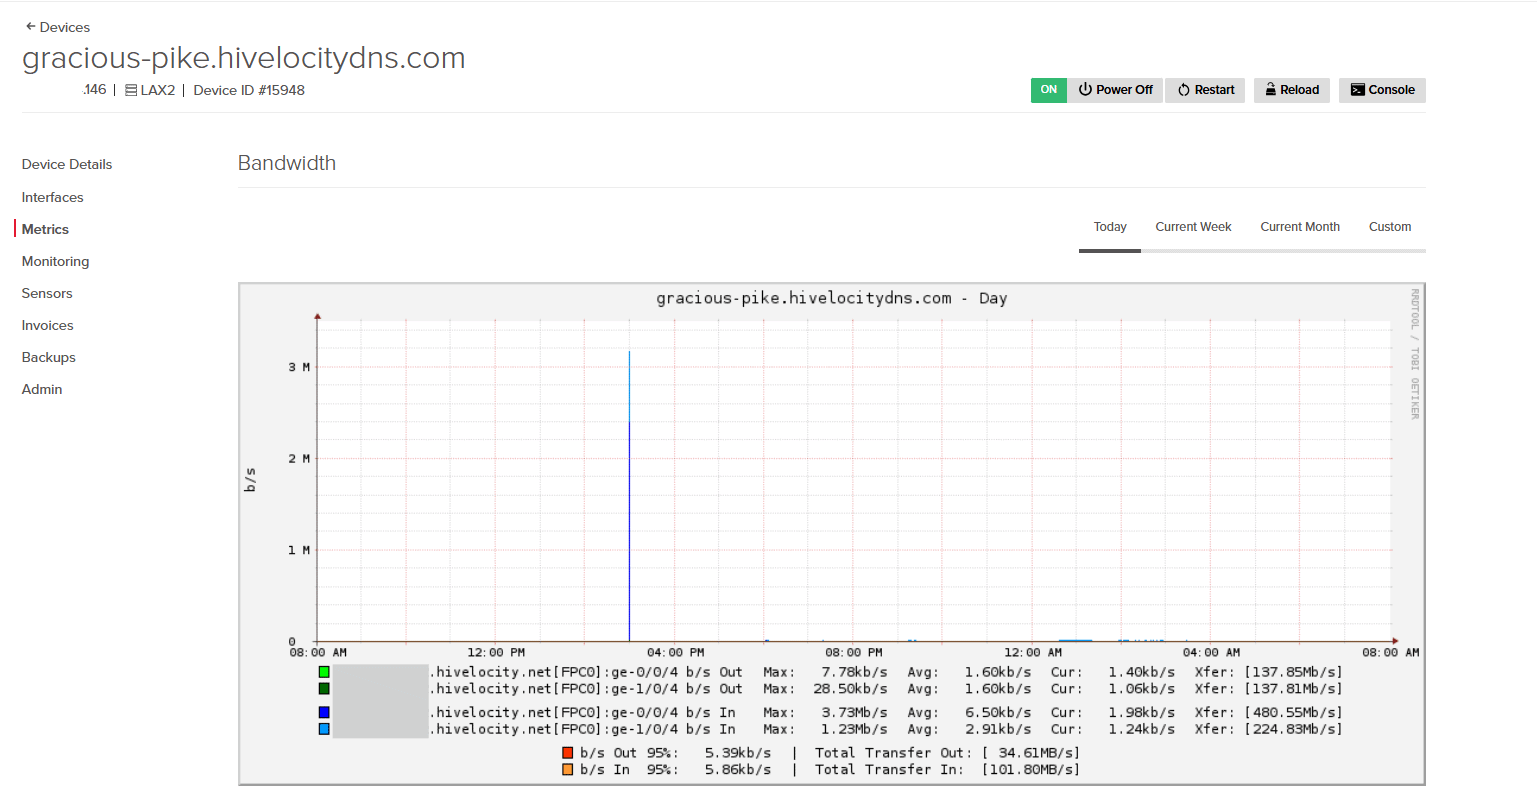
Metrics Page
The Metrics Page of your dedicated server includes information involving bandwidth from various time points and an overview of your Managed Services (Subscribed devices only) which will provide further in-depth details regarding your server status.
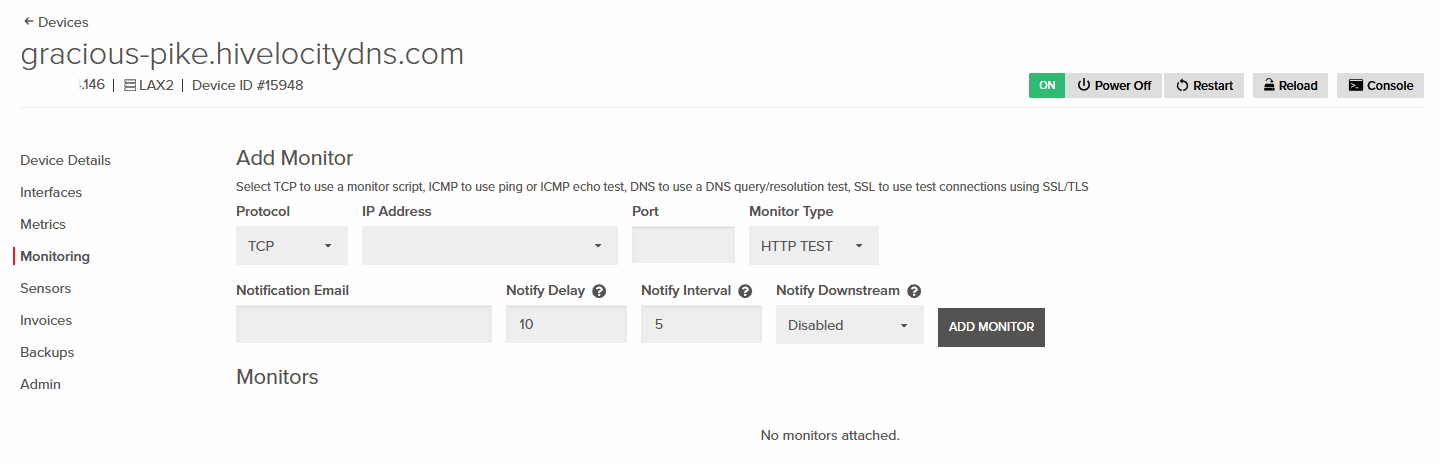
Monitoring Page
The Monitoring Page allows you to choose TCP to run a monitor script, ICMP for a ping or echo test, DNS for a query/resolution test, and SSL for connection tests over SSL/TLS. This feature can be very useful because it gives you visibility into the health and reliability of your server.
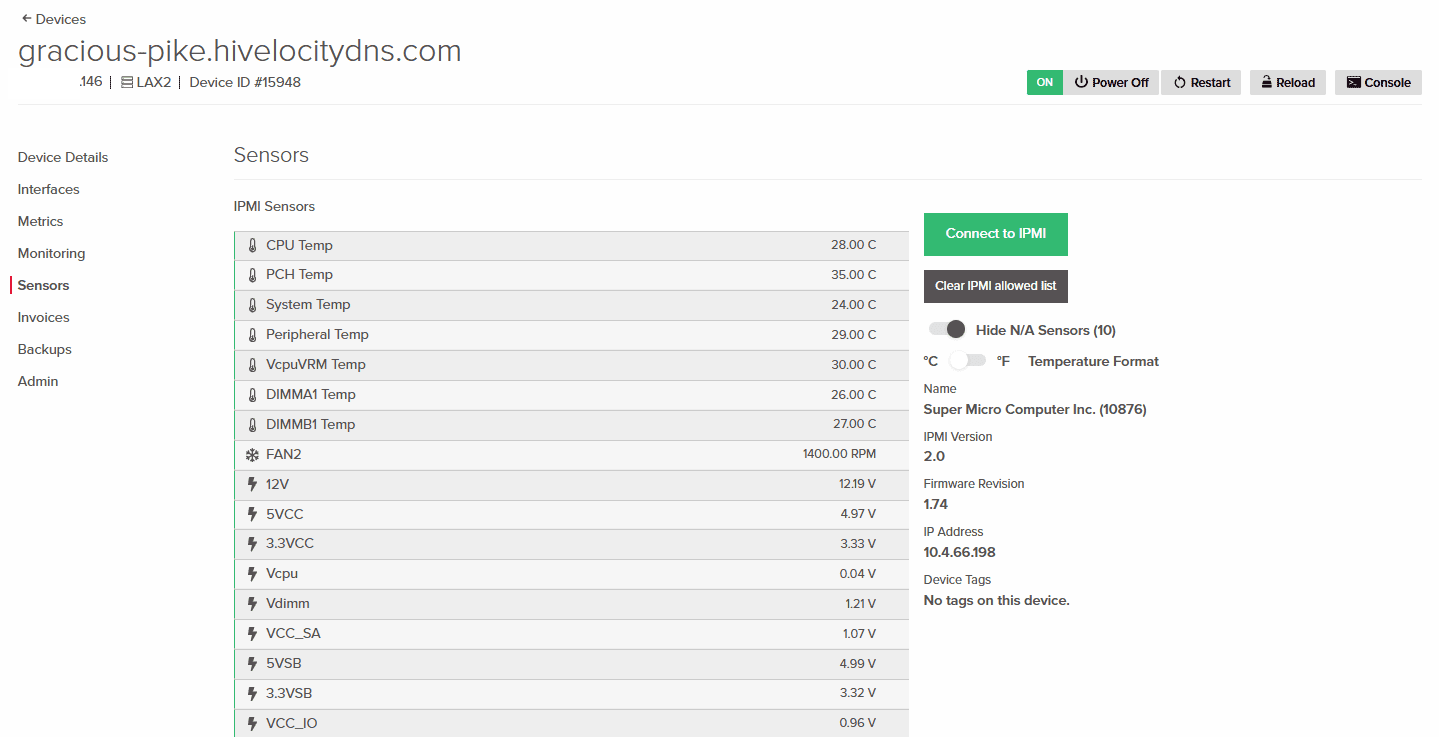
Sensors Page
The Sensors page provides information regarding temperature and voltage on top of allowing you to connect to IPMI, which is a full remote view of your server to provide you control on the unit. The IPMI feature is very useful as it allows remote control of your server in instances when the connectivity on the server has been impaired.
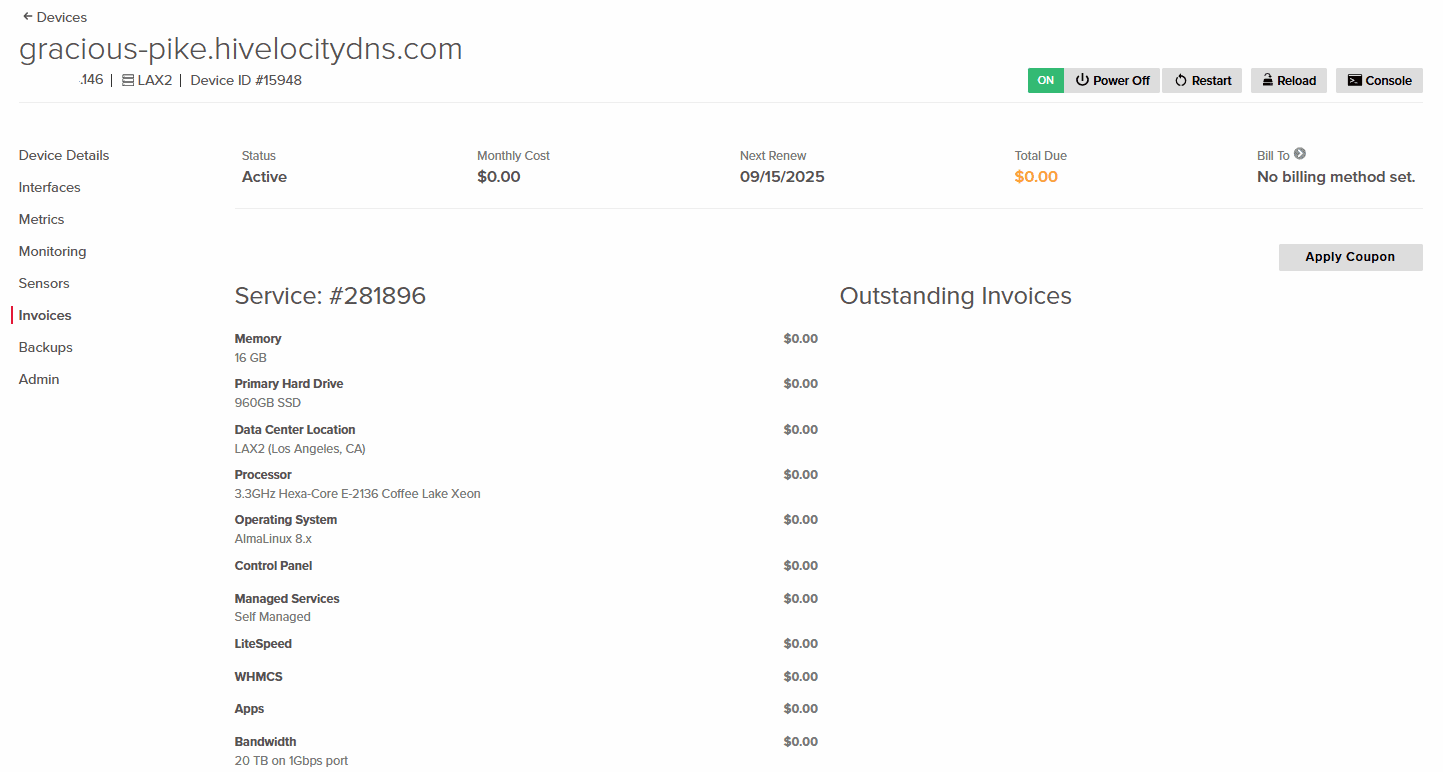
Invoices Page
The invoices page allows you to view outstanding invoices, recent invoices, and to complete payments.
Backups Page
The Backups page will allow you to sign up to the Rapid Restore backup service, and if utilizing the service, view restore points status and request specific recovery. Pressing the “Sign Up” button will open a form for you to fill out so that the team can begin installing the service.

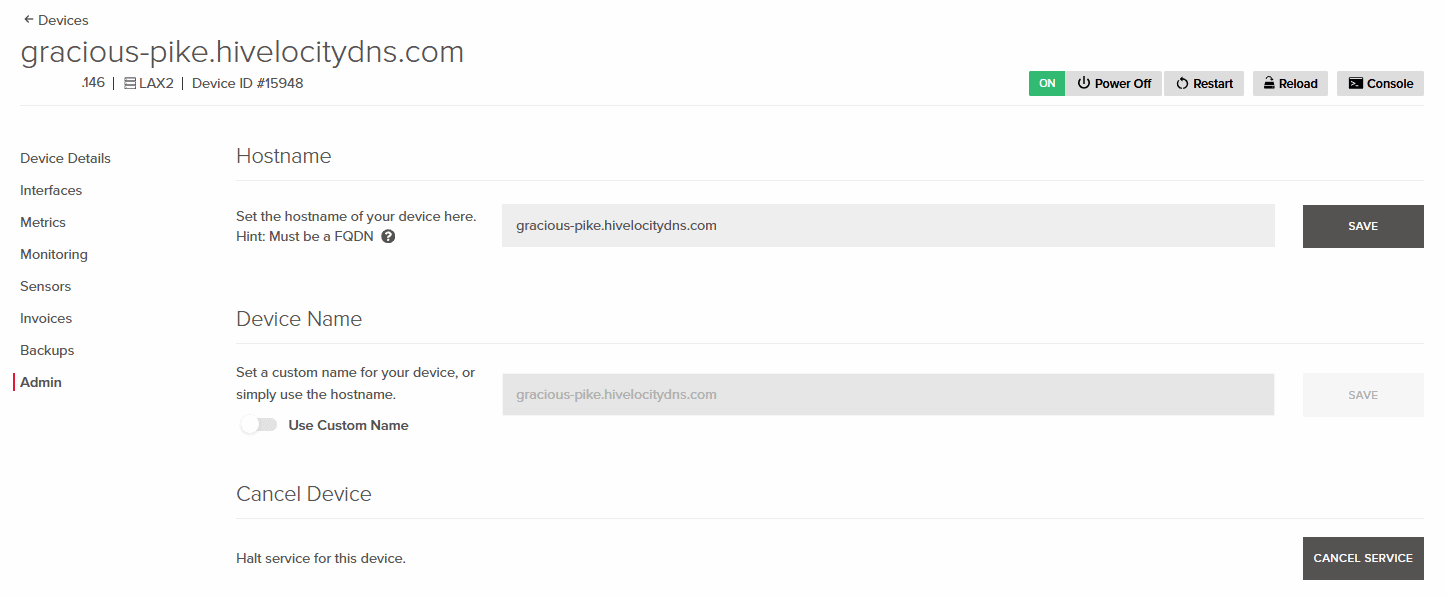
Admin Page
The Admin Page of your dedicated server includes the option to set a hostname for your device, create a custom device name for device recognition, and the option to cancel your device and related services.
– by Pascal Suissa