Introduction
An ISO file is an archive file that contains an identical copy of data found on an optical disc, such as a CD or DVD. ISO files are often used to distribute large programs and operating systems that are intended to be burned to an optical disc or mounted as a virtual disc. A virtual disc is a software simulation of a physical disc that can be accessed by applications as if it were a real disc.
The VPS can use an ISO file as a source of installation media or as a virtual disc drive. To use an ISO file in your VPS, you will need to attach the ISO file to the virtual CD/DVD drive of the VM. The instructions below will explain how to do so in the Hivelocity customer portal.
Custom ISO Management
To upload and manage ISOs with your VPS, proceed with the following steps.
1. Head over to Hivelocity.net and login to the customer portal.
2. Once you’ve gone through the login process. The screen below will appear, listing all of your current devices.
-
- You can note which device is VPS and which is a dedicated server by looking at the “Type” column as needed.
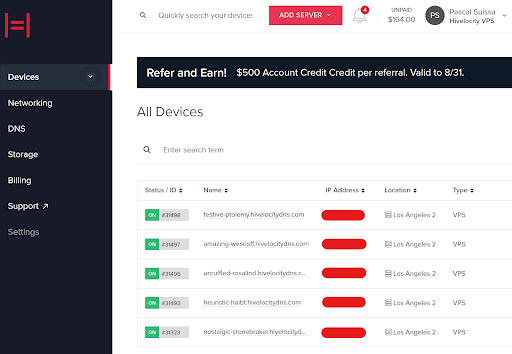
3. Click on the device ID you wish to upgrade, for this example, we will select device 31497 from the list above.
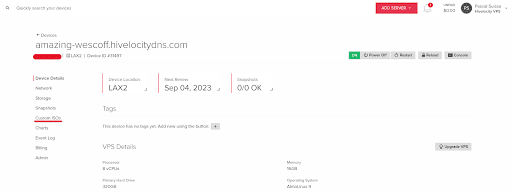
4. In the next page, proceed to select “Custom ISOs”.
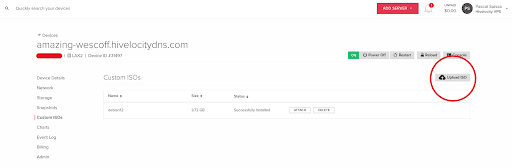
5. In the next page you will be able to view existing ISOs that are able to be used with all of your VMs as those are account-wide, along with the option to upload an ISO, as marked in the image below.
6. Once you’ve clicked on the “Upload ISO” button, a popup window will appear where you will be required to enter the details and link of the ISO, along with checking the box if the ISO is bootable.
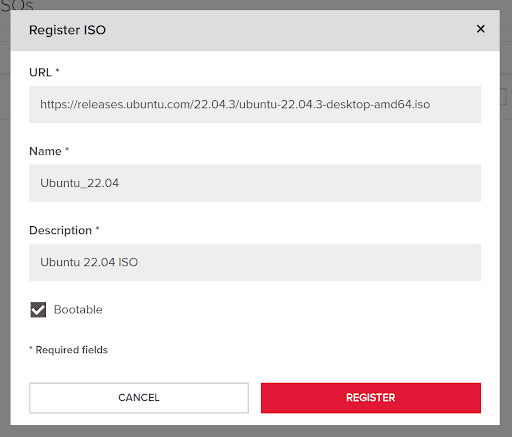
7. Click the “Register” button and the ISO will begin to upload to your VPS portal, as shown below.
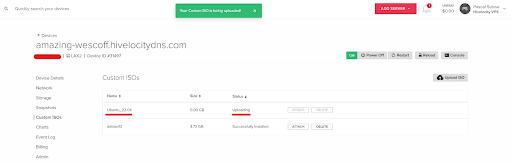
8. Once the upload is complete, you will be able to view, attach, and delete the ISO as needed.

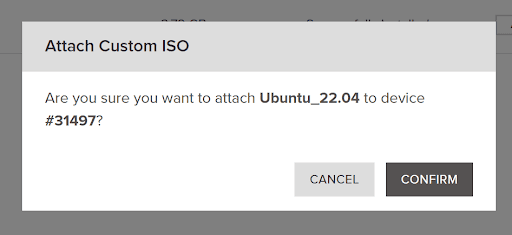
9. Continue to click the “ATTACH” button on the ISO you’ve uploaded.
10. You will be prompted to confirm if you wish to attach that ISO to your VPS, confirm if accurate.
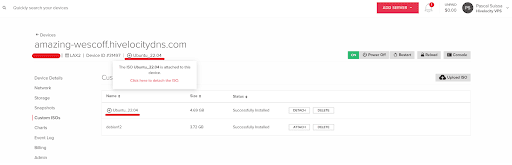
11. A confirmation message will appear once the attachment has been completed. A CD icon will appear next to the ISO to indicate that it is attached to your system as well.
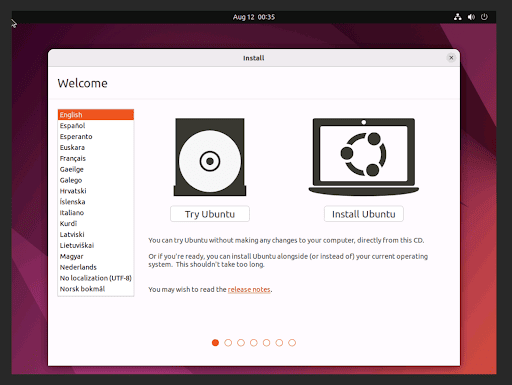
12. Proceed to reboot your VPS and click the “Console” button to view the VPS with the attached ISO.
13. Once you’re done with the ISO, proceed to click on the “DETACH” button and proceed to restart your VPS.
