A virtual local area network (VLAN) is a way of creating multiple logical networks on a single physical network. A VLAN can group devices or users based on different criteria, such as function, location, or security level. Devices in the same VLAN can communicate with each other directly, while devices in different VLANs need a router or a switch to communicate.
VLANs can improve network performance, security, and management by reducing broadcast traffic, isolating sensitive data, and simplifying network design and deployment. VLANs use tags to identify which network frames belong to which VLAN as they follow the IEEE 802.1Q standard, which specifies a 32-bit field that contains a VLAN identifier (VID) ranging from 1 to 4094.
One of the greatest benefits of using a VLAN between your devices, other than the security and direct communication between your servers, is that the traffic being sent back and forth is not counted against your public traffic quota as the VLAN traffic goes through a different interface. This article will take you through setting up a VLAN using the automated system within the customer portal that will allow you to connect dedicated servers with your VPSs or go over setting up a VPS network to connect just the VPSs along with how to set those up within the operating system itself.
Connecting Dedicated Servers and Virtual Private Servers (VPS) Using a Virtual Local Area Network (VLAN)
This process describes creating a VLAN that can be used between your physical dedicated servers and your virtual private servers (VPS). The steps here can also assist you with using the automated system to create a VLAN for your dedicated servers only as well.
1. Head over to Hivelocity.net and log in to the customer portal.
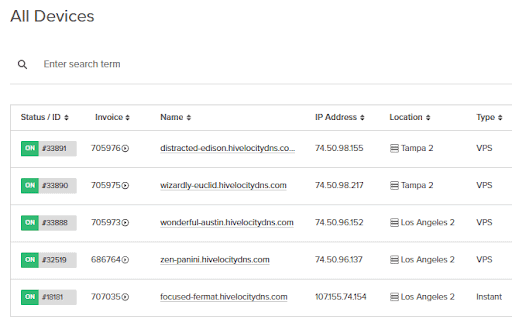
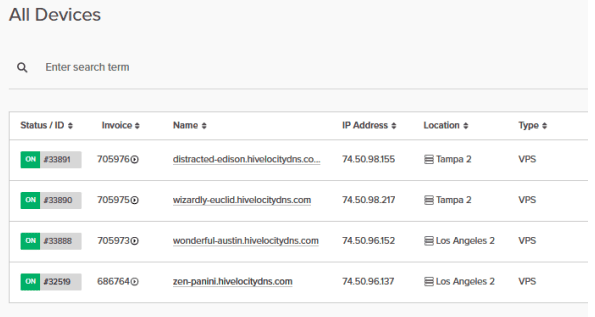
2. Once you’ve gone through the login process. The screen below will appear, listing all of your current devices.
- You can note which device is VPS and which is a dedicated server by looking at the “Type” column as needed.
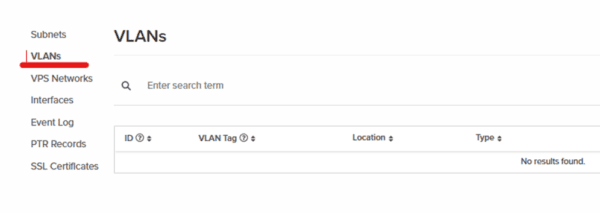
3. Proceed to select the “Networking” tab on the left side menu followed by selecting “VLANs”.
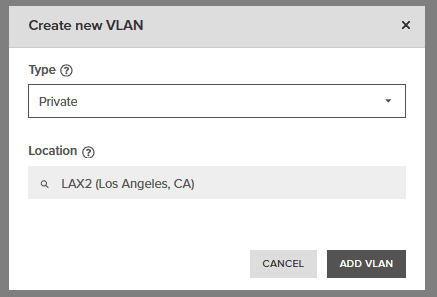
4. Proceed to create a new VLAN by pressing the “Create New VLAN” button. Here you will be able to select between a “Public” and “Private” VLAN type and location.
-
- VLAN Type
- Choose “Public” if you want to be able to assign IPs to the VLAN to make it reachable from the internet.
- Choose “Private” if the VLAN should never be reachable from the internet.
- Note that all VLANs are subject to traffic billing and overages, except for private VLAN traffic on unbonded devices.
- Location
- This would be the facility where the VLAN will be created.
- Only devices and subnets from the same facility are allowed in the VLANs.
- VLAN Type
5. For this example we will use “LAX2” as there are 3 devices at that location (1x Dedicated 2x VPS) and select Private as we wish to create a private VLAN.
6. Proceed to make the selections as above and press the “ADD VLAN” button.
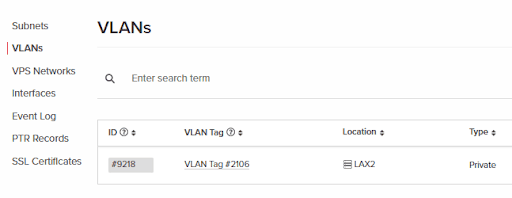
7. Now that we’ve created a VLAN tag, we can head over to the “VPS Networks” tab. This is where we can create a network between the VPSs and our physical devices.
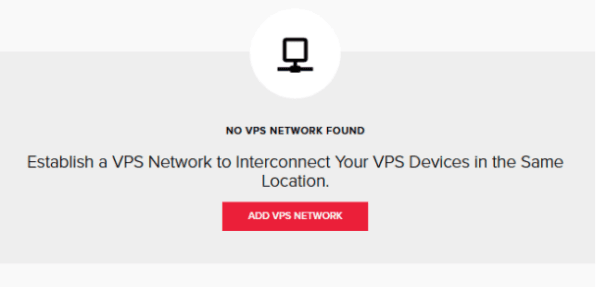

8. Proceed to press the “Add VPS Network” button.
9. Fill in the required information that will include the VLAN tag we created and the relevant location to that VLAN tag, followed by pressing “Add Network”.
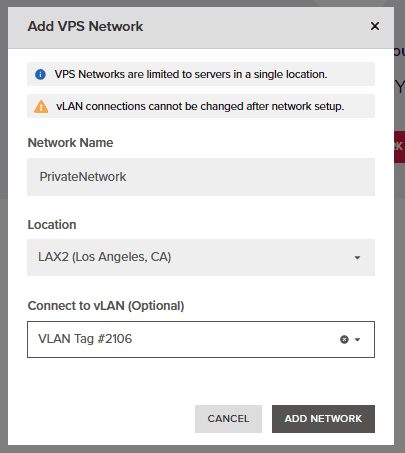

10. Now that we’ve created the VPS network, proceed to press on its title to configure it further.
- Note that we have the VPS network connected to the VLAN that we created earlier as per the green icon under “vLAN Connection”.

11. Press on “Add VPS Device” and select each of the devices that are in that location.
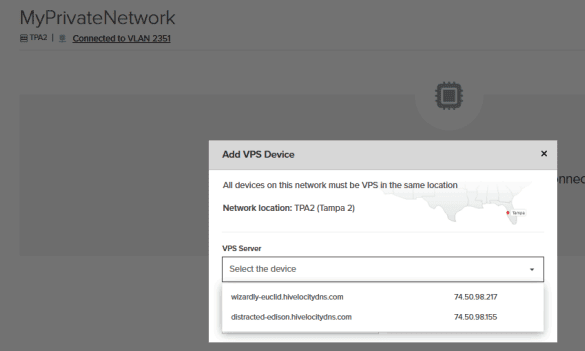
12. Once submitted per device, you will see a message at the top of the screen saying that the task is pending, followed by a green confirmation once done after about a minute. Proceed to perform the task for each device required to be added to the VPS network.
![]()
![]()
13. The next step is to check if your server has a bond setup for redundancy as that would require breaking it to allow the device to be connected via the VLAN we created. Start by heading over to the device page and selecting“interfaces”.
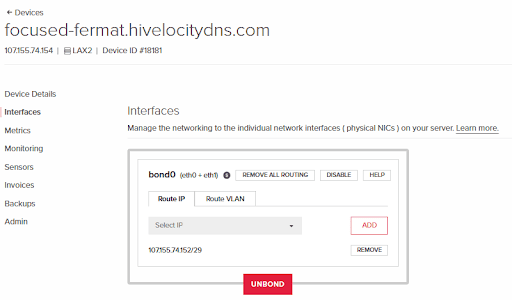
14. Proceed to select the “Remove“ button for the relevant IP that is on the bond.
15. Proceed to select the “Unbond“ button to remove the bond now that the IP has been removed.
16. Once the operation is completed for both steps above, you will be met with two new interfaces “eth0” and “eth1” instead of the “bond0” that was present previously.
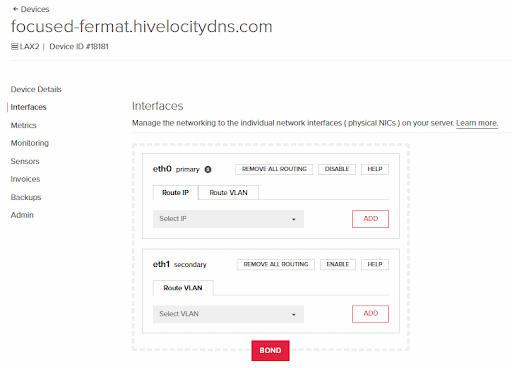
17. Proceed to select the previous IP that was on “bond0” for the public interface (eth0), and the VLAN tag # that we’ve created previously in this guide for the private interface (eth1).
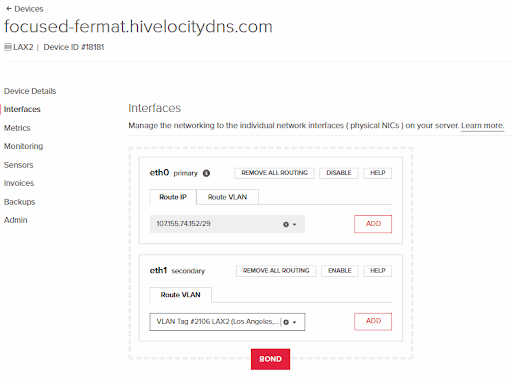
18. Press “ADD” for each one selected to perform the required actions.
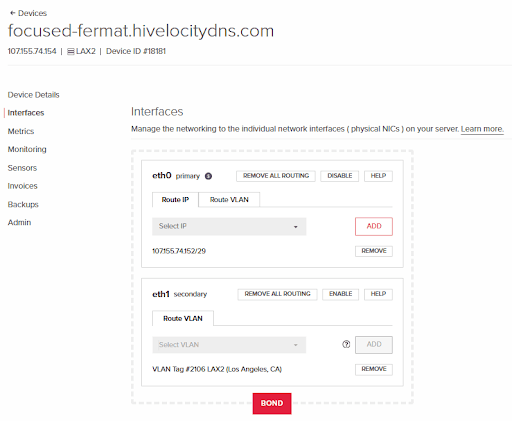
19. To confirm that the device was added properly to the VLAN, head over to the “Networking” tab, “VLANs”, and view the VLAN tag we’re using in this article.
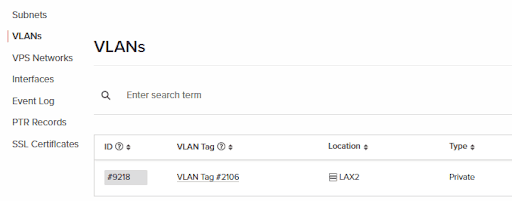
20. Pressing on the ID # we can view the connected interfaces and view that our dedicated device’s private interface (eth1) is indeed connected to this VLAN.
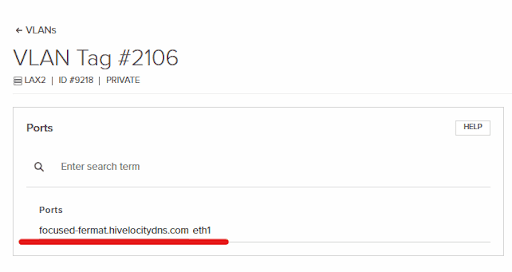
21. Going back to the “VPS Network” tab within “Networking” we can confirm that the VPS network is also connected to the VLAN we created thus concluding our work of creating a private network between a dedicated device and VPS via the customer portal.
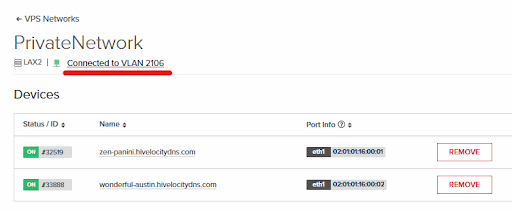
Creating a VPS Network Among Your VPSs (VLAN Between VPSs)
This process describes creating a VLAN that can be used between your virtual private servers (VPS) only.
1. Head over to Hivelocity.net and log in to the customer portal.
2. Once you’ve gone through the login process. The screen below will appear, listing all of your current devices.
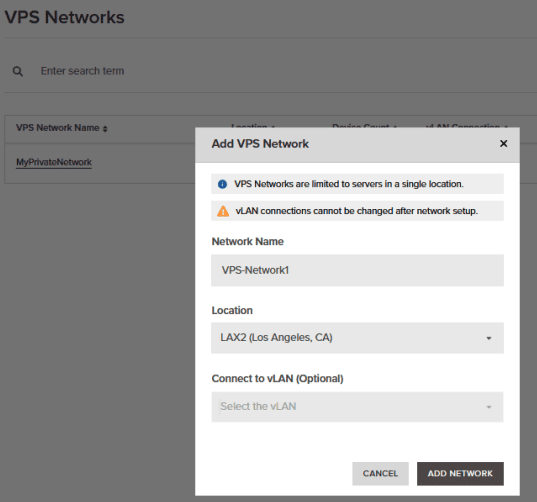
3. Proceed to select the “Networking” tab on the left side menu followed by selecting “VPS Networks”, and pressing the “ADD VPS Network” button.

4. Fill in the required information. As these steps are for VPS network only, we will not select a VLAN tag. Once completed, press “Add Network”.
5. Now that a new VPS network is created, proceed to press on the VPS network name to edit it and add the VPSs.
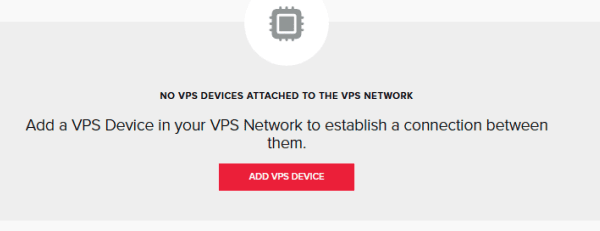
6. Press the “Add VPS Device” as shown above and select your devices (At least 2) from the VPS network location.
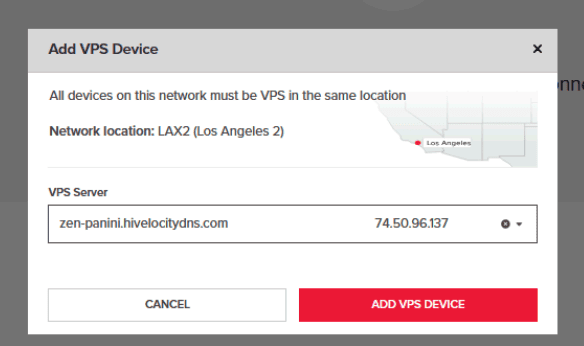
7. That’s it, now the devices can communicate on the private network with each other without having any bandwidth taken from your public traffic pool.
Configuring Private IPs Within the OS for VLAN Connected Devices
Now that you have a private network between your two VPSs, you can communicate privately among them without having to dip into your public traffic quota.
To configure the private network between your VPSs, it is recommended that you contact Hivelocity Support team members by calling 888-869-4678, creating a support ticket via the customer portal, or reaching out via chat through the Hivelocity.net portal.
If you would like to proceed on your own, an example is shown below with two AlmaLinux 9 in the displayed split screen.
1. Login to your VPSs as root and use the command ip a to view that you now have “eth1” interface for private communication.
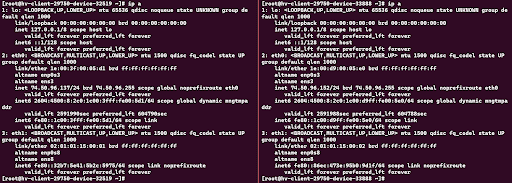
2. Use the command nmtui to alter the network configuration on eth1.
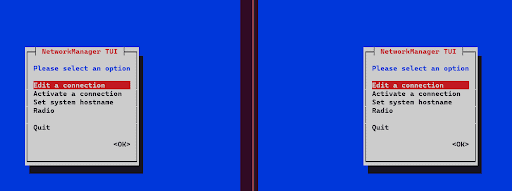
3. Press on “Edit a Connection” and select “Wired Connection 1” followed by selecting “<Edit…> to proceed.
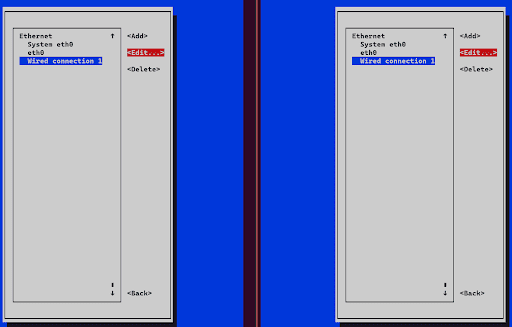
4. For example, we will use /24 so any IP address changes will be made only in the last octet.
-
- Select IPv4 Configuration – “Manual”
- The first device will be 10.0.0.2/24
- The second device will be 10.0.0.3/24.
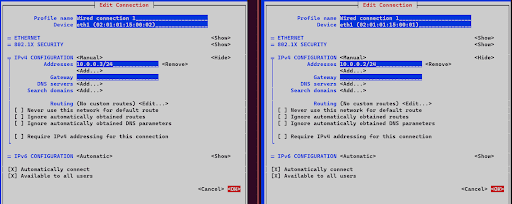
5. Once done with the above, press “OK” and head back by pressing the Escape key once.
6. Proceed to select “Activate a connection”.
7. Select “Wired Connection 1” under “Ethernet (eth1) and Press on “Deactivate” followed by “Activate”.
8. Press the Escape key until you are back in the shell.
9. Now use the command ip a to see the new IP information we’ve added.
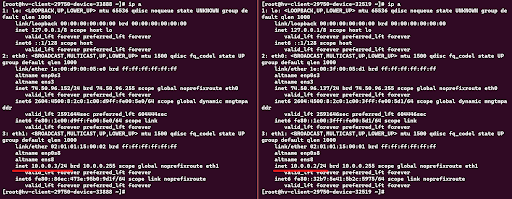
10. Test the connection by pinging using the ping command to each device from one another.

