When a new drive is installed in your system, before it can be used for storage, the first step is to get it initialized. This process involves identifying the drive within the system, setting a partition table and creating partitions, creating a filesystem for each partition, mounting the partition, and lastly, ensuring that the mounting instructions are saved for when the system reboots (also known as mount persistence). In the following tutorial, we’ll show you step-by-step instructions to identify, partition, and mount your new storage drive so it’s ready for use.
Partitioning and Mounting Your Storage Devices in Linux
The following sections and commands will provide you with the information required to partition your storage devices and allow you to begin using them in your Linux system.
Identifying the Disk
The first necessary step when working on your new storage drive is to identify which drive you would like to work on. It’s very important to get this step right, so please follow along closely with the instructions listed below.
- First, ensure to install the parted tool from your package manager onto your system if it’s not already available. This can be done using the command:
yum install parted
- Next, run the following command to list out all available drives in your system:
lsblk
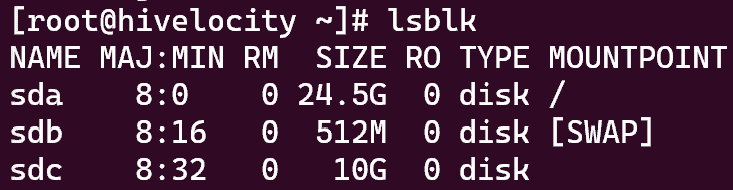
- Once you’ve found the drive you’d like to work with, use the command below to retrieve the new drive in your system. In this case, the drive we’re using is sdc as we know that it’s the new drive we’ve just introduced to the system. *Note: the following command will not work with drives that are already in use.
sudo parted -l | grep error
Setting a Partition Table and Distributing/Creating Partitions
The second step of the process involves creating a partition table and the actual partitions which will be used to divide up and store data on the drive.
- First, you need to set the partition table/disk label for the drive. For this example, for more modern systems, we will go with GPT (GUID Partition Table), but for those with older drives/systems MBR might be the better option. In most cases though, these days GPT is the one to select. *Note: in this example, /dev/sdc is the drive we are working with, but that will likely not be the same in your system. Please be sure to list the name of your device when entering the following commands.
- For the GUID partition table (GPT), use the command:
sudo parted /dev/sdc mklabel gpt
- For the MBR partition table, use the command:
sudo parted /dev/sdc mklabel msdos

- For the GUID partition table (GPT), use the command:
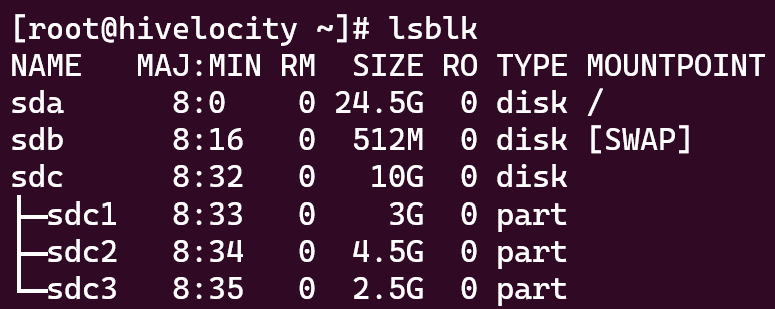
- Next, you will need to create new partitions on the drive. Here you can create multiple partitions which will later become /dev/sdc1, /dev/sdc2, /dev/sdc3 and so on.
*Note: keep the following in mind when using the command below:
- The percentages are used to describe the amount of space on each partition.
- -a opt in the command sets the alignment type which should be set to optimal in order to align to multiple physical block sizes to guarantee performance.
- EXT4 is used here as it is the default filesystem that we intend to use with these partitions.
Now, run the following commands to begin partitioning. In this example, we will create 3 separate partitions. Please take not of the percentages used. If you intend to use one single partition that will span your entire drive, ensure that your percentages are set to “0% 100%” instead.
sudo parted -a opt /dev/sdc mkpart primary ext4 0% 30%
sudo parted -a opt /dev/sdc mkpart primary ext4 30% 75%
sudo parted -a opt /dev/sdc mkpart primary ext4 75% 100%

Creating a Filesystem for Each Partition
The next part of the process requires you to create a filesystem for each partition that’s been created.
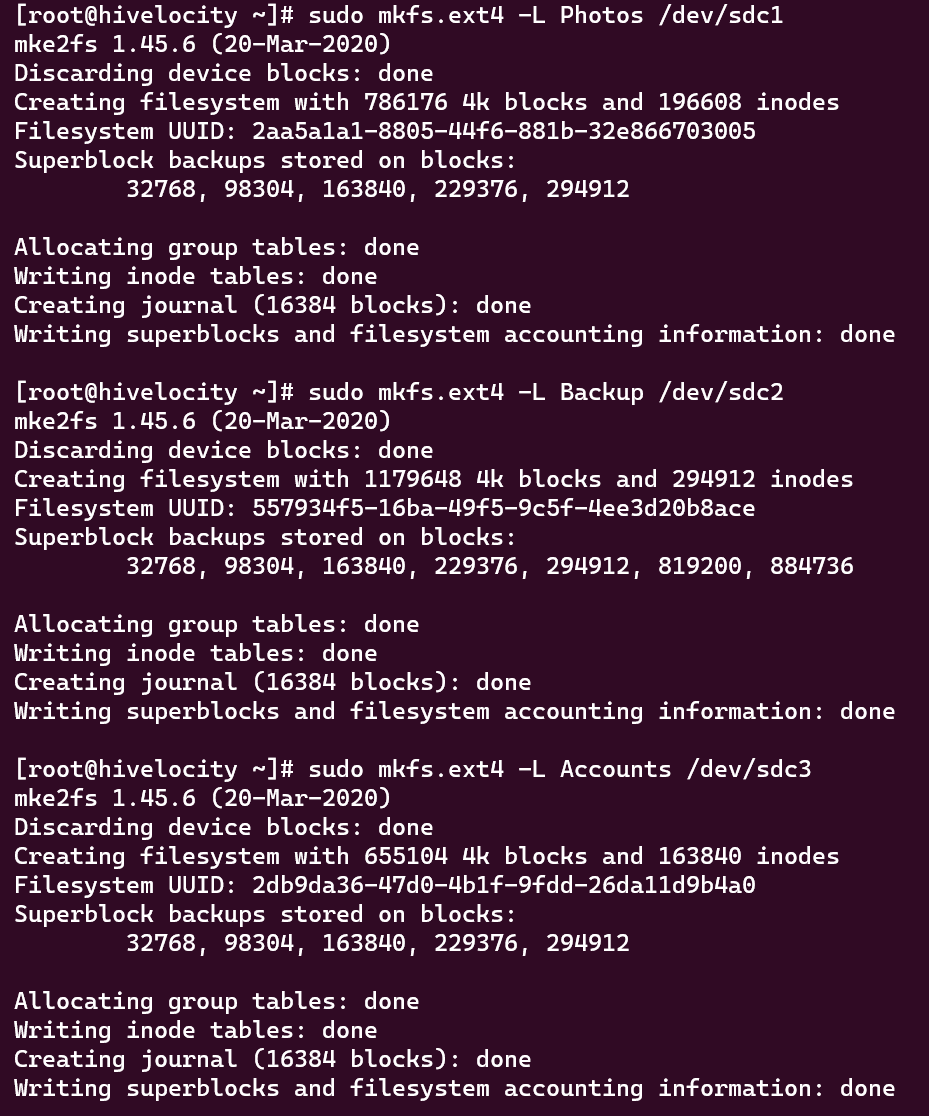
- To create a filesystem on the partitions you’ve just created, run the command listed below.
*Note: keep the following in mind when using the command shown below:
- -L <Label-Name> will only add a description to the partition and is not mandatory.
- Please note the ext4 portion, as this will also determine the type of filesystem created, which if desired can instead be xfs, ext3, and so on.
- Notice that in this example we are selecting a partition (sdc1) and not the disk (sdc).
- Lastly, the same command below will apply to the sdc2 and sdc3 partitions we created, except with their different labels inserted into the command.
sudo mkfs.ext4 -L Photos /dev/sdc1
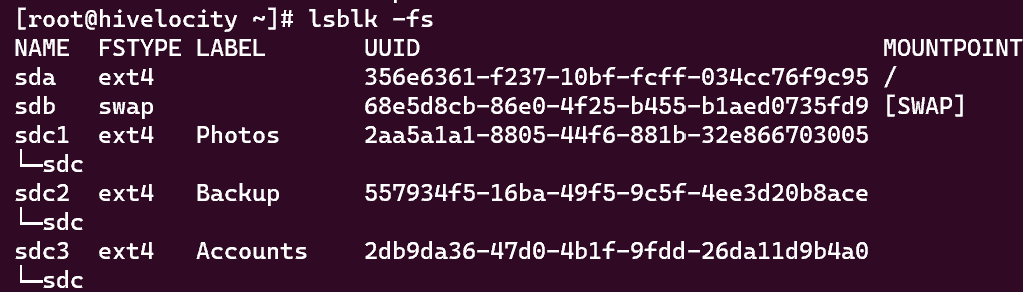
- Next, you can run the following command to view the filesystems we’ve just created:
lsblk -fs
Mounting the Newly Created Partitions
Now that your partitions and filesystems have been created, the last part of this process is to mount the partitions we’ve created into your desired directories.
- First, create a new directory which will be used to mount and connect the chosen partition. In this example we will continue using /dec/sdc1.
sudo mkdir /Photos
- After creating the new directory, we must now mount the partition to this new directory.
- The command structure is mount -o defaults <SourcePartition> <DestinationDirectory>.
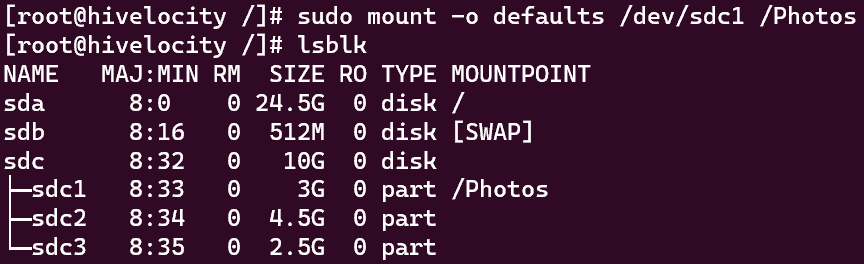
sudo mount -o defaults /dev/sdc1 /Photos
- The command structure is mount -o defaults <SourcePartition> <DestinationDirectory>.
- Now, we need to ensure that the mounting point will be persistent throughout future reboots. To do this, we will need the UUID of the partition. To get the UUID, use the following command:
blkid
The output you receive will be similar to the text below. The example UUID has been highlighted here, and you will need to copy this value from your own results for the command that follows in step 4./dev/sdc1: LABEL=”Photos” UUID=”2aa5a1a1-8805-44f6-881b-32e866703005″ BLOCK_SIZE=”4096″ TYPE=”ext4″ PARTLABEL=”primary” PARTUUID=”39754fad-7d45-4c13-be15-e8e9b1802f5e”
- Now that you have the partition’s UUID, edit the /etc/fstab file and enter the values as shown below to ensure that after each reboot, the mounting point will remain persistent. *Note: be sure to save the /etc/fstab file once you’ve finished making edits.
- *Note: If you plan to remove the drive in the future, ensure to remove or comment (#) out the entry in the file.
The values entered are as follows:
UUID=”UUID-VALUE-HERE” /<Directory> <Filesystem> defaults 1 2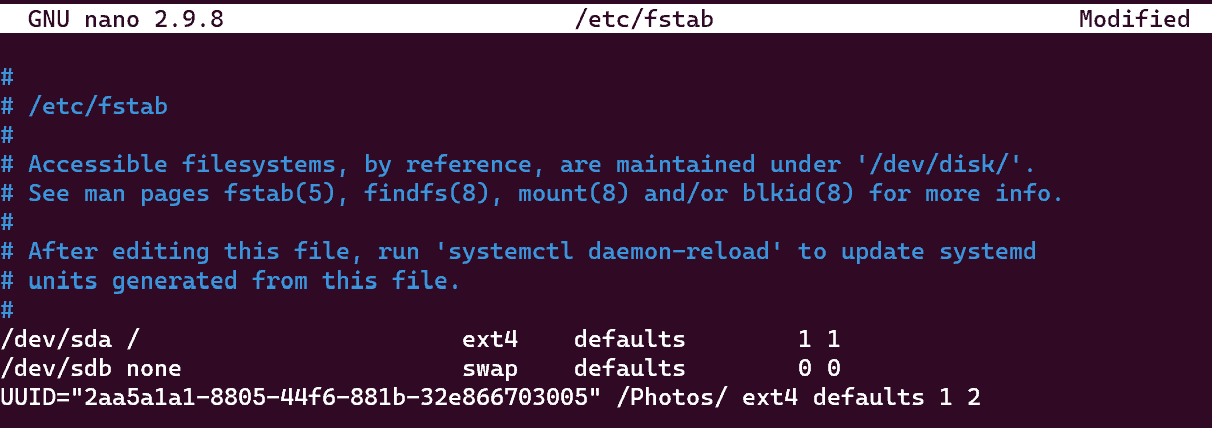
- *Note: If you plan to remove the drive in the future, ensure to remove or comment (#) out the entry in the file.
- Now that you’ve completed making your edits and saved the file, you can test the file and mounting points using the following command.
sudo mount -a
Then, simply repeat this process for any remaining partitions.
-written by Pascal Suissa
